Creating a New Alert Rule
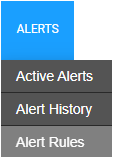
- Within the Alerts tab in the OWS Cloud Portal, select Alert Rules from the dropdown menu.

- Click New Alert Rule.

- Select an Alert Type from the pop-up menu.

- Click Next.


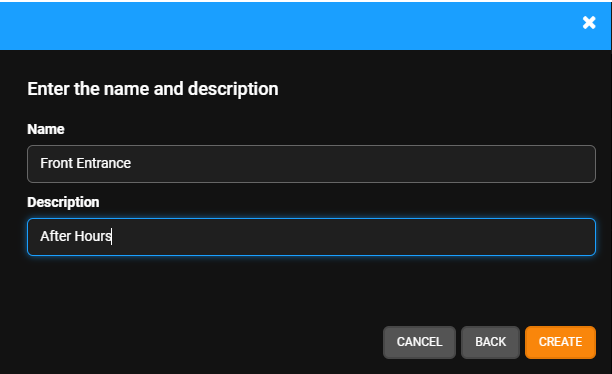
- Name the alert and give it a Description as desired.

- Click Create.

Alert Types
- Analytics and Analytics Queue Alerts: For cameras preconfigured to send analytic events, an alert can be sent based on specifically defined audio or video events within a selected time period.
- License Plate Alerts: License Plate Recognition (LPR) Alerts are sent when numbers and letters that match the rule's criteria are detected by a camera on a vehicle's plate during a specified time period.
- Environmental Alerts: An Environmental Alert helps identify when thresholds are exceeded within an environment as well as sound abnormalities detected by sensors.
- Point of Sale Alerts: Configure Point of Sale alert rules to receive automatic notifications based on specific transaction criteria such as refunds, voids or discounts.
- Motion and Sensor Alerts: Motion Alerts are sent when movement is detected by a camera during a specified time period, and Sensor Alerts are sent when a sensor connected to a recorder is triggered.
- Access Control and Door Access Alerts: An Access Control Alert identifies when there is a trouble event identified with a door. Door Access Alert identifies when an attempt is made to access an area.
- Intrusion and Intrusion Sensor Alerts: An Intrusion Alert or Intrusion Sensor Alert identifies when a sensor event is received from an intrusion system.
- Health and Storage Retention Alerts: Health and Storage Retention Alerts help identify when something is affecting the ability of hardware to capture or record video.
- Software Updates Alerts: Software Updates Alerts generate an alert if a Software Updates policy has been paused due to too many failures.
NOTE: Some alerts are dependent on license type.
NOTE: Show Filters  to filter Alert Rules by specific Locations or Cameras.

Defining an Alert Rule
Choose the Alert Type below to see details on setting the Rule Definition.
Add Users to an Alert Rule
NOTE: Adding Users to a rule automatically grants them permission to view alerts for cameras and locations they have access to based on their User Group permissions.
- Click Users/Notifications on the left-hand menu.

- Click Add User or Add Group.

- Click + next to each User or Group to send emails and push notifications when the alert is triggered.

- Click Add when finished.

NOTE: To receive email, push or client alert notifications, the Email Alert, Push Alert or Client Alert box must be checked. Simply adding a user only gives them access to see this alert’s history. See Alert Notifications for details.
Deleting an Alert Rule or Updating, Disabling, Clearing All Active Alerts
- Click General Info on the navigation sidebar.

- Edit the Name and Description as desired.

- Click Disable Rule to turn the Alert Rule off without deleting it.
- Click Delete Rule to permanently remove the Alert Rule and delete all history associated with it.
- Click Clear All Active Alerts to permanently remove only the Active Alerts from the history associated with the Alert Rule.
- Click Save when finished.
NOTE: The Name given to an alert will appear as the subject line of email notifications sent by that alert.
Alert Permissions
- Administrators should ensure users are added to the desired alert rules and have appropriate location and device-level access. For more information, see Creating an Alert Rule.
- Users need to be given the View Alerts permission and be added to alert rules. They only see alerts for the rules they have been added to and the devices they have permission for.
- Users can be given the Alert Administrator permission. This permission allows the user to view, create, edit, and delete all alert rules, even those they are not added to. This does not give them the permission to view alerts for alert rules they are not added to, and they will still need to be added to view alerts.
- Administrators don't need to be added to alert rules to see the alerts. If they are added to alert rules, they have the ability to toggle a filter in Alert History filters for Show my Alert Rules or Show all Alert Rules. By default it is set to Show all Alert Rules.


 after adding a device or location to go directly to the corresponding device or location.


 to filter Alert Rules by specific Locations or Cameras.