Analytics and Analytics Queue Alerts
For cameras preconfigured to send analytic events, an alert can be sent based on specifically defined audio or video events within a selected time period. The Audio analytic types are Audio Detected, Explosion, Glass Break, Gunshot, Scream, or All Audio Events. The Video analytic types are Intrusion Entered, Intrusion Exited, Intrusion Motion, Camera Out of Focus, Camera Tampering, Change In Area, Face Detected, Fog/Smoke, Gun Detected, Line Cross, Loitering, No Mask Detected, Person Detected, Slip and Fall, Thermal Event Detected, and Vehicle Detected. Analytic Queues is treated as a separate alert type and is sent when a queue line has reached a Medium or High threshold within a determined time range.
Creating an Analytics or Analytics Queue Alert Rule
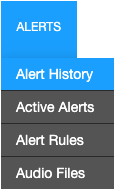
- Within the Alerts tab in the OWS Cloud Portal, select Alert Rules from the dropdown menu.
- Click New Alert Rule.

- Select an Alert Type from the pop-up menu.

- Click Next.

- Name the alert and give it a Description as desired.
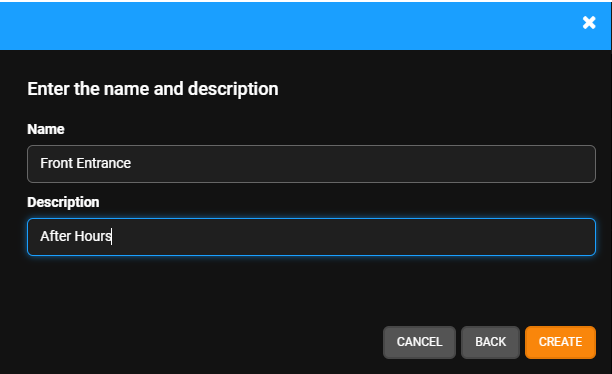
- Click Create.

Defining an Alert Rule: Analytics

- Choose either Video or Audio from Event Group and an Event Type from the dropdown list.
- Enable Alert Regions and then check the regions you want to generate alerts. Regions can be configured for Person Detected, Vehicle Detected, Line Crossing Detected, Loitering, or Intrusion.
- Enable secondary images to receive additional images with alert notifications: thermal images, cropped images, etc.
- Enter the Time of Day ranges that this rule should be active for.
- Check the boxes beneath the Days of the Week on which the rule should be active.
- Select Armed and Disarmed, Armed, or Disarmed from the Intrusion Area Armed dropdown. See Location Arming for more information.
- Active Alert (Optional) - Check the Active Alert box to add the alert to the Active Alert Dashboard and tag it as an Active Alert in email notifications.
- Priority Event Cloud Recording - Check the Priority Event Cloud Recording box to record priority events to the cloud for the associated camera when an alert is triggered by this rule. See Priority Event Cloud Recording for more information.
- Activate Relay on originating device (Optional) - Check the Activate Relay on originating device box to activate a relay when an alert is generated. See Activating a Relay for an Alert Rule for more information.
- Send To Third-Party Integration (Optional) - Check the Send To boxes to send the alert to the associated third-party integration.
- Click Save.
Defining an Alert Rule: Analytics Queue

- Use the dropdown to set the Queue Threshold to either Medium or High.
- Enter the Time of Day ranges that this rule should be active for.
- Check the boxes beneath the Days of the Week on which the rule should be active.
- Active Alert (Optional) - Check the Active Alert box to add the alert to the Active Alert Dashboard and tag it as an Active Alert in email notifications.
- Activate Relay on originating device (Optional) - Check the Activate Relay on originating device box to activate a relay when an alert is generated. See Activating a Relay for an Alert Rule for more information.
- Send To Third-Party Integration (Optional) - Check the Send To boxes to send the alert to the associated third-party integration.
- Click Save.
Add Users to an Alert Rule
NOTE: Adding Users to a rule automatically grants them permission to view alerts for cameras and locations they have access to based on their User Group permissions.
- Click Users/Notifications on the left-hand menu.

- Click Add User or Add Group.

- Click + next to each User or Group to send emails and push notifications when the alert is triggered.

- Click Add when finished.

NOTE: To receive email, push or client alert notifications, the Email Alert, Push Alert or Client Alert box must be checked. Simply adding a user only gives them access to see this alert’s history. See Alert Notifications for details.
Deleting an Alert Rule or Updating, Disabling, Clearing All Active Alerts
- Click General Info on the navigation sidebar.

- Edit the Name and Description as desired.

- Click Disable Rule to turn the Alert Rule off without deleting it.
- Click Delete Rule to permanently remove the Alert Rule and delete all history associated with it.
- Click Clear All Active Alerts to permanently remove only the Active Alerts from the history associated with the Alert Rule.
- Click Save when finished.
NOTE: The Name given to an alert will appear as the subject line of email notifications sent by that alert.
Activate Active Deterrent LEDs on Device
After enabling the Configure Alert Rules for Active Deterrence permission and adding a compatible active deterrent device to an alert rule, go to the Alert Rule Definition.
- Check Activate LEDs on originating device.

- Select either Solid or Strobe to set the white light mode.
NOTE: Default LED mode is Solid.
- Set the Duration (in seconds) for the white light deterrence.
- Click Save.