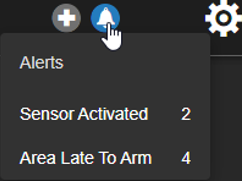
Active Alerts are an easy way to manage your most critical alerts by uniquely tagging them and keeping them in one place.
Active Alerts
Go to Alerts > Active Alerts.

NOTE: You can click Alerts on the navigation bar to go directly to Active Alerts.
Active Alerts allows you to display and manage critical alerts generated by OWS. Users can tag any alert rule as an Active Alert. Active Alerts are displayed as a widget seen on every page of OWS and are listed in the new Active Alerts Dashboard. Active Alerts can be managed or cleared directly from the dashboard. Email notifications are labeled as “Active” for easy filtering.


The Active Alerts board only shows alerts generated by rules with the Active Alert option enabled. These alerts will remain “Active” for a specific period of time before no longer shown on the board or when a user manually closes them.
- Health Alerts – Red
- 24 hours – after 24 hours these alerts will de-escalate to Orange
- Health Alerts – Orange
- 72 hours – these alerts will display for 72 hours or until manually closed
- Event Alerts – Blue
- 72 hours – these alerts will display for 72 hours or until manually closed
Alerts no longer shown on the Active Alerts board are still available to view in the Alert History page. When you click the Group By links on either the Active Alerts board or Alert History, the list of alerts will be the same.
Make an Existing Alert Rule Active
- Go to the Alerts > Alert Rules > (Select an Alert) > Rule Definition.
- Click the Active Alert checkbox and click Save.

Access Existing Active Alerts and the Active Alerts Dashboard
You can access existing active alerts by clicking the alarm icon in the upper right-hand corner to access active alerts.

NOTE: Critical health alerts are accessible by using the plus sign in the upper right-hand corner of the page.
You can also go to Alerts > Active Alerts.

Filters
Quick filters include All Alerts, Group by Alert Type, and Group by Location.
For more filtering options, click Show Filters.
Use the various fields to specify which Alerts should display, then click Apply.
- Location Name
- Location Custom ID
- Device Name
- Device ID
- Alert Type
- Alert Rule
- Event Type
- Acknowledgement State
- Alert Severity
- Access/Intrusion User

Active Alert Details and Video
- To see a thumbnail image of the active alert, hover over the camera icon.
- Click View to see more details and the video for an alert.


![]()


 next to the alerts you want to acknowledge (an Acknowledge option will appear once alerts have been checked).

