Intrusion and Intrusion Sensor Alerts
An Intrusion Alert identifies when a panel is used. Intrusion Alerts identify when a panel in an Area is Armed, Disarmed or Late to Arm. Intrusion Alerts also identify when a Panel Connection has been Disconnected. Intrusion Alarms can be set for Burglary, Emergency Alarm, Fire Alarm, Intrusion - Day, Intrusion - Exit, Intrusion - Night, Intrusion Alarm, Panic Alarm, Supervisory Alarm, or All Event Types within a set time limit.
Creating an Intrusion and Intrusion Sensor Alert Rule
Defining an Alert Rule: Intrusion
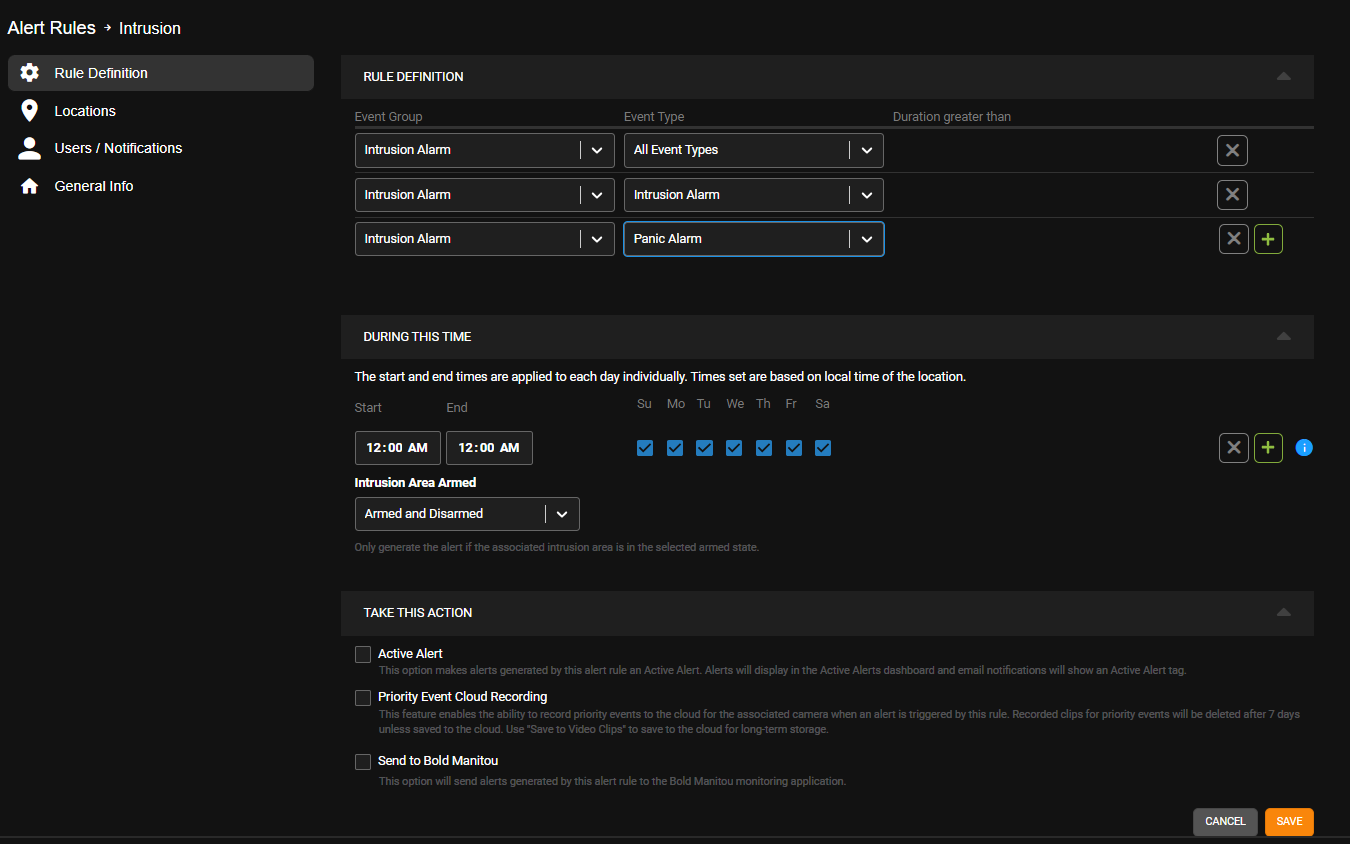
- Choose Area, Panel Connection or Zone Alarm from the Event Group and then an Event Type from the dropdown menu.
- Enter the Time of Day ranges that this rule should be active for.
- Check the boxes beneath the Days of the Week on which the rule should be active.
- Select Armed and Disarmed, Armed, or Disarmed from the Intrusion Area Armed dropdown. See Location Arming for more information.
- Active Alert (Optional) - Check the Active Alert box to add the alert to the Active Alert Dashboard and tag it as an Active Alert in email notifications.
- Priority Event Cloud Recording - Check the Priority Event Cloud Recording box to record priority events to the cloud for the associated camera when an alert is triggered by this rule. See Priority Event Cloud Recording for more information.
- Send To 3rd Party Integration (Optional) - Check the Send To boxes to send the alert to the associated 3rd party integration.
- Click Save.
NOTE: For information about enabling Priority Event Cloud Recording for Intrusion Alerts, see Priority Event Cloud Recording.
Defining an Alert Rule: Intrusion Sensor
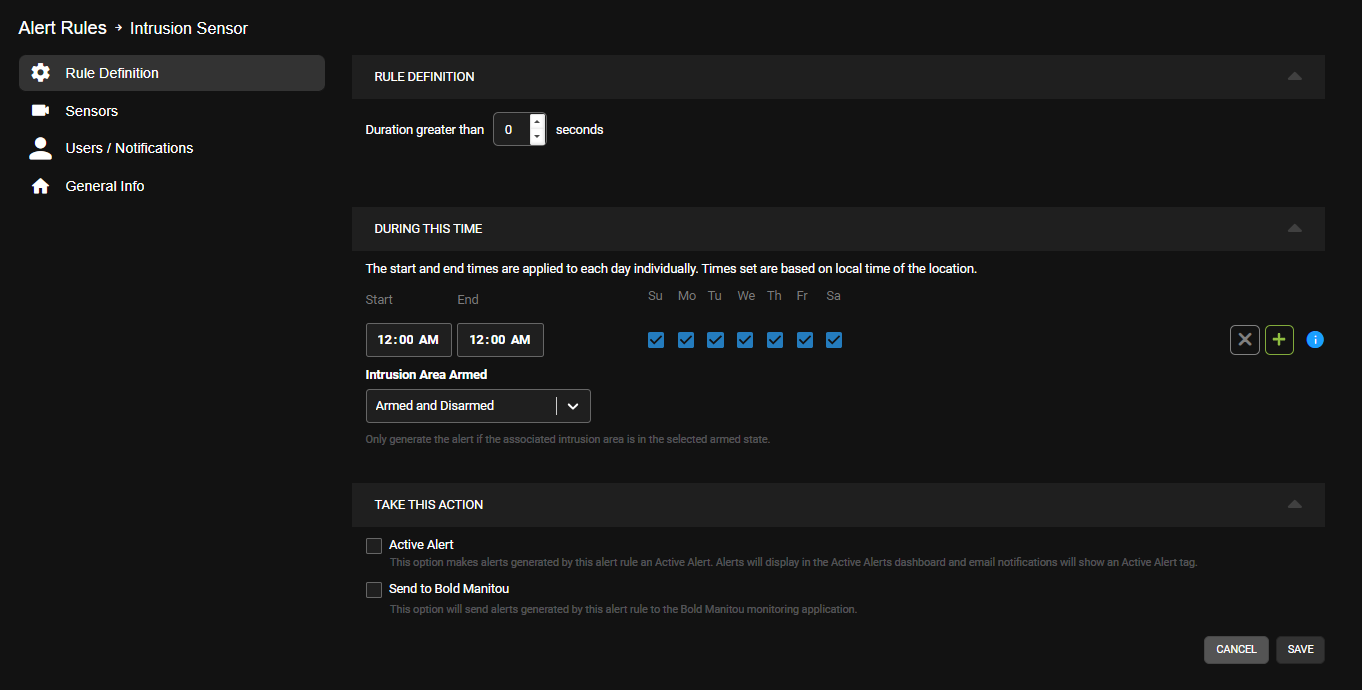
- Enter a minimum amount of time in seconds before the Intrusion Sensor Alert is activated.
- Enter the Time of Day ranges that this rule should be active for.
- Check the boxes beneath the Days of the Week on which the rule should be active.
- Select Armed and Disarmed, Armed, or Disarmed from the Intrusion Area Armed dropdown. See Location Arming for more information.
- Active Alert (Optional) - Check the Active Alert box to add the alert to the Active Alert Dashboard and tag it as an Active Alert in email notifications.
- Priority Event Cloud Recording - Check the Priority Event Cloud Recording box to record priority events to the cloud for the associated camera when an alert is triggered by this rule. See Priority Event Cloud Recording for more information.
- Send To 3rd Party Integration (Optional) - Check the Send To boxes to send the alert to the associated 3rd party integration.
- Click Save.

