Locations in Command Station
Locations in Command Station aligns device management with the physical areas where your devices are installed. Locations and all devices associated with a specific location can be configured in OpenEye Web Services in Management > Locations > Locations.
NOTE: Locations in Command Station is only available as an Optional Release. For more information, see Account Options.
To view more information on Live View in other clients, select:
Cloud Video Player | Web Client | iOS Mobile App | Android Mobile App
Locations in Live View
NOTE: For Recommended Release, see Live View in Command Station and Search View in Command Station.

- Click on a location to display added devices.
- Drag and drop a location to view all cameras in the grid.
- OR -
Drag and drop a camera to view it in one of the grid views.
Navigation Buttons
 |
Live | Click to view live video in Live. |
 |
Search | Click to search video in Search. |
Locations
 |
Refresh | Manually check web services for any recorder or permission changes. |
 |
Expand | Click the arrow to Expand and Collapse the Locations list. |
| Locations | Displays a list of Locations viewable to the user's OWS login account. Click on a Location name to display devices. | |
| Layouts | After configuring a grid, you can save and share the layout by clicking on the layout icon. | |
 |
PTZ | Control PTZ, home position, zoom in/out, auto focus, menu, and set presets. |
| Maps | Displays a list of floor plans and associated events shared with the user. | |
 |
Metrics | Display the CPU, GPU, Memory and network usage for the Client, and the CPU, GPU, and Memory for Locations. |
 |
Search | Search the device list. Can search location and/or device. Results can be shown nested or individually. |
NOTE: You can customize the sizes of the Video Player and the device list by dragging the divider between.
Camera Icons
| Active cameras shown in the camera grid. | ||
 |
Active cloud cameras shown in the camera grid. | |
| Active cameras not shown in the camera grid. | ||
| Connection with camera failed. | ||
| Camera out of service. | ||
| Camera not yet connected. |
View Controls
 |
Grid | Specify a screen grid to view live video from cameras in the Viewing Pane. |
 |
View | Drop down live video options: 4:3, 16:9, Original and Stretch. |
 |
Stream | Specify the stream quality for cameras in the Viewing Pane. |
 |
PTZ | Enable and disable PTZ control in live view. |
 |
Sequence | Enable and disable auto live sequence and modify sequence time interval. |
Audio Options
For devices with audio capabilities.
| Audio | Click to enable and adjust volume level for audio in live. | |
| 2-way Audio | Click to enable 2-Way Audio for cameras with speaker and microphone. |
Locations in Search
In Event Search in Command Station, perform a search to see a display of the locations and the analytic search filters available for those locations.

Search Filter Options
- Enter a search term in the search bar.

- Choose to search Company, Recorders, Devices, and Nested Results in the search by checking the boxes.

- Check the analytic types under the Locations to filter the search.
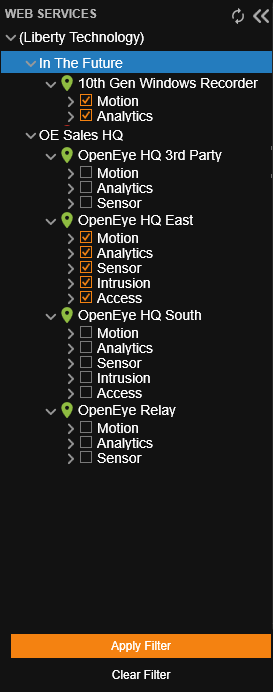
- Click Apply Filter.
Matches appear in Search Results.
Locations in Layouts
Layouts preserve the arrangement of cameras in the live view screen, allowing you to quickly switch between defined sets/arrangements of cameras.
NOTE: For Recommended Release, see Saving Screen Layouts in Command Station.

Creating a Layout
- Add the camera tiles desired from a recorder or multiple recorders in Live.
- Click Layouts
 .
. - In My Layouts or Shared Layouts, click Add
 , and then type the name of the layout.
 - Arrange the camera tiles as desired.
- Right-click the layout, and then click Update.
Locations in PTZ
The PTZ controls on the left-hand pane allows you to control a PTZ using push commands.
NOTE: For Recommended Release, see PTZ Options in Command Station.

- Click on the arrows to reposition the camera as desired.
- Click on the zoom in and out buttons to zoom in or out as desired.
- You can select your desired preset previously setup within the camera settings.
| Directional Controls | Pan/tilt or navigate through UTC camera menu. |
| Home | Send camera to home position. |
| Zoom in and out | Use mechanical zoom controls and auto focus on some analog HD cameras. |
| Menu | Open analog HD camera menu on supported cameras. |
| AF | Sends auto focus command to supported cameras. |
| Presets | Move, set or delete presets. |
Locations in Maps
Maps allow you to show available devices in a location. Devices can be quickly accessed and viewed once they have been added to a map.
NOTE: For Recommended Release, see Maps in Command Station.
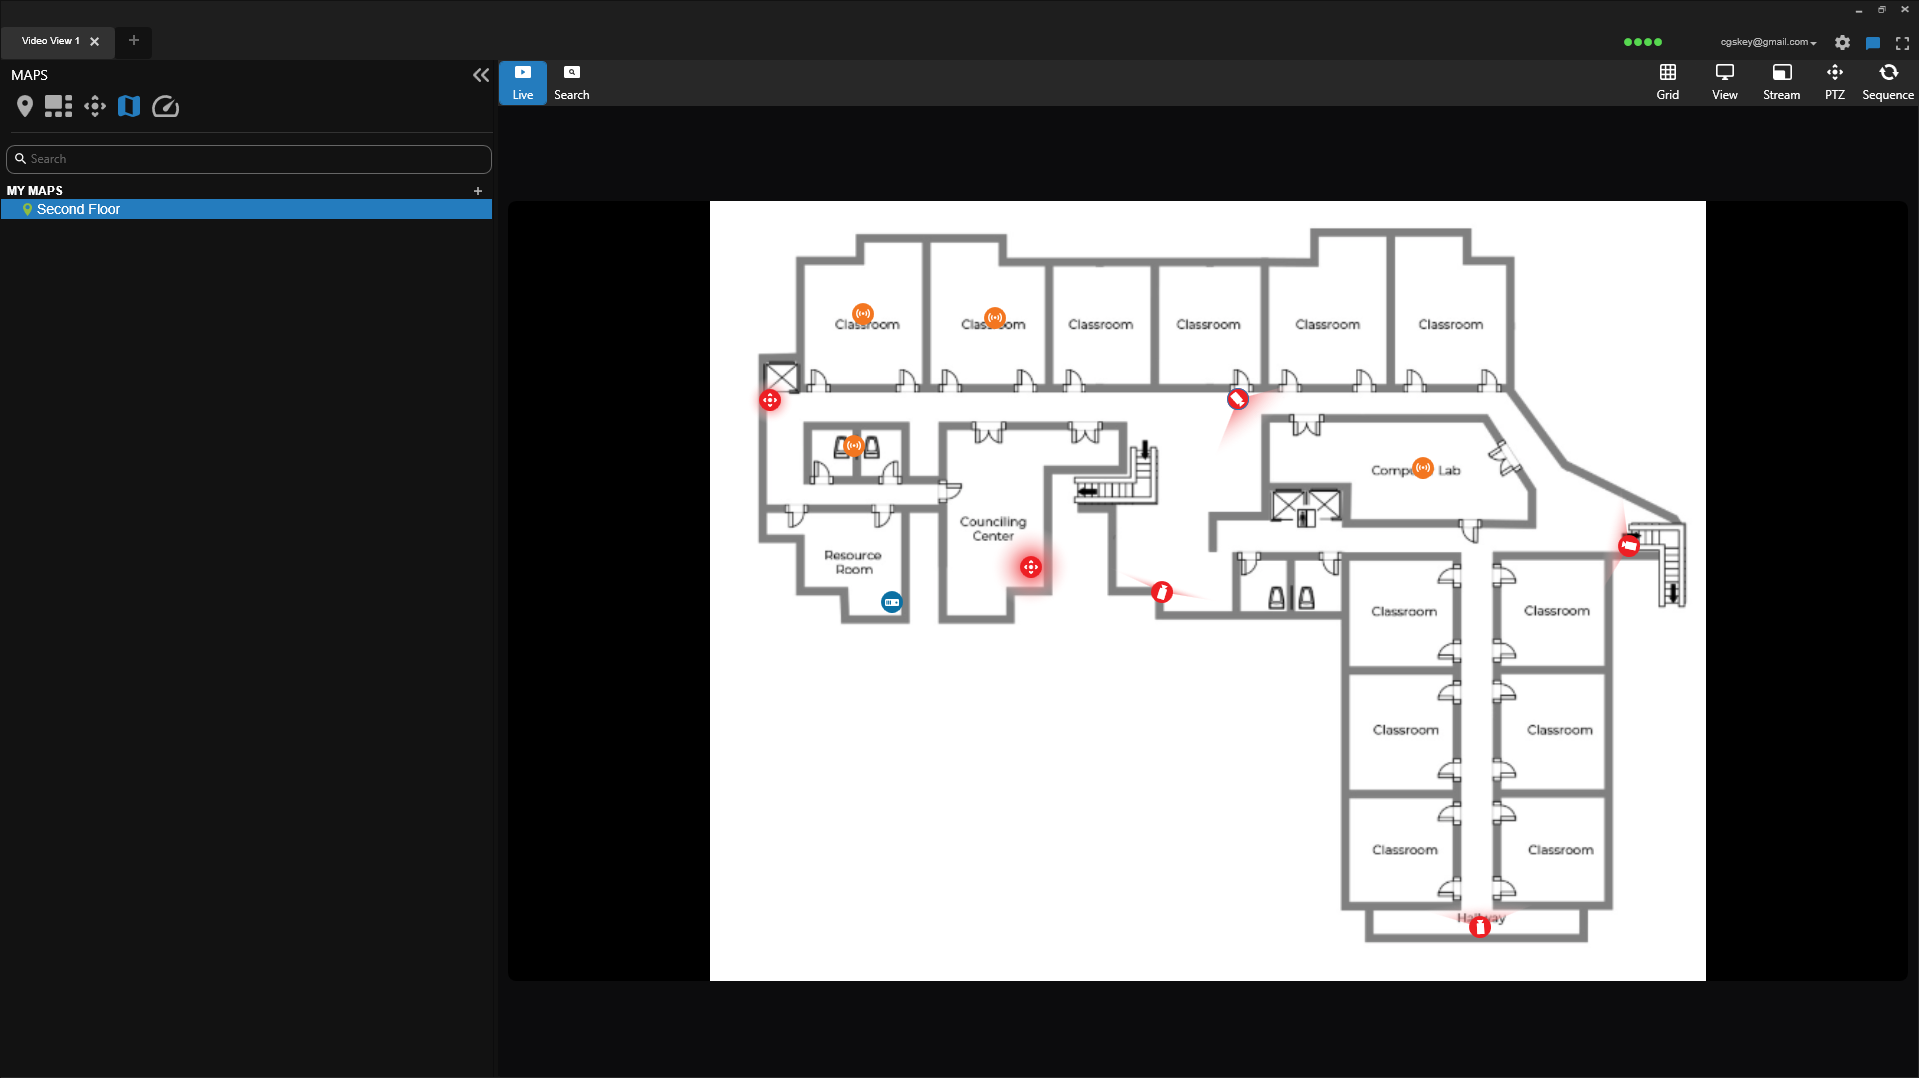
- Select the next to My Maps.
- Select Create New Map.
- Click Create.
- Select Click here to load a map.
- Select a file.
- Click Open to add the file as the base map image.
- Drag and drop available devices from locations to the map.
Locations in Metrics
Click Metrics the CPU, GPU, Memory and network Bandwidth usage for the Client, and the CPU, GPU, and Memory for Locations.

Locations in Linked Cameras
Linked Cameras allow users to follow individuals as they travel from one area to the next without losing track, or to continue monitoring an incident across devices as it unfolds.
NOTE: For Recommended Release, see Linked Cameras in the Command Station Desktop Client.

- Click Linked Camera Setup from the Right-Click Menu on a camera’s viewing pane or by right-clicking on a camera name in the camera list.
- Drag and drop another camera from the locations list onto the grid in the location where it is installed relative to the primary camera (in the center).
NOTE: You can drag up to sixteen cameras in a Linked Camera Setup.
NOTE: A camera being linked can be opened in another linked camera setup tab by double clicking the camera.
- Click Save.
Related Links
Recommended Release Live View in Command Station
Recommended Release Search View in Command Station
Recommended Release Event Search in Command Station
Recommended Release Saving Screen Layouts in Command Station
Recommended Release PTZ Options in Command Station