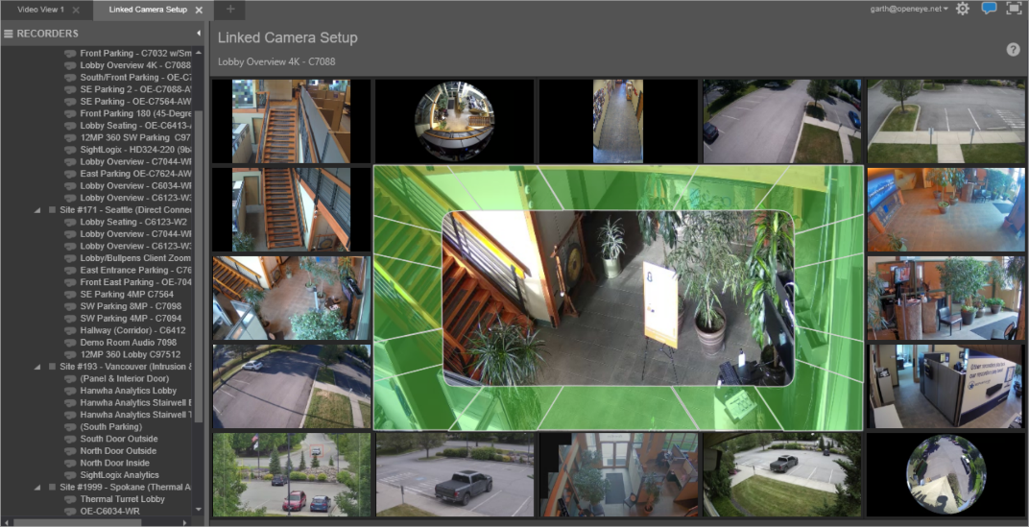
Linked Cameras in the Command Station Desktop Client
Linked camera viewing is a highly intuitive feature that allows users to easily and quickly track individuals or incidents by clicking on the screen in the direction a person is traveling. Available in both live view and search within Command Station Desktop Client, users do not need to remember camera naming conventions or know which cameras are associated with an area, nor do they have to manually load each camera. This allows users to follow individuals as they travel from one area to the next without losing track, or to continue monitoring an incident as it unfolds. Linked camera settings are saved to OpenEye Web Services (OWS), and made available to all users once configured, saving the time and hassle of configuring each user’s remote client individually.
NOTE: For the Optional Release, see Locations in Linked Cameras. For more information, see Account Options.
|
|
Linked Cameras Setup

- Click Linked Camera Setup from the Right-Click Menu on a camera’s viewing pane or by right-clicking on a camera name in the camera list.
- Drag and drop another camera from the camera list onto the grid in the location where it is installed relative to the primary camera (in the center).
NOTE: You can drag up to sixteen cameras in a Linked Camera Setup.
NOTE: A camera being linked can be opened in another linked camera setup tab by double clicking the camera.
- Click Save.
Related Links
Enable Linked Camera in Search
