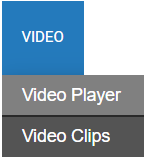
OWS Video Player
Introducing the OpenEye Web Services (OWS) next-generation, cloud-based web client delivering a completely new live and playback experience in the OWS Cloud Portal. The new cloud client gives users a more feature-rich interface with multi-site video support, new event search types, and advanced layout and event data viewing options.
|
|
Access the Cloud Video Player
To access the Cloud Web Client, click the Video tab > Video Player within the OWS Cloud Portal.
NOTE: Connecting to the OWS Video Player via the CONNECT button will display a dynamic camera grid based on the number of cameras associated with the location. The selected location will also display in the search filter. Clear the filter to view all locations:
- 10+ cameras = 4x4 grid
- 5-9 cameras = 3x3 grid
- 3-4 cameras = 2x2 grid
- 1-2 cameras = 1x2 grid
- 1 camera = 1x1 grid
Video Pane
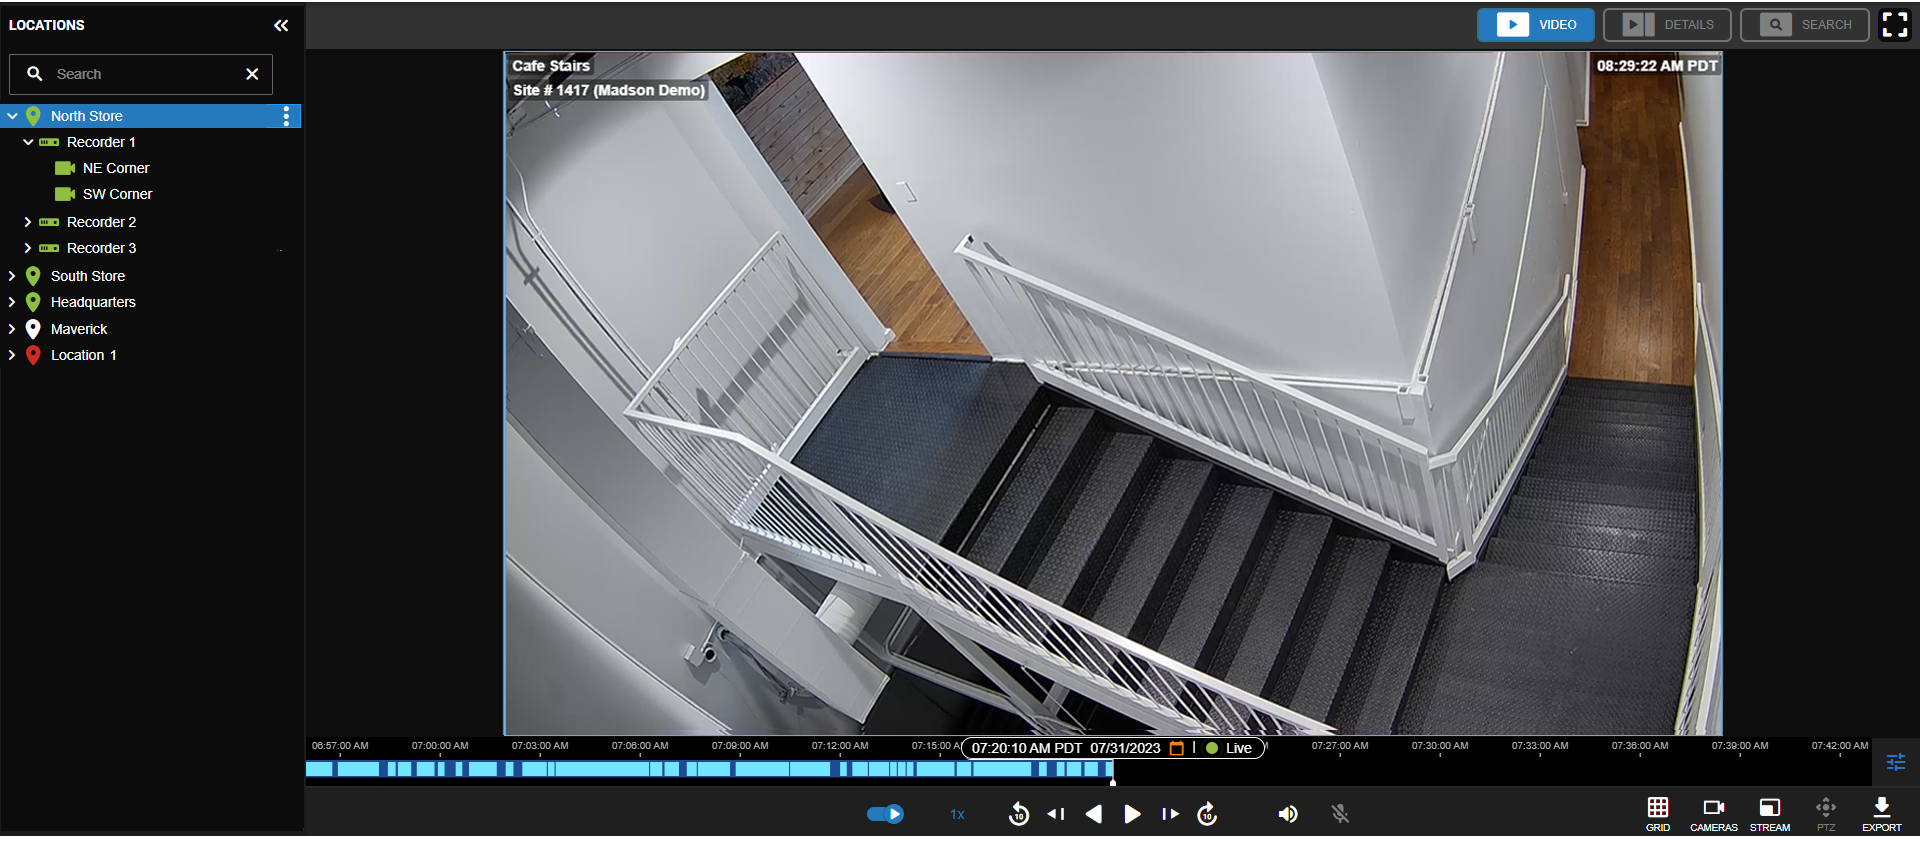
Full player - Displays only the video pane. 
Player with details - Displays the video pane with video details displayed on the right. 
Search - Go to Event Search. 
NOTE: Any recorders or cameras currently in view will be automatically included in the Event Search Filters.
NOTE: Full player, Player with details, and Search functions require OWS Cloud Web Client version 2.30 or higher. Earlier versions will display "New Search" above the video pane.
Full Screen - Click the full screen icon to view the video player in full screen mode. 
Locations - Displays a list of Locations viewable to the user's OWS account. Click on a Location name to display devices.
To display video:
- Click on a location to display a list of devices.
- Double click on the location, recorder, or camera name.
-OR-
Drag and drop a location, recorder or camera name into the Video Player.
NOTE: All cameras connected to a location can be displayed by dragging and dropping the Location name into the Video Player. If the current camera Grid is too small to display all cameras, click arrows on the sides of the Video Player to go to the next or previous camera Grid display. 
Expand - Click the arrow to Expand and Collapse the device list. ![]()
NOTE: You can customize the sizes of the Video Player and the device list by dragging the divider between.
Search - Search the device list. 
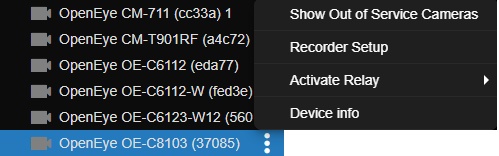
Show Out of Service Cameras - Click on the three dots next to a recorder or camera name and click on Show Out of Service Cameras to display out of service cameras in the list (out of service cameras are hidden by default).
Camera Icons:
 - Active cameras shown in the camera grid.
 - Active cameras not shown in the camera grid.
 - Connection with camera failed.
 - Camera out of service.
 - Camera not yet connected.
NOTE: The order of the cameras listed under a Location or recorder in the list can be changed in Management > Locations > Locations > Cameras.
Recorder Setup - Click on the three dots  next to a location or device name and click on Recorder Setup to access setup from the OWS Video Player. You will be taken directly to Setup > General Configuration > Cameras.
Open Camera Link - Click on the three dots next to a camera name from the device list to Open Camera Link for remote access to supported cameras.
Activate Relay - Activate a relay associated with the chosen camera. A line break in the menu appears at the top of the list between the relays associated with a camera and relays not associated with cameras in the Cloud Web Client.
Device Info - Click on the three dots next to a device name from the device list to view Device ID, Connection, Version, and Image Version for a Recorder.
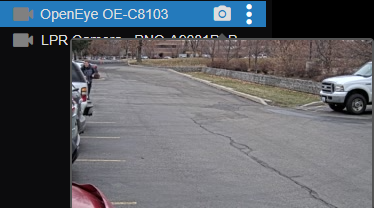
Thumbnail Preview - Hover the cursor over the camera icon next to a camera name to see the thumbnail preview image.
Video Pane Menu - Click the bottom right-hand corner of a video player pane to bring up the video pane menu.
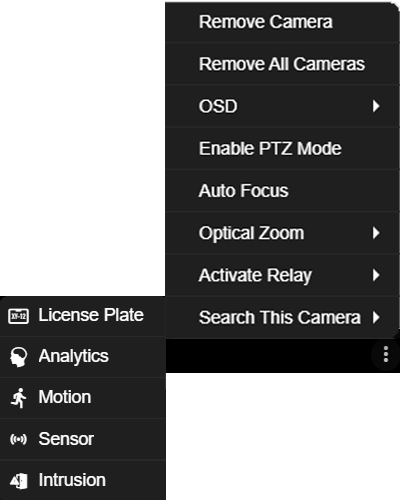
Remove Camera - Remove the camera video displayed in a specific grid pane.
Remove All Cameras - Remove all camera video displayed in all grid panes.
OSD - Check the On-Screen Display options for the current video pane.
Enable On-Screen Display - Check to enable or disable On-Screen Display information.
Camera Name - Check to display or hide Camera Name in all grid panes.
Location Name - Check to display or hide Recorder Name in all grid panes.
Diagnostics Information - Check to display or hide Diagnostics Information in all grid panes.
Date - Check to display or hide the Date in all grid panes.
Time - Check to display or hide Time in all grid panes.
Time Zone - Check to display or hide Time Zone in all grid panes.
NOTE: Fisheye cameras will have an additional 360 View Mode in the right-click menu. You can choose Interactive (mouse controls similar to PTZ), 360 Panorama (for ceiling mounted cameras), or 2x180 Panorama (for wall mounted or ceiling mounted cameras).
Enable PTZ Mode - Check to point, tilt and zoom the camera image with the mouse.
Auto Focus - Click to auto focus for compatible cameras.
Optical Zoom - Zoom In or Zoom Out of the image in the camera pane.
Activate Relay - Activate a relay associated with the chosen camera. A line break in the menu appears at the top of the list between the relays associated with a camera and relays not associated with cameras in the Cloud Web Client.
Search This Camera - Initiate an Event Search from the camera pane.
Timeline - Continuous recording is represented by dark blue lines on the Timeline Search bar, with light blue lines on the Timeline Search bar representing Motion events.

Playback Speed – Control the speed of video playback. Move the cursor over Playback Speed to display the controls. 

Jump Video Backward – Jump video backward in 10 second intervals.
Skip Backward – Move to the previous frame of recorded video.
Play Backward – Play recorded video backward.
Pause – Pause video playback (while video is playing).
Play Forward – Play recorded video forward.
Skip Forward – Move to the next frame of recorded video.
Jump Video Forward – Jump video forward in 10 second intervals.
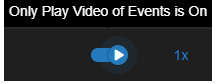
Only play video of events - Play events only (will only display event video as indicated by the light blue lines on the Timeline).
NOTE: The player can can only play video of events when the Grid is set to a single camera pane.
Zoom - Zoom in and out to adjust the time range and timeline.
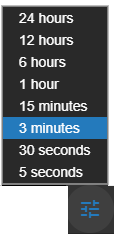
NOTE: You can zoom in and out with the mouse wheel when the cursor is placed over the Timeline Bar.
Keyboard Shortcuts – Playback Controls are also mapped to the following keys:
Space – Pause/Play video. When paused reset playback speed to 1X.
Left Arrow – When playing video, reduce playback speed one setting.
Right Arrow – When playing video, increase playback speed one setting.
Left Arrow – When video is paused, frame left.
Right Arrow – When video is paused, frame right.
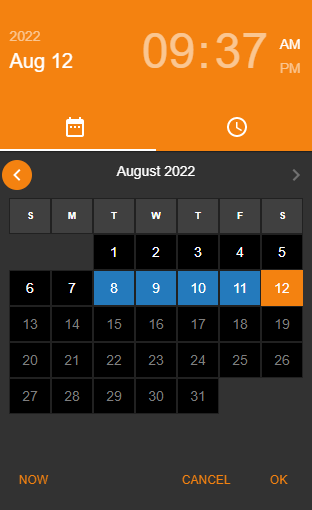
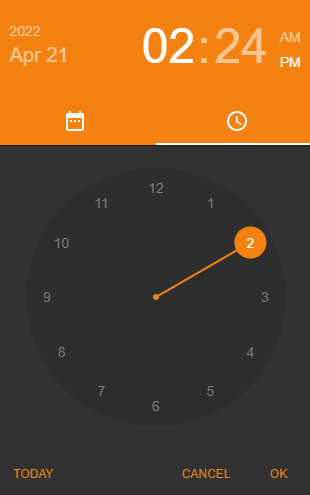
Date / Time Picker - Use to designate a date and time to search recorded video. Clicking on the date and time  will display a calendar that can be used to display video from a specific date and time.
Go Live - Indicates video status (either live or searchable video). Click  to change between video search and live video.
NOTE: A Live icon will replace the text "Go Live" to indicate live video. ![]()
NOTE: You can also click at the end of the Timeline bar to go to live video.
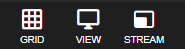
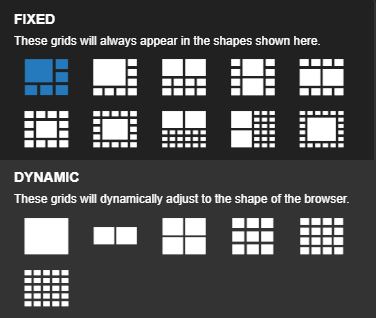
Grid - Designate a Fixed or Dynamic screen division to view live video from cameras in the viewing pane.
- Fixed - These grids will always appear in fixed shapes and arrangements.
- Dynamic - These grids will dynamically adjust to the shape of the browser.
View - Live video viewing options [Original (displays original aspect ratio of all cameras) or Stretch (stretches camera images to fit Camera Tile)].
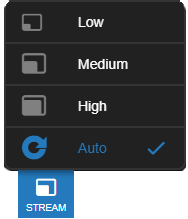
Stream - Designate the stream quality for cameras in the Viewing Pane (Low, Medium, High, or Auto Quality).
Export - Export and share video clips, snapshots or archives from the Video Player.

NOTE: If the width of the page is reduced, the Grid, View, Stream, and Export buttons will be condensed into a single More  button.