Event Reports
NOTE: Event Reports is currently in beta. All beta requests must be directed through your OpenEye Sales Representative.
Creating an Event Report
- Click Reports in the top navigation bar.
- Click New Report.
- Choose Event Report and click Next.
- Enter a Report Name, Report Description, and choose a Report Type from the dropdown.
- Click Confirm when finished.
Configuring Event Reports

Quick Links
Setting Report Defaults
When a user opens the report it will open to the Time Frame, Starting Period, and Default View defaults configured in Report Defaults. Once opened, these can be edited in the Report Filters section on each page.

Select the defaults for the report, and click Save.
Adding Users to a Report
Changing General Info or Deleting a Report
From the General Info tab, users can edit Report Name and Description or Delete Report.
View Report
Click on View Report  from Quick Links on an Event Report or click View
  on a report from the Reports list.
Edit Report Filters
Click on Edit Report Filters  from Quick Links on an Event Report or click Edit Filters
 ![]() on a report.
on a report.
Select Event Report Type
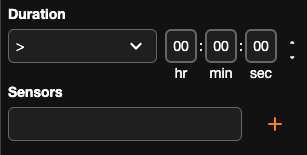
Select an Event Report from the list to view or edit.
NOTE: The information icon ![]() next to each event search type will display the same notice about third-party sources. Notice: These results may contain events from third-party sources which differ in accuracy and performance from our own analytic solutions.
next to each event search type will display the same notice about third-party sources. Notice: These results may contain events from third-party sources which differ in accuracy and performance from our own analytic solutions.

Edit Filters on a Report
Select a report, and click Edit Filters ![]()
Analytics Event Report
Click on an Analytics report  to edit Analytics event report filters.

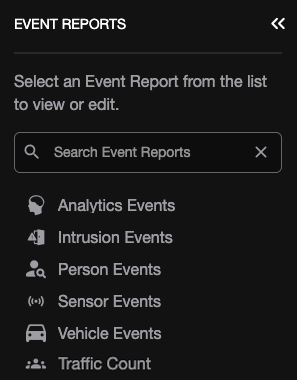
- From the Duration dropdown, select greater than or less than, and then set hours, minutes, and seconds.
- From the Event Types dropdown, select Vehicle Detected, Person Detected, or Select All.
- Select Cameras from the dropdown or click Search Cameras
 to select from a list of cameras.
 - Click Update, Save, or Save as New Report.

Intrusion Event Report
Click on Intrusion ![]() to edit Intrusion event report filters.
to edit Intrusion event report filters.

- From the Duration dropdown, select greater than or less than, and then set hours, minutes, and seconds.
- From the Event Types dropdown, select Sensor Activated or Select All.
- Select Cameras from the dropdown or click Search Cameras to select from a list of cameras.
- Select Cardholders from the dropdown or click Search Cardholders to select from a list of cardholders.
Select Sensors from the dropdown or click Search Sensors
to select from a list of sensors.- Select Panels from the dropdown or click Search Panels to select from a list of panels.
- Select Areas from the dropdown or click Search Areas to select from a list of areas.
- Click Update, Save, or Save as New Report.
Person Event Report
Click on Person  to edit Person event report filters.

- Select Cameras from the dropdown or click Search Cameras to select from a list of cameras.
- Select a Relevance Level to include only events that meet or exceed a High, Medium, or Low level.
- Click Update, Save, or Save as New Report.
Enabling Attribute Filters for Person Event Reports
- Toggle Attribute Filters on.
- Configure one or more attribute criteria.
- Click Update or Save to apply the filters.
If Attribute Filters are enabled but no attributes are selected, all matching person events are included.
Top Clothing and Bottom Clothing
Select up to two colors for both top and bottom clothing items to filter events by detected clothing color.
Sensor Event Report
Click on Sensor  to edit Sensor event report filters.
- From the Duration dropdown, select greater than or less than, and then set hours, minutes, and seconds.
- Select Sensors from the dropdown or click Search Sensors to select from a list of devices.
- Click Update, Save, or Save as New Report.
Vehicle Event Report
Click on Vehicle  to edit Vehicle event report filters.

- Select Cameras from the dropdown or click Search Cameras to select from a list of cameras.
- Select a Relevance Level to include only events that meet or exceed a High, Medium, or Low level.
- Click Update, Save, or Save as New Report.
Enabling Attribute Filters for Vehicle Event Reports
- Toggle Attribute Filters on.
- Configure one or more attribute criteria.
- Click Update or Save to apply the filters.
If Attribute Filters are enabled but no attributes are selected, all matching vehicle events are included.
Vehicle Type
Filter events by detected vehicle category:
- Any
- Car
- Truck or Van
- SUV
- Commercial
Only events matching the selected vehicle type(s) will be included.
Vehicle Color
Filter events by detected vehicle color.
- Select up to two colors.
- Only events matching one of the selected colors will be included.
Traffic Count Report
Click on Traffic Count ![]() to edit traffic count report filters.
to edit traffic count report filters.

- From the Locations dropdown, select a location or click Search Locations to select from a list of locations.
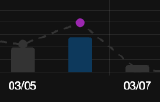
- From Line Cross Direction, use the dropdown to select Both, Enters, or Exits.
NOTE: If Both is selected, use Enters Per Day and Exits Per Day to switch displays on the Report. See Controls for more information.
- Click Update, Save, or Save as New Report.
Viewing Event Reports
After configuring a report, view data visualization, and navigate directly to video verification from the report.

Click on the three dots next to a report for additional options.
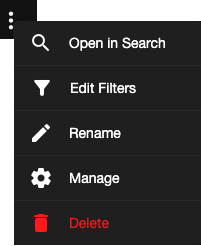
Additional Options
| Open in Search | Open Event Search in the Cloud Video Player from an individual report. | |
| Edit Filters | Modify the filters applied to the report. | |
| Rename | Enter a new name for the report. | |
| Manage | Open the report's General Info page. | |
| Delete | Delete the report. |
Controls
 |
Details | View a graph and list of events for the report. |
 |
Thumbnails | View a thumbnail display of events for the report. |
 |
Offset | Change the display time offset between –4 seconds and +4 seconds. |
 |
Month / Week / Day Dropdown | Change the time range displayed by month, week, or day. |
 |
Time Range | Change the displayed data to the current or a previous month, week, or day. |
 |
Export | Export a .csv file of event report data. |
 |
Hide / Show Graph | Hide the graph to display only the events list, or show the graph to return to the default view. |
| Edit Filters | Modify the filters applied to the report. | |
 |
Hide Bar Graph | Click the current time range below the graph to hide the bar graph display. |
 |
Hide Data Line | Click the previous time range to hide the data line. |
 |
Select Date/Hour |
Click on an individual bar graph to apply a day/hour filter to the event list. Click Reset to include all dates/hours. |
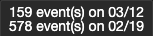 |
Display Number of Events | Point to a Bar Graph or Data Line to display the number of events. |
| Thumbnail Preview | Point to the camera icon to preview event thumbnail. | |
 |
Enters Per Day | If the Both filter is selected for a Traffic Count Report, click to change display to Exits Per Day. |
 |
Exits Per Day | If the Both filter is selected for a Traffic Count Report, click to change display to Enters Per Day. |
NOTE: A status bar appears while report data is loading. 
Viewing a Thumbnail Display

 |
Offset | Change the display time offset between –4 seconds and +4 seconds. |
 |
Size | Change thumbnail size between small, medium, or large. |
 |
Sort | Sort thumbnail date/time by ascending or descending order. |
 |
OSD | Select on screen display. |
 |
View | Change thumbnail view between original and stretch. |
|
Month / Week / Day Dropdown | Change the time range displayed by month, week, or day. |
 |
Time Range | Change the displayed data to the current or a previous month, week, or day. |
Event Report Details
Open Details ![]() to play video and view additional event information.
to play video and view additional event information.

Click View Video  to open Event Search in the Cloud Video Player.
Details Controls

 |
Play Events Only | Enable to play events only (will continuously play event video). |
| Playback Speed | Control the speed of video playback. Click on 1x speed dropdown to select from 0.25x, 0.5x, 0.75x, Normal 1x, 1.25x, 1.5x, 1.75x, 2x, or 4x. | |
 |
Skip Backward | Move to the previous frame of recorded video. |
| Play Backward | Play recorded video backward (click again to pause). | |
| Play Forward | Play recorded video forward (click again to pause). | |
 |
Skip Forward | Move to the next frame of recorded video. |
 |
Multi-Result Selection | Select multiple event search results from the Thumbnails view and export them to Video Clips in Search > Display in the OWS Cloud Client. |
 |
Export | Click Export from the Details pane to export Single Camera or Multi Camera video, Snapshot, or Archive. See Export and Clip Sharing in the Cloud Video Player. |
| Fullscreen | Click to view video in fullscreen mode. |