User Group Permissions
The following gives you a breakdown of each section within User Group Permissions and the specific settings in each:
Users: View and add Users to a group.
Web Services Permissions: Manage permissions tied to Web Services access and settings.
2-Step Verification: Enable Multifactor authentication for User Groups as a simple way to add security to your system.
Locations / Cameras: Enable User Group access to specific locations and groups.
Hidden Cameras: Specify any cameras that should be inaccessible.
Layouts Permissions: Manage permissions for shared layout options and groups.
Video Clips Permissions: Manage permissions for video clip exports and manage access to video clips.
General Info: Edit the Name or Descriptions of the User Group, or to delete the group entirely.
NOTE: Available permissions are dependent on licensing tier. See OWS Licensing FAQs for more information.
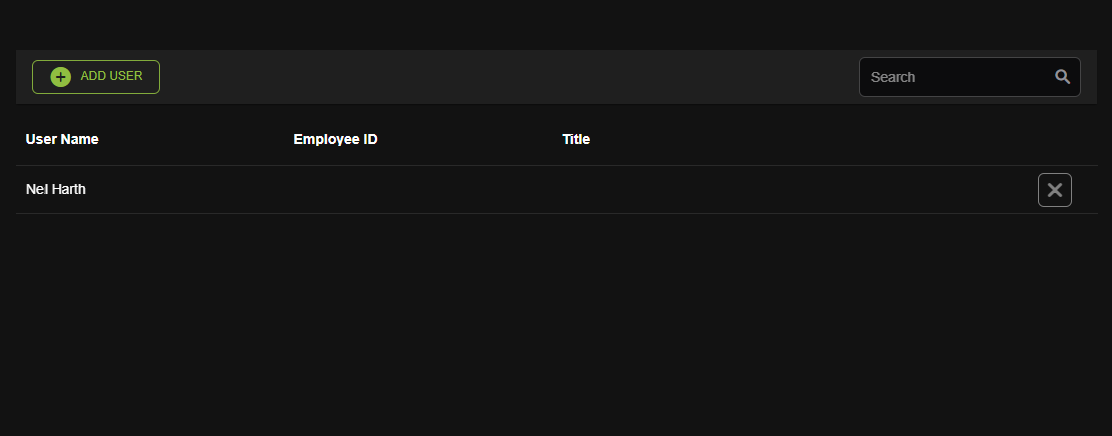
Users
The first tab is Users, which allows you to add Users to User Groups. It is recommended to set all of the permissions in a User Group first and then add the Users. For more information on adding Users to a User Group, view the instructions in How to Create Users and User Groups.
2-Step Verification
Use this tab to enable multifactor authentication. Multifactor or 2-Step Verification is a simple way to add security to your system. Add another layer of protection to your OWS account by enabling 2-Step Verification in your User Group settings. Under Management > User Groups > 2-Step Verification, select the permissions you want to assign to the User Group and then click Save.
- Enable 2-Step Verification: Using 2-step verification will help prevent unauthorized Users from accessing an account with just a stolen password. When users sign in using a new device, 2-step verification will require users to enter both their password and a unique code that they receive on their phones.
- Force Disable 2-Step Verification Requirement: In some cases, there may be users who are unable to use 2-Step Verification (users who don't have access to a phone, etc.). When this happens, they may need to be exempted from 2-Step Verification.

Locations / Cameras
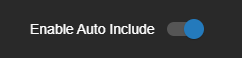
Use the Locations / Cameras tab to add locations or location groups to a User Group. Whatever is chosen will dictate what locations or location groups that Users can view. For some groups, it may be advised to click Enable Auto Include so that any future locations and their devices added are available to the User Group. If this is enabled, view the Hidden Cameras menu below. Under Management > User Groups > Locations / Cameras, add devices accessible to the User Group.
- Add Location: Select All or select specific locations from the menu to add to the User Group. Enable Auto Include so that any future locations and their devices added are available to the User Group.
- Add Location Group: Select All or select specific location groups from the menu to add to the User Group.
- Add Camera: Select All or select specific cameras to add to the User Group.
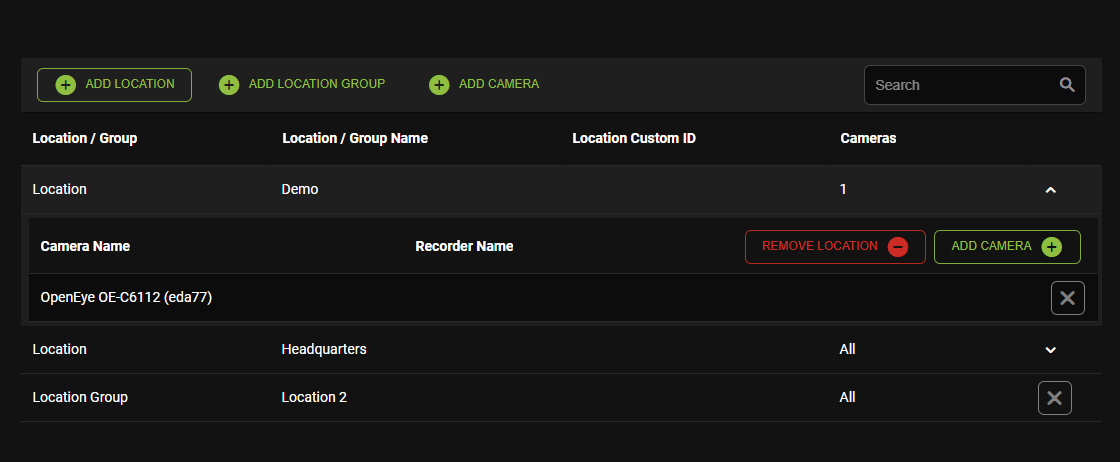
Adding Locations and Cameras to a User Group
- Click Locations / Cameras on the navigation sidebar.
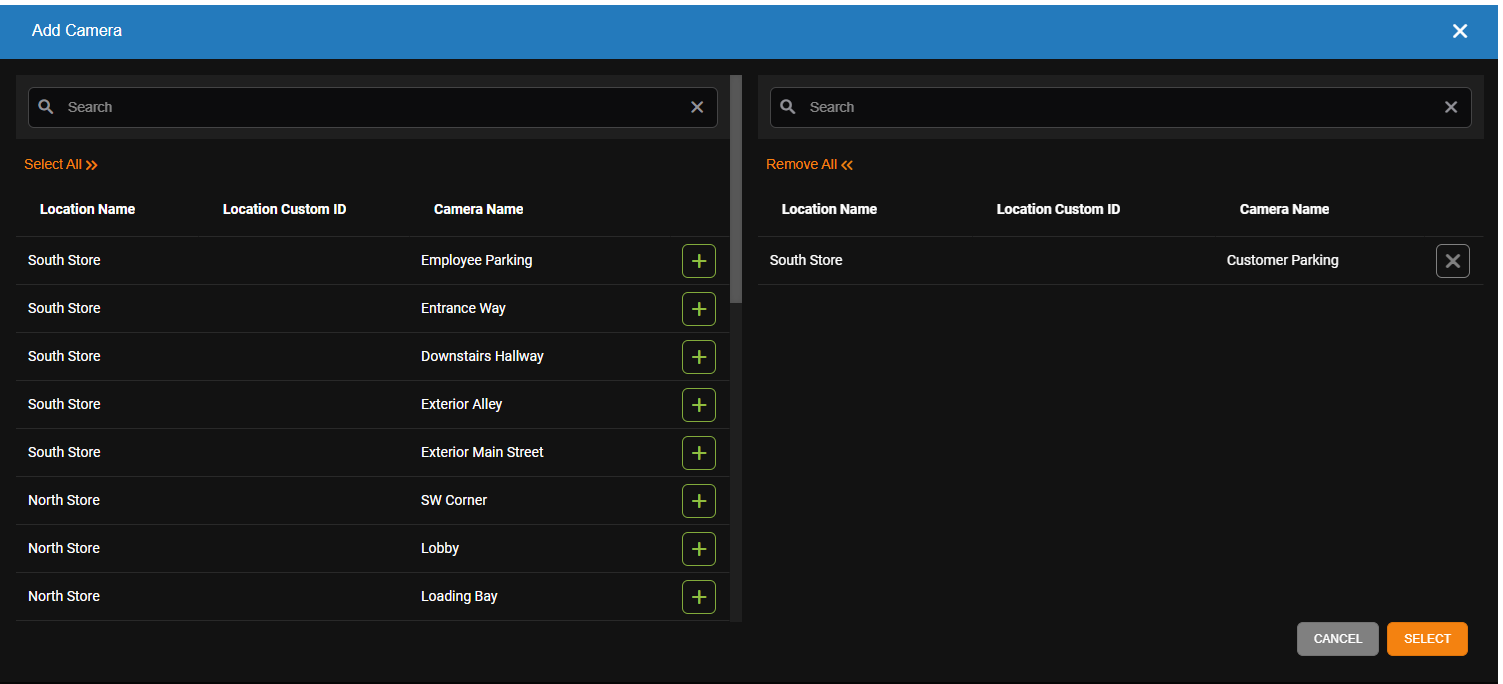
- Click Add Location, Add Location Group, or Add Camera.


- Click the Add button next to each device you'd like to be added for the User Group.

NOTE: To add all Locations, Location Groups or Cameras to a User Group, click Select All.
-
Click Select when finished.

Hidden Cameras
Use this tab and permission setting to restrict access to specific cameras. Users will not be able to see the cameras or any sensor events the cameras are associated to. This permission will override any other camera permissions. Users in this group will be denied access to the cameras even if they are granted access in another user group. You may use this permission if you selected Enable Auto Include in Locations / Cameras (as you’ve provided access to all of the cameras available on all recorders). Under Management > User Groups > Hidden Cameras, add cameras that are inaccessible to the User Group.
- Add Hidden Camera: Click Add Hidden Camera
 and select cameras that will be hidden and inaccessible to the User Group.

Layouts Permissions
This tab allows you to enable or disable Layout Group Management, Shared Layout Options, and Shared Layout Group Permissions.
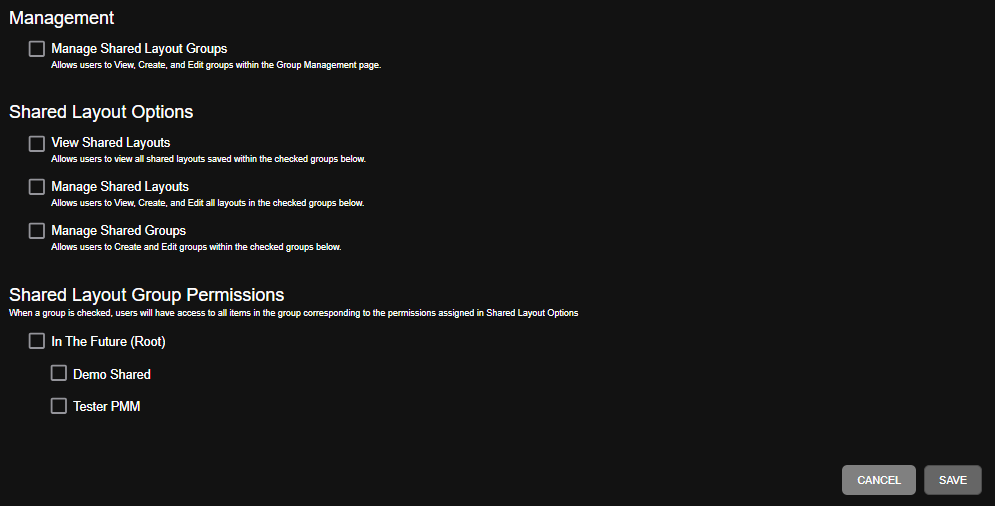
Management
Manage Shared Layout Groups - Allows users to View, Create, and Edit groups within the Group Management page.
Shared Layout Options
View Shared Layouts - Allows users to view all shared layouts saved within the checked groups below.
Manage Shared Layouts - Allows users View, Create, and Edit all layouts in the checked groups below.
Manage Shared Groups - Allows users to Create and Edit groups within the checked groups below.
Shared Layout Group Permissions - When a group is checked, users will have access to all items in the group corresponding to the permissions assigned in Shared Layout Options.
Video Clips Permissions
This page allows you to enable or disable Video Clip Export and Video Clip Management permissions. Under Management > User Groups > Video Clips Permissions, check the permissions you want to assign to the User Group. Click Save after checking permissions.

- Export
- Export Video Locally - Allows exporting of recorded video to a local storage location (USB, Disc, etc.)
- Export Video to Web Services - Allows exporting of recorded video to Web Services.
- Management
- View and Download Any Video Clip - Allows viewing and downloading any video clip.
- Edit Any Video Clip - Allows editing any video clip titles and notes.
- Delete Any Video Clip - Allows permanently deleting any video clips.
- View and Download Video Clips Added by User - Allows access to view and download video clips added to the account by the user.
- Edit Your Video Clips - Allows editing your video clip titles and notes.
- Delete Your Video Clips - Allows permanently deleting your video clips.
- View Clips Shared with User - Allows access to video clips shared directly with the user. Ability to Download clips is controlled at the share level.
- Download Video Clips - Allows access to download video clips the user has permission to view. Allows sharing to other users with Download option.
- View and Download Any Video Clip - Allows viewing and downloading any video clip.
NOTE: Any new user groups that are created will have to enable the permissions to View Clips Shared with User and Download Video Clips. User groups created previous to July 17, 2024 will have these Permissions enabled by default.
NOTE: If a user doesn't have permission to download video clips, guest users they share video clips with will also be unable to download video clips.
- Limit Access to Locations in this User Group - Access to video clips is only granted if the location is listed in this User Group.
- Sharing
- Share Video Clips - Allows sharing of video clips to users who have a full Web Services accounts.
- Share with New Guest Accounts - Video clips can be shared with users who do not have Web Services accounts. Users without accounts will be given guest accounts.
- Share Video Clips - Allows sharing of video clips to users who have a full Web Services accounts.
- Folders
- Video Clips Folder Administrator - The Video Clips Folder Administrator can create, edit, and delete folders in the Video Clips Folder Manager.
- Grant Access to the following Folders - When a folder is checked, users will have access to all items in the folder corresponding to the permissions assigned in Video Clips Permissions.
NOTE: Video Clips Folders is currently available as a beta. If you would like to have this feature before its official rollout, please contact your OpenEye Sales Representative for additional details.
General Info
Use this section to edit the Name or Descriptions of the User Group, or to delete the group entirely. Deleting a group cannot be undone and will remove all users from the group.

Clone User Group
- Click Clone
 .
.

- Enter Name and Description.
NOTE: The cloned User Group must be given a unique name.
- Check which options from the original User Group you want to copy to the clone.
- Click Create.