Video Clips Folders
NOTE: Video Clips Folders is only available with certain licensing tiers. See OWS Licensing for more information.
Video Clips Folders Permissions
In order to use this feature it must be enabled as a license feature option AND on the the Video Clips Folder Management End User page.
Go to Management > User Management > User Groups > Edit  > Video Clips Permissions.

Check the Folders permissions to give to the User Group:

| Video Clips Folder Administrator | Allow the User Group to create, edit, and delete folders in the Video Clips Folder Manager. |
| Grant Access to All Folders | Give the User Group access to all video clips folders. |
| Created Folders | Give the User Group access to the video clips in that folder. |
NOTE: If there are any subfolders under a checked folder, the User Group will also have access to those folders.
Click Save. 
Managing Video Clips
Go to Management > Video Clips.

The folder hierarchy appears in Folder Management. Click to the left  of a folder and drag and drop to change folder order in the hierarchy.

NOTE: Click collapse to hide the subfolders.
Add New Video Clips Folder
NOTE: A default folder is automatically created when Video Clips Folders is enabled. If a user group is given access to a video clips folder, they will also have access to the default folder.
- Click Add New
 to create a new folder.
 - Enter a New Folder Name.


- Click Add.

Move Video Clips Folders
- Click the three dots
 on a folder to move all of the video clips in that folder to a new destination folder.

- Click Move Video Clips.

- Select a Destination Folder.
- Click Move Clips.
Folders in Video Clips
When Video Clips Folders Permissions are enabled, the folders list appears in the Video Clips list.
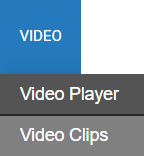
Go to Video > Video Clips.
A user will be able to see the folders they have access to under the Folders list.

Move Video Clips
- Check the video clips to move to a folder.

- Click Move and select Move to Folder from the dropdown.

- Select the folder and click Move.

Video Clip Options

| Delete | Click to delete the selected video clip or clips. |
| Download | Click to download the selected video clip or clips to a local machine. |
| Move | Click to move video clip or clips to a group or folder. |
| Share | Click to share video clip or clips with user or user group. |
| X | Deselect video clips. |
NOTE: Individual clips can be shared with a user without giving permission to a folder.
Export to a Video Clips Folder
- Click Export on the video player.

- Select an Export Type: Single Camera and Multi Camera.

Export Single Camera
- Select the Date / Time, Duration, Video Quality and Video Resolution. Check to include Audio if available.

NOTE: Longer Duration and higher Video Quality will result in larger video files.
Video Resolution:
| Original | Fast option. Does not include date/time and does not dewarp video. |
| High Quality | Takes longer. Max resolution of 9MP and adds date/time to bottom of video. |
| Medium Quality | Takes longer. Max resolution of 2MP and adds date/time to bottom of video. |
| Low Quality | Fast option. Does not include date/time and does not dewarp video. |
- Click Next.
- With Export to Web Services selected, Select Destination Folder for the export.

- Click Export.