Managing Customer Accounts
Within the Channel Partner Management Portal, the Accounts tab will display all of the Customer Accounts managed by a Channel Partner. Users will be able to view information such as Account Name, Account Type, Used Licenses, Unused Licenses, Locations, Days Since Last Sign In, and quickly reference the Recorder Registration Code linked to the Customer Account. Users can access a Customer Account by clicking Select, adjust Customer Account settings and permissions by clicking Manage, or create a new Customer Account by clicking Add New Account.
NOTE: Using Search on the Customer Accounts page will allow a Channel Partner to enter a recorder name and it will return the Account Name the recorder resides in.
Managing a Customer Account
Go to Accounts > Customer Accounts.
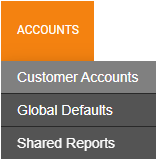
NOTE: You can click Accounts on the navigation bar to go directly to Customer Accounts.

Account Name - Name attached to Customer Account
Account Type - The account type used to designate the subscription tier and features it will support
Used Licenses - The number of assigned licenses for the account
Unused Licenses - The number of unassigned licenses available for the account
Locations - The number of locations created in the account
Days Since Last Sign In - The number of days since someone last signed in to the account
Account Registration Code - Code used to connect recording devices to the account
NOTE: You can customize the Customer Accounts table. See Table Functionality for more information.
After creating a Customer Account, click Manage  next to the Account Name on the Customer Accounts page to access the Account Profile.
Account Profile
The Account Profile page contains the following elements:

Account Details
Account Type - The account type used to designate the subscription tier and features it will support
Account ID - A manually assigned ID for internal organization
Subscription ID - Unique ID for subscribers
Name - Name attached to Account Profile
Address, City, State/Province, Postal Code, Country - Address for the customer account
End User Decision Maker Postal Code - The postal code of the end user decision maker responsible for this accounts purchasing decisions.
Channel Partner Decision Maker Postal Code - The postal code of the channel partner decision maker responsible for this accounts purchasing decisions.
NOTE: The Postal Code is mandatory when United States is the selected Country. When managed by the Channel Partner, the Postal Code will be hidden for the End User.
Default Language - This is the language that will be displayed by default for users. Users are able to select their own language preference in their user profile settings.
Date Format - This is the date format that will be displayed by default for all users. Users are able to select their own date format preference in their user profile settings.
Time Format - This is the time format that will be displayed by default for all users. Users are able to select their own time format preference in their user profile settings.
Time Zone - Time Zones are used for Report Reminder Notifications. They will control the local time report emails are sent.
Non-Email User Accounts
Account Alias - The Account Alias is used as the suffix for non-email based user accounts. For example, if the Account Alias was set to 'AbcFoods' and a username was set to 'BSmith', the user would log in with 'BSmith@AbcFoods'.
Create Non-Email Users - Enabling this option will allow you to add users without an email address to your account. When this option is disabled, existing non-email users will not be affected and will remain accessible. This option gives you control over whether the non-email user interface is displayed when adding users.
For more details, see How to Create Non-Email User Accounts.
Mailing Address
Account Registration Code - This code is used to Connect recorders to the Web Services account. Use this code when configuring the Web Services section of recorder setup. The code is automatically generated and is uniquely tied to the End User account.
In the rare case that a reset of the codes is required, a new code can be generated by the End User. To do this, access the End User’s Account Profile page and click Generate New Code.
For more details, view Registering a Recorder to an OWS Account.
Deactivate Account - All devices must be removed before deactivating an account. Account will remain in the list of customer accounts, but marked as disabled.
Delete Account - Completely delete the Customer Account, including all video, users, and data saved to it. This cannot be reversed. To delete the account, enter your password and click DELETE.
Click Save to preserve any changes.
Account Options

Drop Administrative Access
By default, the Channel Partner will have full administrative access to their Customer’s Accounts. This allows the Channel Partner to better service their customers by managing the customer’s recorders, users, video archive, and all other OWS functions to provide the highest level of support. If this level of access is not required, dropping Administrator permissions from the Customer Account is optional. If Administrative Access is dropped, the Channel Partner will be unable to access the customer’s OWS portal (blue bar portion of OWS). To reinstate these privileges, an End User must navigate to Settings (gear icon) > Remote Support Options and check the box Labeled ‘Allow Channel Partner to manage and support my Web Services account.’
Account Type
This option sets the account type and designates the subscription tier and features that it will support. The default setting for a new account is Auto. When the first recorder is registered to the account the setting will automatically change to the type assigned to the recorder license, the Auto option will be hidden. Manually changing this setting can reduce functionality for recorders and features available with the account.
Disable Account
Disabling an account will prevent End Users on that account from logging in to it, and also from receiving Alerts and Reports if they were configured.
Use Global Defaults
This option will enable the Global Defaults set by the Company Account. See the Global Defaults section for more information.
Enable Subscription Management
This option will enable subscription management. This change cannot be undone.
Enable Video Clips
This option is enabled by default. This controls the availability of the Video Clips pages and uploaded videos for the Customer Account.
Software Update Options

Hide Command Station Updates from User
This option will hide Command Station Desktop Client update notices from End Users.
Report and Alert Options
These options control account permissions related to Alerts and Reports. Refer to their respective sections for more information.

Enable Reports and Alerts
The following options allow the End Users to view reports and alerts:
- Enable Health Alerts
- Enable Non-Health Alerts
- Enable Analytic Alerts
- Enable Intrusion Alerts
- Enable Access Control Alerts
- Enable Reports
NOTE: Enable Reports is a global option that enables/disables all reports, including shared and custom, for this account. This option must be enabled for the account to access any reports.
Create/Edit Reports
These options allow the account’s End Users to create and edit their own reports if the End User has been given permission to create and edit reports.
- Day/Night Images Report
- System Summary Report
- Inventory Report
- Thumbnail Report
- Trend Report
NOTE: Report permissions are dependent on your OWS license. View the complete list of features by license type for more information.
View Shared Reports
If enabled, the account’s End Users will be able to view the selected reports but will not be able to edit or delete them. These reports are created at the Channel Partner level, in the Accounts > Shared Reports page.
- Day/Night Images Report
- System Summary Report
- Inventory Report
Use the dropdown menu to select which shared reports are accessible to the Customer Account.
NOTE: If the dropdown menu is blank, no Shared Reports have been created yet.