iOS Mobile App
iOS Mobile App Overview
|
|
Select Account and Location
- After logging in to OpenEye Web Services, select an account from the list or use Search to filter by account name.


- Use the dropdown to select a location.

You will be taken to the live screen for that location.
NOTE: See Locations for more information on Locations in OpenEye Web Services.
NOTE: In the Locations list, a green dot indicates a location with all devices available, a yellow dot indicates a location with some devices available, and a red dot indicates a location with no devices available.
Live and Recorded Screens


| Viewing Pane | Displays Live screen views of cameras within the grid selection, view settings, and stream settings. |
| Camera Tile | View live video from a specific camera in each individual tile. |
| Live | Transition from the Recorded screen to the Live screen. |
| Devices | View the list of available devices, including Web Services Devices and Local Devices. |
| Recorded | View recorded video from a specific camera in each individual tile. |
| Event Search | Transition from the Live screen to the Event Search screen where event time, date and camera specifications can be set. |
| Cameras | View the list of available cameras in Web Services and Local Devices. |
| Relay Connection | This connection uses the relay service to stream video. |
| Quick Links | Streamlines Cloud Management with quick links to alerts, recorder management, reports, user management and video clips. |
| Timelines | Default continuous recording is represented by dark lines on the Timeline Search bar, with lighter lines on the Timeline Search bar representing events. Selecting additional timelines from Timeline Filters will represent continuous recording as a darker color and events as lighter events. |
| Event Type Filters | Click the filter icon |
NOTE: The Relay Connection can turn off after a period of inactivity.
Camera List
- Click the cameras icon
 to display the camera list.
 - Move cameras higher or lower in the list to change the order of cameras displayed in the current grid layout.
- Close the camera list to view Live or Recorded displays of the cameras.

Event Type Filters
- Click the filter icon
 and check which timelines to display,
 - Close to view the selected timelines.

Recorded Timeline Playback Controls

| Playback Speed | Control the speed of video playback. |
| Pause | When Recorded video is paused, Play Forward and Play Backward will both display and the options to Skip Backward and Skip Forward will display. |
| Jump Backward | Jump paused video backward in 10 second intervals. |
| Jump Forward | Jump paused video forward in 10 second intervals. |
| Play Events | Displays only event video as indicated by the lighter lines on the Timeline. |
| Expanded Menu | The expanded menu displays the relays icon, stream quality icon, export icon and grid icon. |
Recorded Timeline - Paused
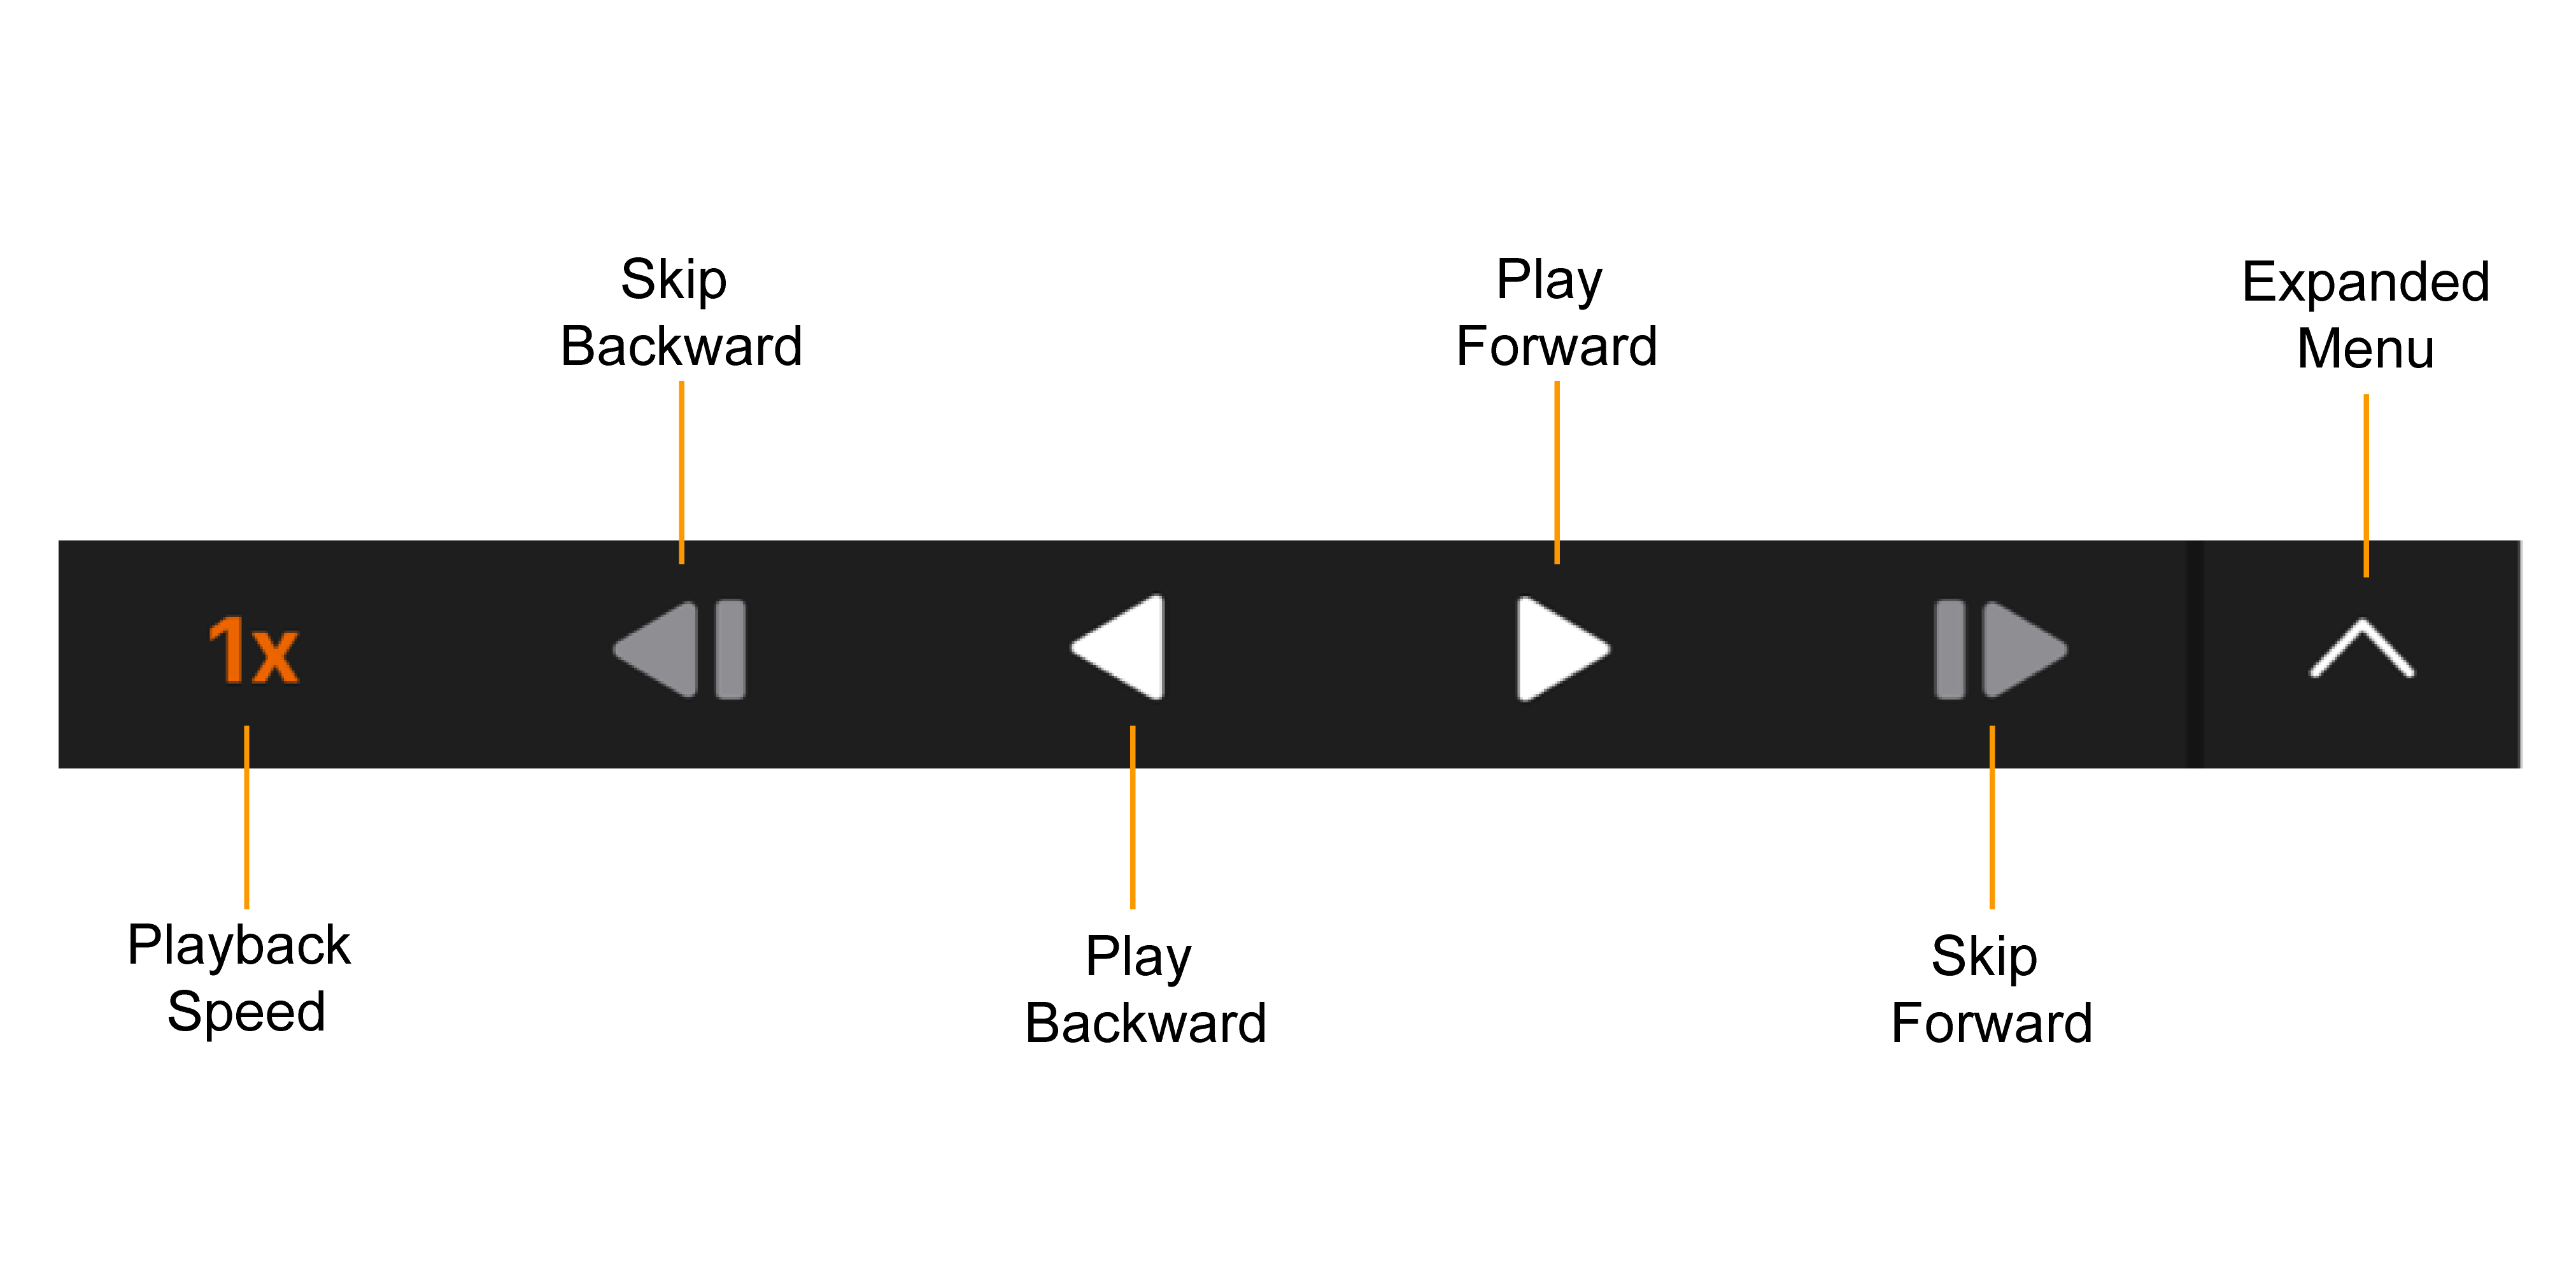
| Playback Speed | Control the speed of video playback. | |
| Skip Backward | Move to the previous frame of recorded video. | |
| Play Backward | Play recorded video backward. | |
| Play Forward | Play recorded video forward. | |
| Skip Forward | Move to the next frame of recorded video. |
Expanded Menu Controls
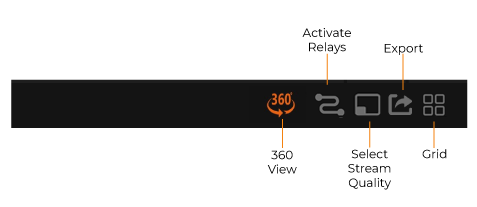
| Activate Relays | Activate or deselect relays associated to your cameras. To activate a relay, simply click on the desired camera viewing pane, select Activate Relay, choose a relay from the list of enabled relays, and a small ✔️ will appear on the right hand side next to the relay name. |
| Select Stream Quality | Specify the stream quality for cameras in the Viewing Pane. Available stream qualities may change between grid layouts and Live and Recorded screens. |
| Video Clip Export / Sharing | Export still images and recorded video as seen in the current search playback. Users may export clips to cloud or use the Clip Sharing Feature to export video to other users quickly. Under Export Type after tapping the Export Icon, users can also download JPG Snapshots directly to their iOS device. |
| Grid | Specify a screen grid to view video from cameras in the Viewing Pane. |
| 360 View | Pan the camera view in multiple directions even if the camera does not have moving mechanical parts. 360 View requires a camera with Fisheye capabilities. |
NOTE: You can export a video clip to your OWS cloud account directly from your iOS mobile device. Do not select the "Share Video Clip" button if you wish to only share to the OWS cloud. The video clip will appear in your Web Services Account after the export has been complete.
Grid Options
- Click the grid control icon
- Select a grid layout in Live and Search displays.
- Close to view the selected grid layout.
The selected layout will continue to display while the app is open.

Set Location Arm/Disarm State
Set a location's arm/disarm state from your iOS mobile device. See Location Arming for more information.
- Swipe right on a Location and tap the option to arm or disarm a location.

- Click Arm to confirm changing the location from a disarmed to an armed state.

- The location will show as armed in the location list.

PTZ Controls

| Two-Way Audio | Where supported, enable Two-Way Audio for cameras and audio devices with speaker and microphone. |
| PTZ Presets | Where supported, preset your PTZ controls. |
| PTZ Controls | In the Live Viewing Pane, PTZ controls allow you to pan and tilt the camera's view as well as zoom in or out using the touch screen. Use one finger to drag the camera view in the direction desired and two fingers to zoom. |
| Digital Zoom | By expanding or pinching two fingers on Camera Tile, the user can zoom in on a live or recorded video for detailed viewing. |
NOTE: You can select audio-only speaker devices configured with a location. These devices can be used with Live, Search and two-way audio.
Select Event Type
- Click Events to search by event type.

- Select a Date/Time, Duration, Event Type, Location, and Cameras.

Event Search Screen

Use the controls and the scrub bar to search through video, as well as details such as Start, End, Duration, Location, Source, and Source Type related to the currently searched video.
NOTE: Event search video player has pinch-to-zoom functionality.
Event Search Playback Controls

| Autoplay Next Event | Automatically play through all events. | |
| Previous Event | Navigate to the previous event in the Event Search. | |
| Play Forward | Play recorded video forward. | |
| Next Event | Navigate to the next event in the Event Search. | |
| Download | Download Video of the selected event. |
NOTE: Autoplay next event is on will display when Autoplay Next Event is enabled and a Pause function will become available.

Alert History Search
- Click Alerts to search by alert type.

NOTE: Any alert type that has more than 100 results, will display as 100+.
- Select Filter to select a Date/Time, Location, and Alert Type.
- Click Apply.

NOTE: Custom Date/Time filter range is limited to 30 days.
NOTE: Only one Alert Type can be filtered at a time.
- Click an Alert Type to display results in Thumbnail or Full View.


- Click on a result in Thumbnail View or Full View to open the video in the Event Search Screen.