POS Permissions
Grant POS Connect Permissions to User Groups to allow access to terminals, cameras and POS locations.
User Group Permissions
Users with Management permissions can view terminals, manage cameras, and indicate primary cameras through the Management tab. Point of Sale (POS) will be turned on in OpenEye Web Services (OWS) once any number of POS Terminal Licenses have been activated for a customer account.
NOTE: Some POS Connect features are dependent on license type.
|
|
Grant Point of Sale Permissions to a User Group
- Click Management in the top navigation bar.
- Hover over User Management and click User Groups from the dropdown menu.

- Locate the User Group Name and click Edit.

- Click Point of Sale Permissions.
- Click the Search Point of Sale Data and Configure Point of Sale Options checkboxes.
- Search Point of Sale Data will allow the account to search Point of Sale data.
- Configure Point of Sale Options will allow the account to manage Point of Sale options including Terminal and Camera Mapping.

- Click Save.
NOTE: Grant Point of Sale Permissions to a User Group first, and then add individual users to the group.
Add Point of Sale Locations
- Click Management in the top navigation bar.
- Hover over User Management and click User Groups from the dropdown menu.
- Locate the User Group Name and click Edit.
- Click Add Point of Sale Locations.

- Click + in the Not Selected column to add a location to the Selected column.
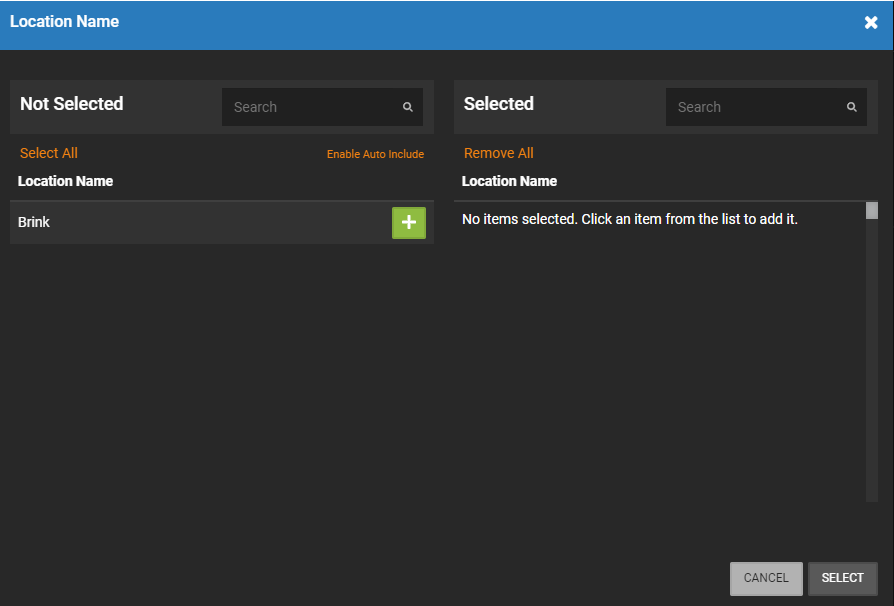
- When the Location(s) have been added, click Select.
NOTE: Use Search to find a location in either the Not Selected or Selected lists.
NOTE: Click X in the Selected column to remove a location and put it back in the Not Selected column.