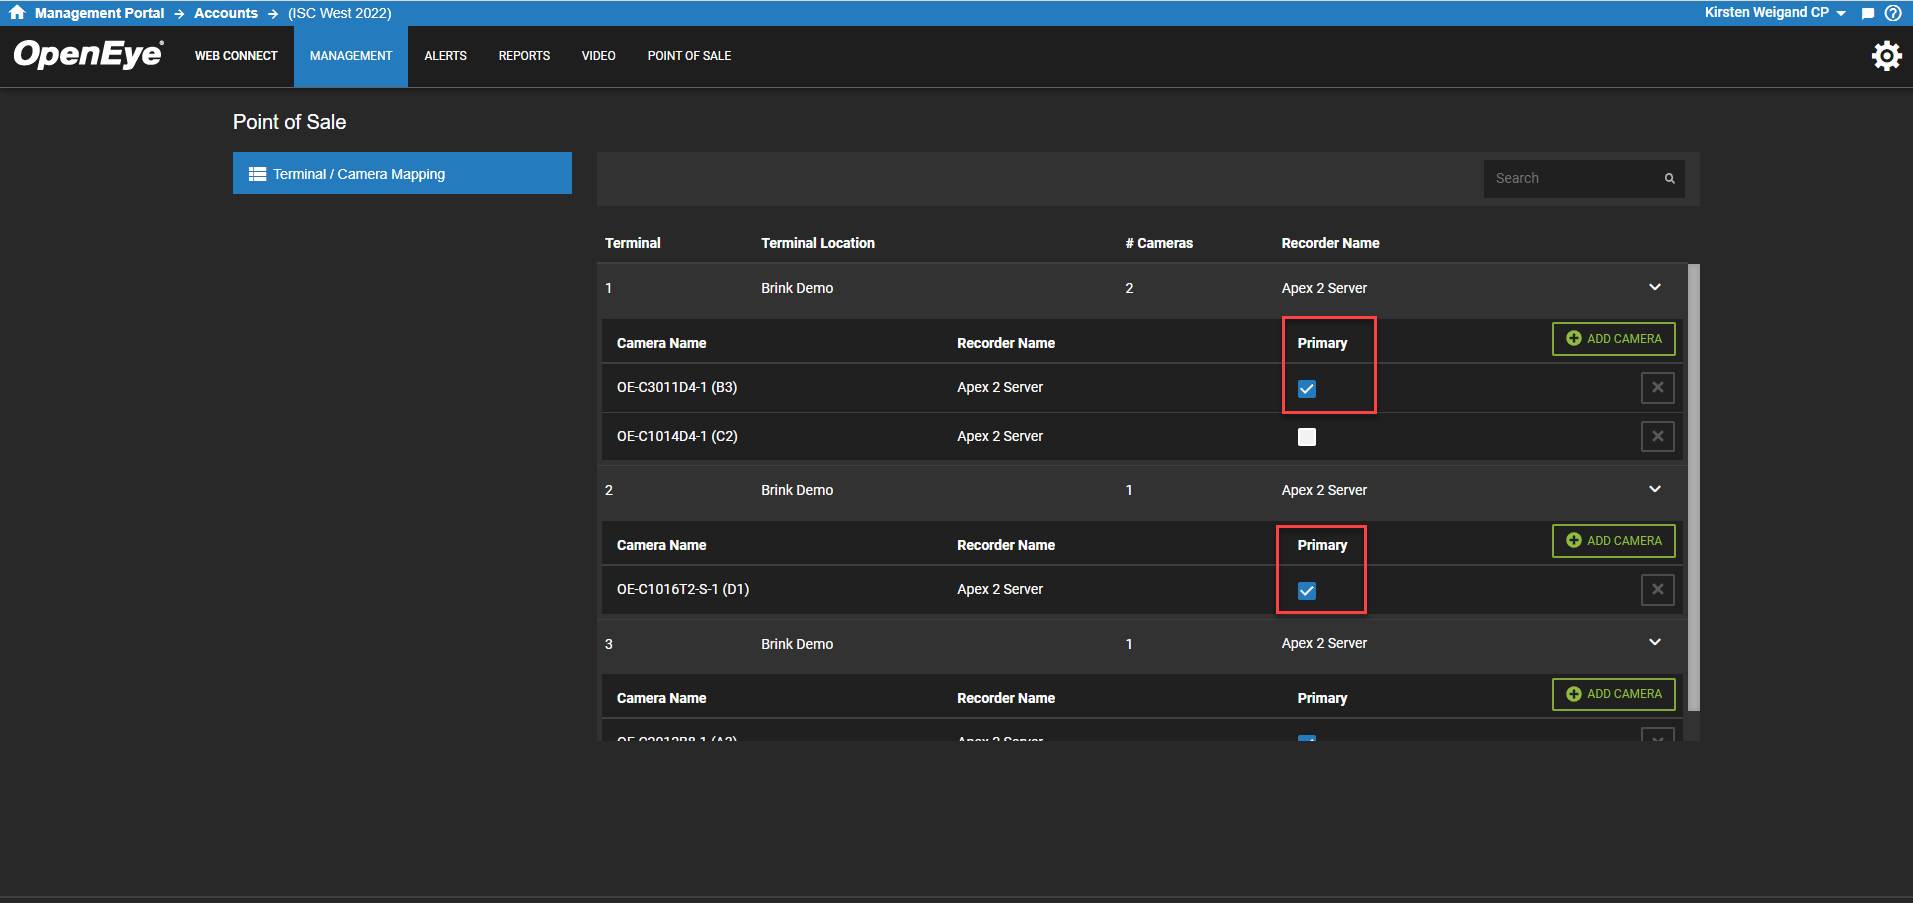
Terminal and Camera Mapping
With the terminal information prepopulated from data contained and synced over from the customers’ POS Protocol, users can integrate existing cameras to POS Connect.
|
|
Map Terminals and Cameras
- Click Point of Sale from the Management dropdown menu.

- Click the arrow next to the terminal you wish to select.
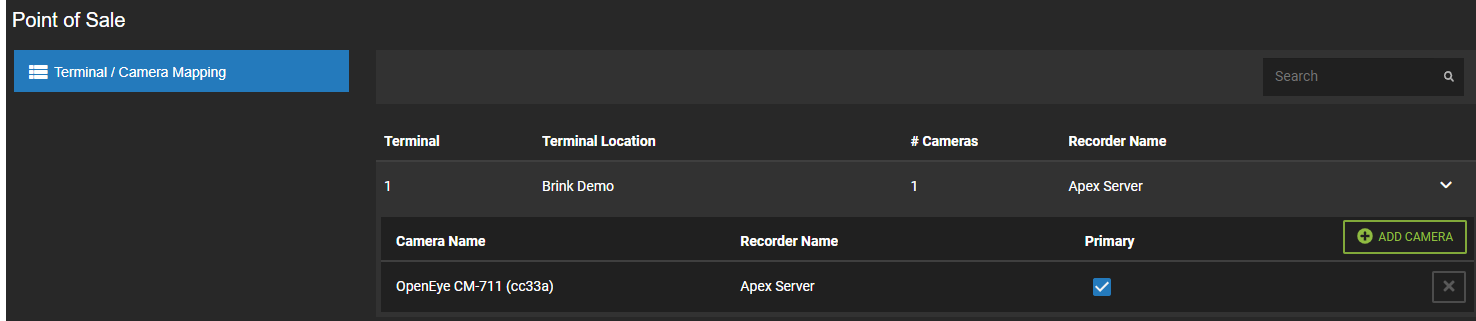
- Click Add Camera.
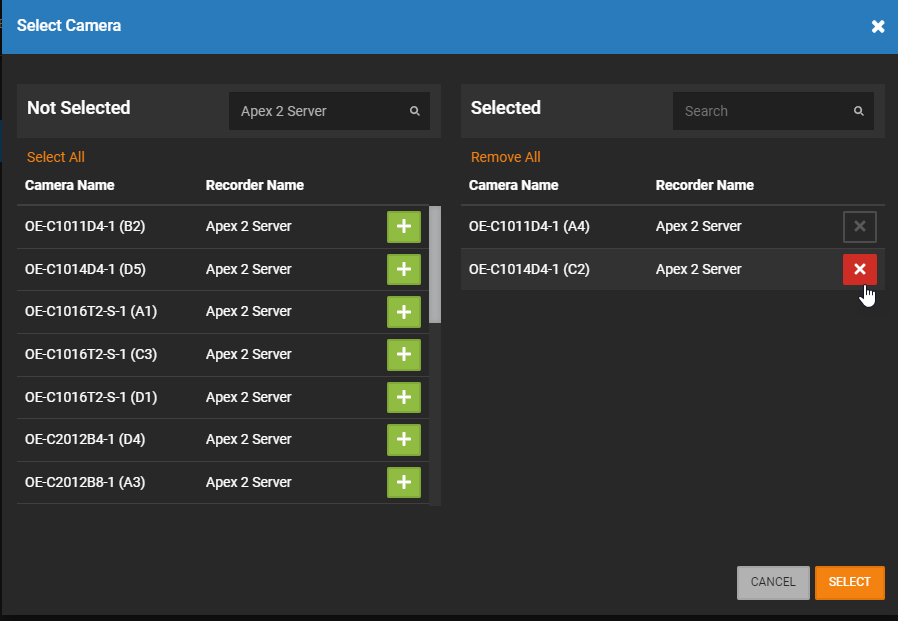
- Click + in the Not Selected column to add a camera to the Selected column.
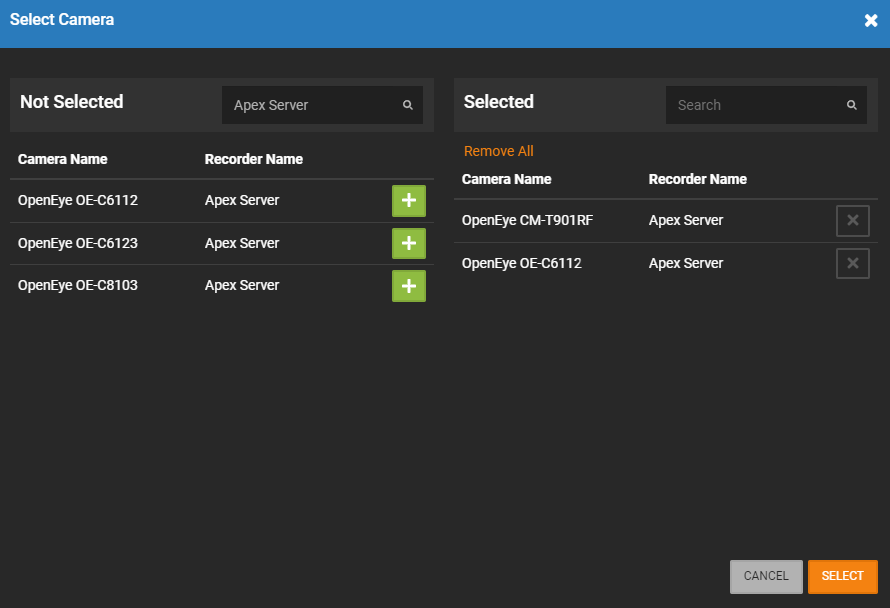
- Click Select.
NOTE: Use Search to find a location in either the Not Selected or Selected lists.
NOTE: Click X in the Selected column to remove a location and put it back in the Not Selected column.
- After selecting cameras, choose a primary camera for the terminal by checking the Primary box.
NOTE: The number of cameras that can be mapped to one terminal is 4 total.
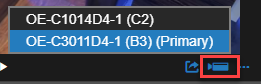
After running a search, the receipt view will populate. Within the video section, there will be a camera picker icon and when clicked, the mapped cameras will be displayed allowing you to choose between them. The primary camera is called out within that pick list. View Receipt and Video for more details.
Best Practice: Deploy fisheye cameras or cameras with corridor mode to capture a complete view of merchandise and point-of-purchase areas.