AXIS Object Analytics (AOA) Integration Instructions
Enable Analytics in OpenEye Web Services (OWS)
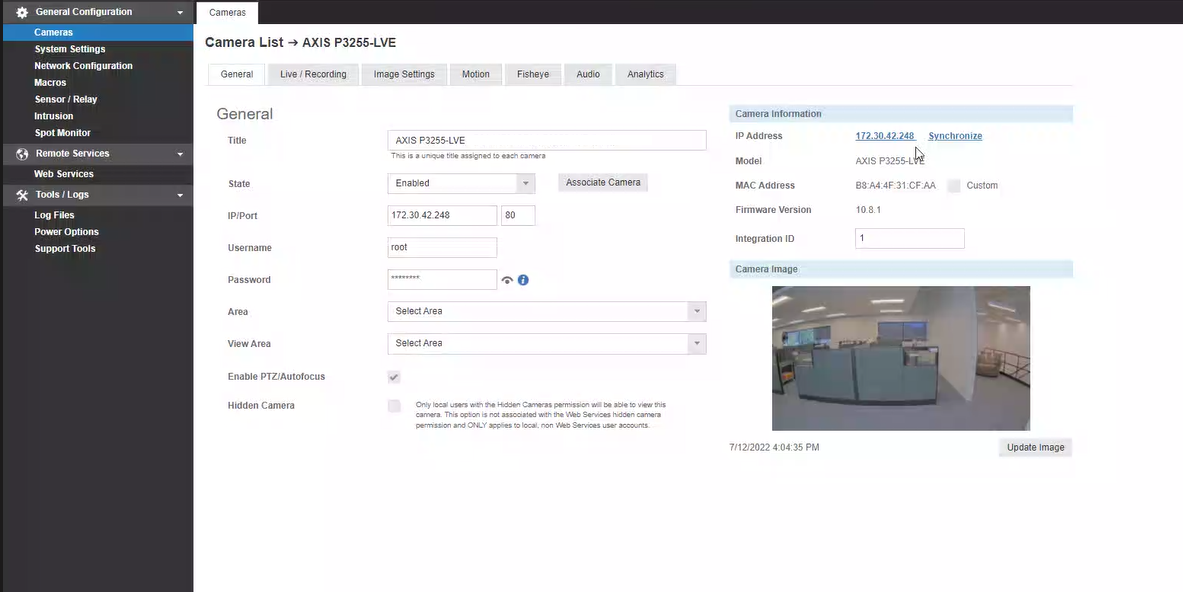
To enable Analytics for an individual camera, connect to a recorder, click Setup (gear icon) > General Configuration > Cameras and select the camera you want to configure from the camera list. Click on the Analytics tab and check the box for General Analytics for the supported camera.
When this option is enabled, any supported analytic events received from this camera will be stored and sent to OpenEye Web Services. These events will then be made available in Event Search and Macros.

NOTE: This integration requires the use of an AXIS IP camera capable of supporting the AXIS Guard Suite analytics package. Before continuing with creating a rule in OWS, follow AXIS Object Analytics instructions to configure a compatible AXIS IP Camera.
Configure Analytics in the AXIS Camera
Cameras can be accessed through the IP Address under Setup (gear icon) > General Configuration > Cameras > Camera Information > IP Address.
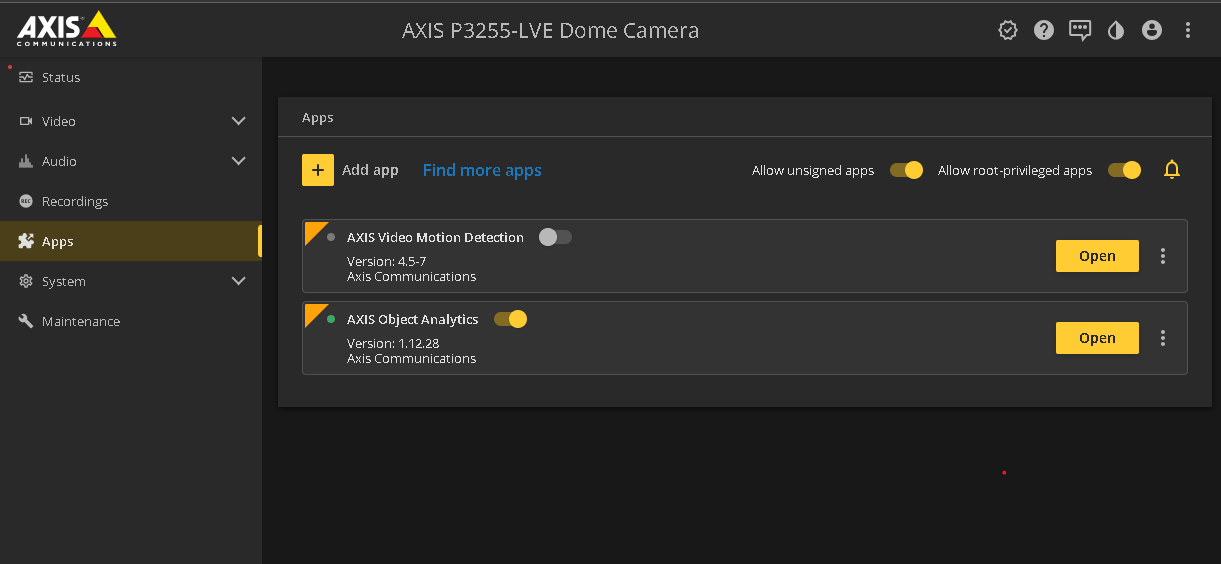
- After an AXIS IP camera has been configured, navigate to to the Apps area of the Settings Menu and select Open next to the app.
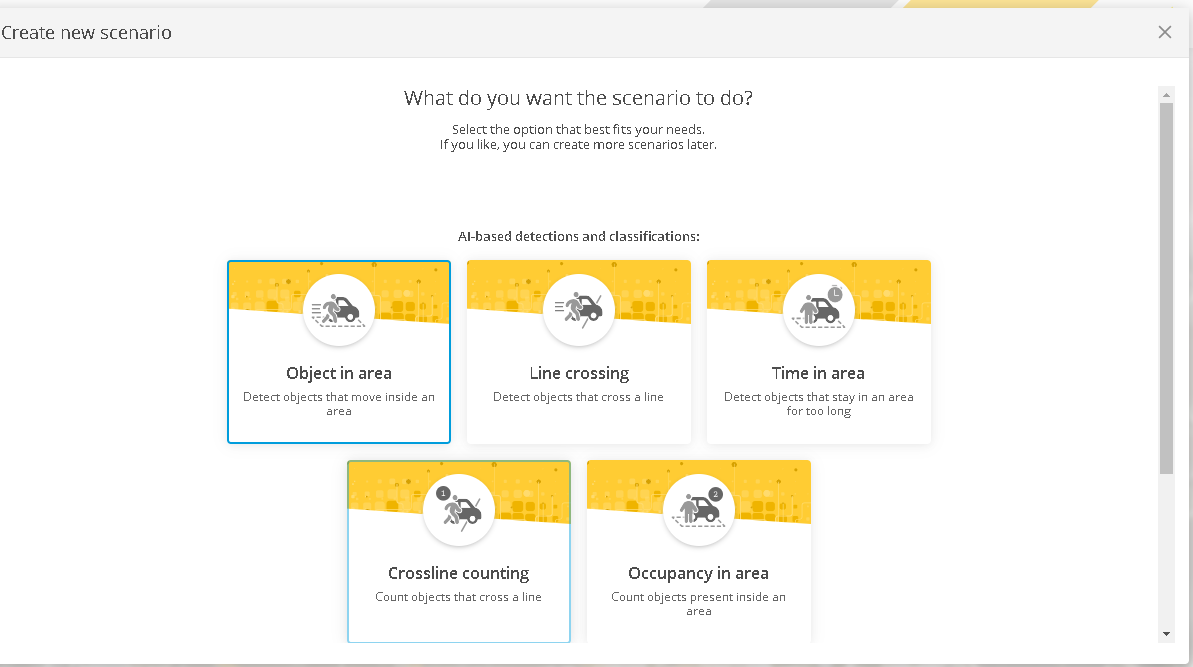
- In the new Scenarios window that opens, you will be able to create a New Scenario or modify an existing one.

- If no scenario is present, select New scenario and select the type of scenario. Currently Apex supports Object in area, Line crossing, and Time in area.
NOTE: Crossline counting and Occupancy in area are not currently supported.
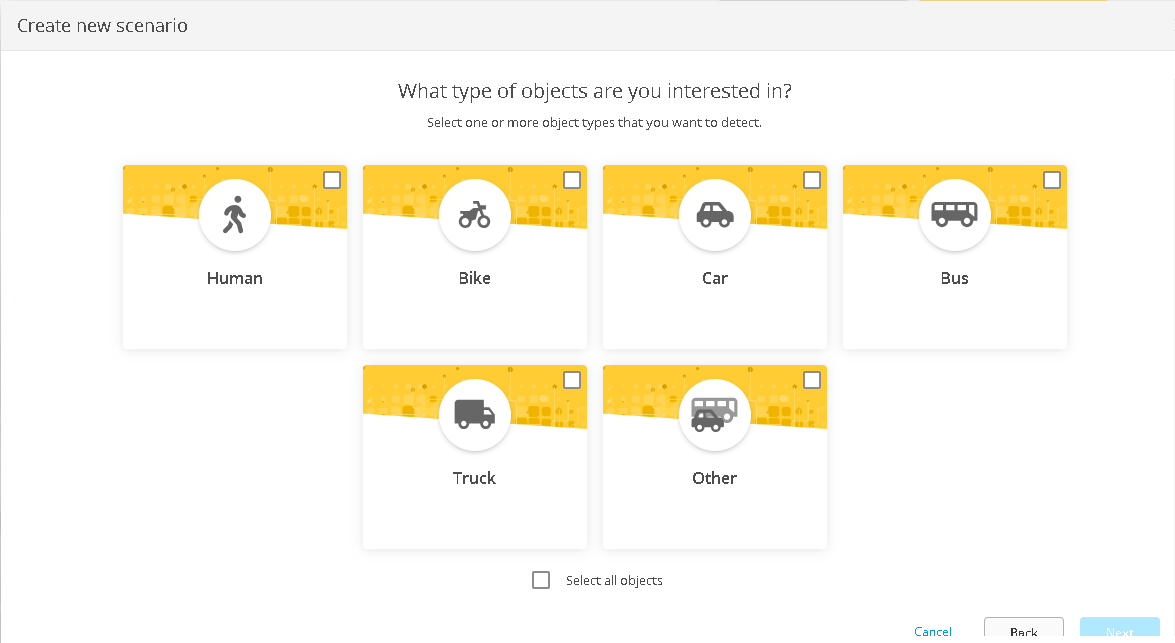
- Select a detection or classification for the scenario (we will select Object in area as an example), and then select objects from the Object Selection page.
NOTE: Apex supports all available objects, but Bike, Car, Bus, Truck and Other are all grouped together as Vehicle events in OWS.
- After selecting the object(s) for detection, configure the name of the scenario and the Detection Area in the Scenario Setup page.
NOTE: The name of the Scenario will appear in scenario events generated by this rule, so it is important that your scenario be named appropriately.

- After clicking Finish, you will be returned to the scenario page. Select the configured scenario and click Open to adjust its settings.

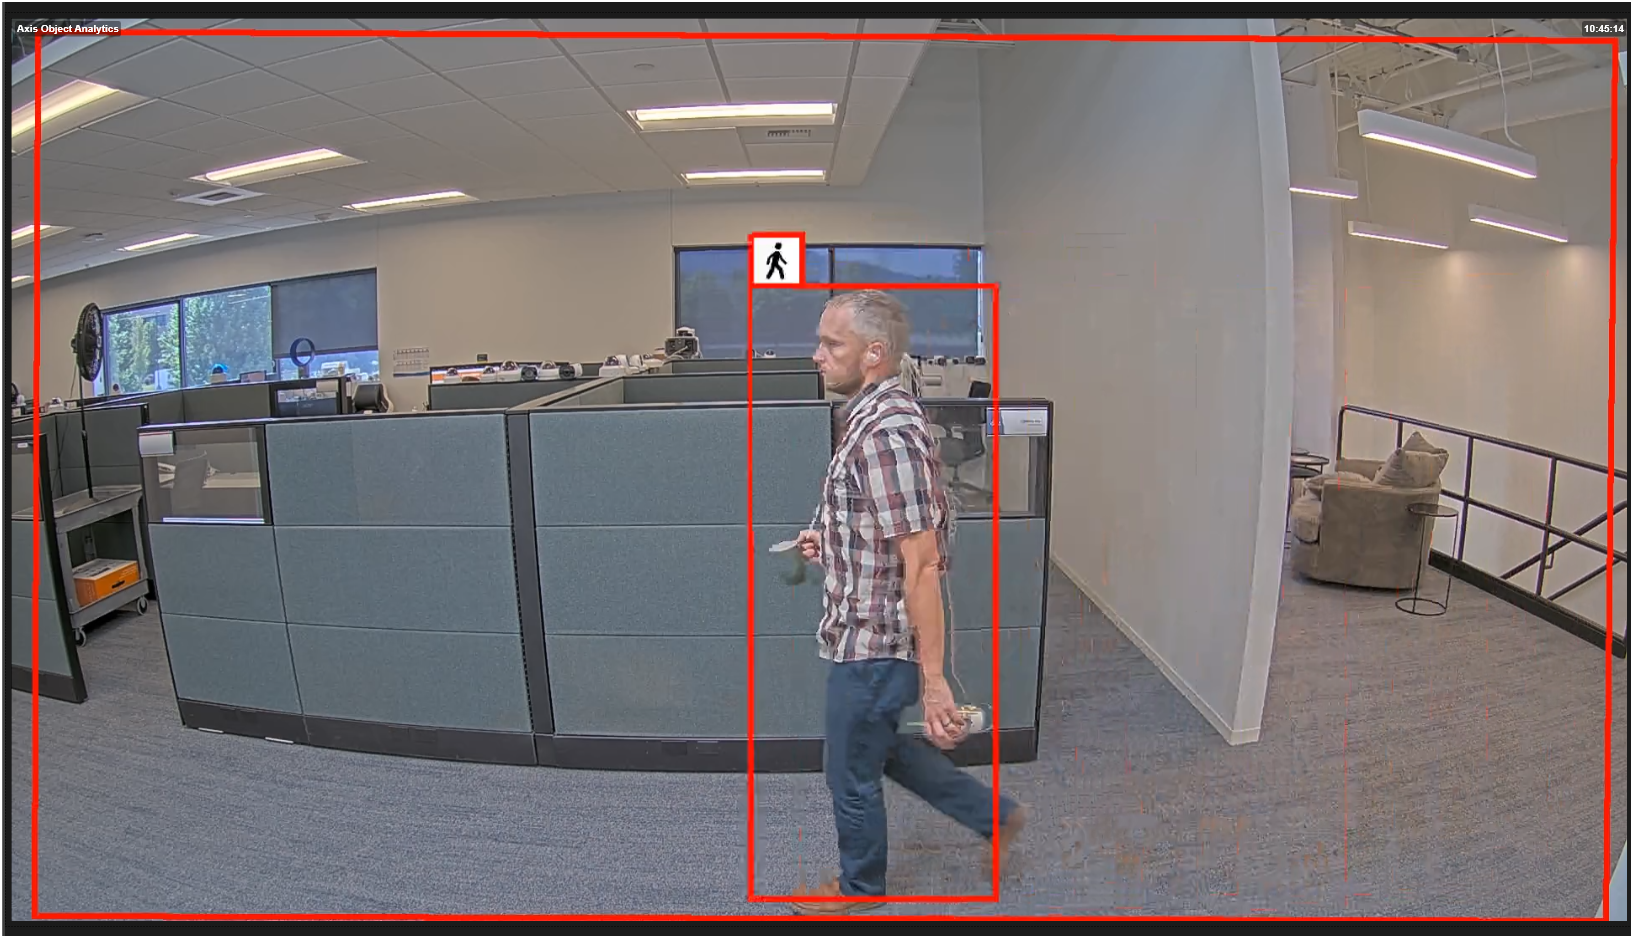
NOTE: All objects that enter the camera's view will be detected and will show in the OWS Server Software as corresponding Person or Vehicle events, regardless of whether the object enters the configured Area of Interest or has been in the scene long enough to satisfy the Time in Scene. To view only events where a person or vehicle entered the Area of Interest and were present long enough to satisfy the Time in Scene, use the Scenario Event search in the OWS Video Player.
Once object classification has been configured on the AXIS IP Camera, a bounding box will appear around detected objects in the viewing pane: objects classified as humans get a red bounding box, and objects classified as vehicles get a blue bounding box.
To receive notifications based on an analytic event, an alert rule has to be created and configured in OWS.
Analytics Alerts in OWS
For cameras pre-configured to send analytic events, an alert can be sent based on specifically defined video events within a selected time period.
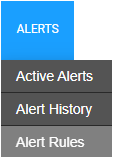
- Within the Alerts tab in the OWS Cloud Portal, select Alert Rules from the dropdown menu.
- Click Add New Rule.

- Select Analytics from the pop-up menu.

- Click Next.

- Name the alert and give it a Description as desired.
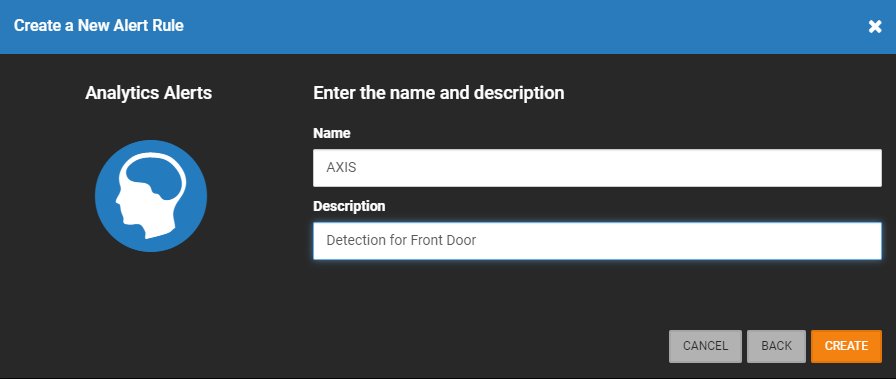
- Click Create.

Defining an Alert Rule: Analytics
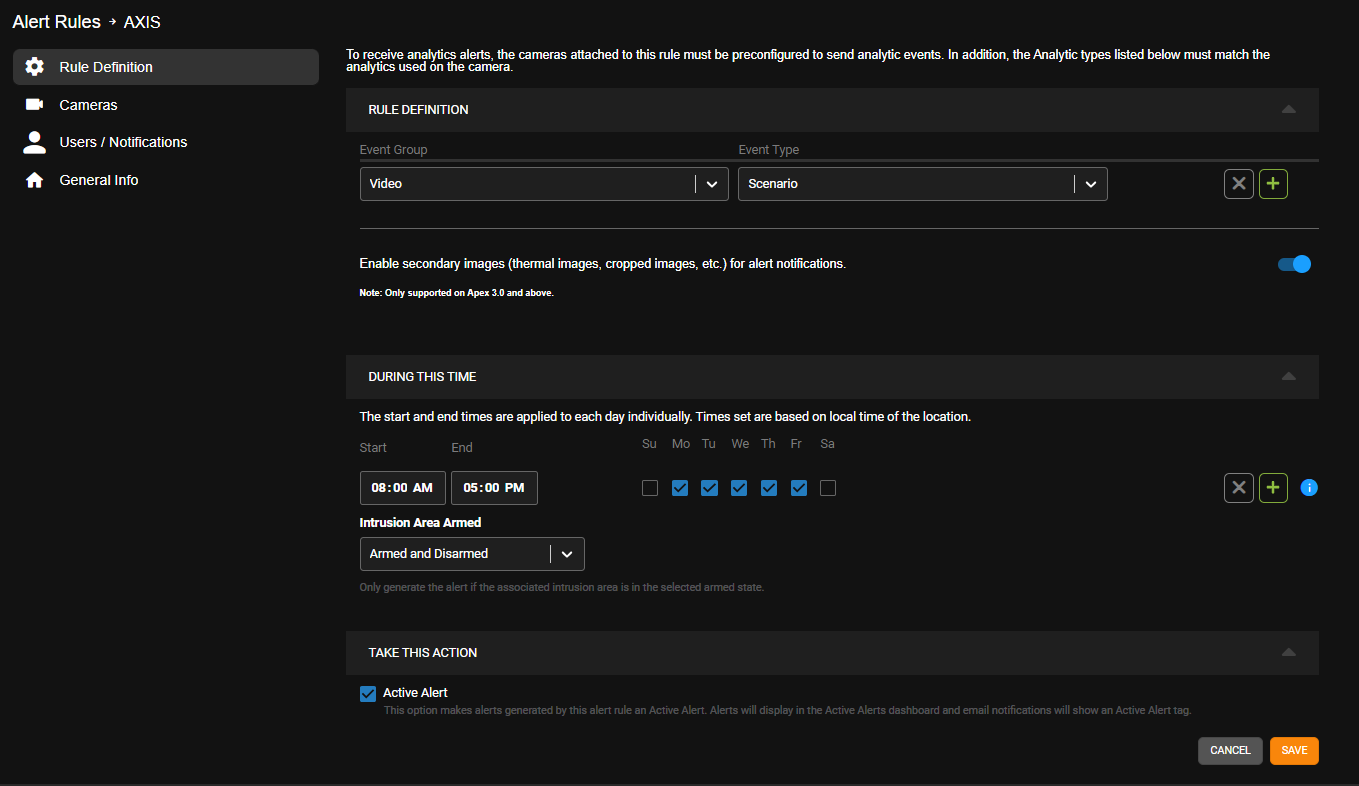
- Choose Video from Event Group and an Event Type from the dropdown list.
- Enter the Time of Day ranges that this rule should be active for.
- Check the boxes beneath the Days of the Week on which the rule should be active.
- Select the state of the intrusion area between Armed, Disarmed or both.
- Active Alert (Optional) - Check the Active Alert box to add the alert to the Active Alert Dashboard and tag it as an Active Alert in email notifications.
- Send To 3rd Party Integration (Optional) - Check the Send To boxes to send the alert to the associated 3rd party integration.
- Click Save.
Adding Cameras to an Alert Rule
- Click Cameras on the navigation sidebar.

- Click Add Camera.

- Click the Add button next to each device you'd like to be included in the Alert.

-
Click Select when finished.

Adding Users to an Alert Rule
NOTE: Adding Users to a rule automatically grants them permission to view alerts for cameras and locations they have access to based on their User Group permissions.
- Click Users/Notifications on the left-hand menu.

- Click Add User or Add Group.

- Click + next to each User or Group to send emails and push notifications when the alert is triggered.
- Click Add when finished.
NOTE: To receive email, push or client alert notifications, the Email Alert, Push Alert or Client Alert box must be checked. Simply adding a user only gives them access to see this alert’s history. See Alert Notifications for details.
Deleting an Alert Rule or Updating, Disabling, Clearing All Active Alerts
- Click General Info on the navigation sidebar.

- Edit the Name and Description as desired.

- Click Disable Rule to turn the Alert Rule off without deleting it.
- Click Delete Rule to permanently remove the Alert Rule and delete all history associated with it.
- Click Clear All Active Alerts to permanently remove only the Active Alerts from the history associated with the Alert Rule.
- Click Save when finished.
NOTE: The Name given to an alert will appear as the subject line of email notifications sent by that alert.
Search Analytic Events in OWS
NOTE: AXIS Object Analytics person detection events are searchable under Person.
NOTE: AXIS Object Analytics vehicle detection events are searchable under Vehicle.
NOTE: AXIS Object Analytics events where the Time in Scene option is enabled are searchable in OWS under the Analytics > Scenario event type.
To access the Cloud Web Client, click the Video tab > Video Player within the OWS Cloud Portal.
NOTE: You can click Video on the navigation bar to go directly to Video Player.
NOTE: Depending on the number of cameras assigned to a location, connecting to the OWS Video Player via the CONNECT button will display the OWS Cloud Video Player with 14 cameras on a 4x4 Grid or 9 cameras on a 3x3 grid. If there are 15 or more cameras assigned to the location then it will load a 4x4 grid without any video displayed.
Grid Layout by Camera Count
| 1 Camera | Single Camera | |
| 2 Cameras | 1x2 Grid | |
| 3-4 Cameras | 2x2 Grid | |
| 5-9 Cameras | 3x3 Grid | |
| 10+ cameras | 4x4 Grid |
In the OpenEye Web Services (OWS) Video Player, click Search 
NOTE: Any devices currently in view in the Video Player will be automatically included in the Event Search Filters.
Person Search
Person | Vehicle | License Plate | Analytics | Point of Sale | Motion | Sensor | Access Control | Intrusion
Click on Person  to search person detection events.

- Select a Date / Time from the dropdown.
NOTE: If you select Custom Range, enter a Start Date / Time and End Date / Time in the fields, or click the calendar  and set Start and End Date / Time, then choose Location Time (Default) or My Time (UTC) from Timezone Preference. From the Duration dropdown, select greater than > or less than < and enter numerical values for hr : min : sec or click the up and down arrows to increase or decrease the Duration.
- Select Cameras from the dropdown or click Search Cameras
 to select from a list of cameras.
NOTE: If you don't see your camera on the list, enable Show All Cameras. 
- Click Search to to display the list of Events that match the search criteria. Click Reset search filters to start over with a new search.

NOTE: See Attribute Filters and Similarity Search for more Person Event Search options.
Vehicle Search
Person | Vehicle | License Plate | Analytics | Point of Sale | Motion | Sensor | Access Control | Intrusion
Click on Vehicle  to search vehicle detection events.
- Select a Date / Time from the dropdown.
NOTE: If you select Custom Range, enter a Start Date / Time and End Date / Time in the fields, or click the calendar and set Start and End Date / Time, then choose Location Time (Default) or My Time (UTC) from Timezone Preference. From the Duration dropdown, select greater than > or less than < and enter numerical values for hr : min : sec or click the up and down arrows to increase or decrease the Duration.
- Select Cameras from the dropdown or click Search Cameras to select from a list of cameras.
NOTE: If you don't see your camera on the list, enable Show All Cameras.
- Click Search to to display the list of Events that match the search criteria. Click Reset search filters to start over with a new search.
NOTE: See Attribute Filters for more Vehicle Event Search options.
Analytics Search
AXIS Object Analytics events are searchable in OWS under the Scenario event type.
Person | Vehicle | License Plate | Analytics | Point of Sale | Motion | Sensor | Access Control | Intrusion
Click on Analytics  to search Person Detected, Vehicle Detected, Line Crossed, Fog / Smoke, Camera Tampering, Mask Detected, Queue, and Scenario events.

- Select one or more of the Analytics Event Types: Person Detected, Vehicle Detected, Line Crossed, Fog / Smoke, Camera Tampering, Mask Detected, Queue, and Scenario.
- Select a Date / Time from the dropdown.
NOTE: If you select Custom Range, enter a Start Date / Time and End Date / Time in the fields, or click the calendar and set Start and End Date / Time, then choose Location Time (Default) or My Time (UTC) from Timezone Preference. From the Duration dropdown, select greater than > or less than < and enter numerical values for hr : min : sec or click the up and down arrows to increase or decrease the Duration.
- Select Cameras from the dropdown or click Search Cameras to select from a list of cameras.
NOTE: If you don't see your camera on the list, enable Show All Cameras.
- Click Search to to display the list of Events that match the search criteria. Click Reset search filters to start over with a new search.