Toast Integration Instructions
Follow the steps below to configure the OpenEye Web Services Cloud Integration with Toast. If you need additional resources, see Add or Remove an Integration With Toast Partner Integrations.
NOTE: If you do not see the Integrations tab on the left panel menu or are unable to find the OpenEye integration you may need to add Toast Partner Connect to your Toast account.
Add OpenEye in Toast
- From the Toast account, use the left-panel menu and navigate to Integrations > Integration management > Browse & purchase integrations.


- Using the Search field, enter OpenEye. Then click Add Now on OpenEye to add the integration.
NOTE: OpenEye can also be found under the Security category.
- For accounts that have more than one location, a Select Locations dropdown is shown. Click this to select the locations you want to use, then click the Apply button.


NOTE: OWS can only map cameras from one OWS location to one Toast location. Toast locations can have one or more terminals, but we can only map cameras from one OWS location to one Toast location. If there are more Toast locations than OWS locations, users will need to merge their Toast locations so they can map their cameras.
- Review the details shown on this page for what data Toast will share with OpenEye then click the Confirm button at the bottom of the page.

- OpenEye is now added to My Integrations. Use the gear icon to change the configuration or the plus icon to add new locations.

- It will take up to 48 business hours after you add the OpenEye integration to your Toast account for the account to be linked to your OWS account.
Add Toast Data Collection in OWS
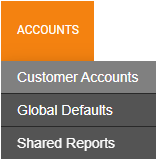
- From the OWS Channel Partner portal, go to Accounts > Customer Accounts.
- Click the Manage
 button on the account you want to edit.

- Select the Subscription Management tab and press Edit.
NOTE: Only End User accounts that have Subscription Management enabled will see the tab.

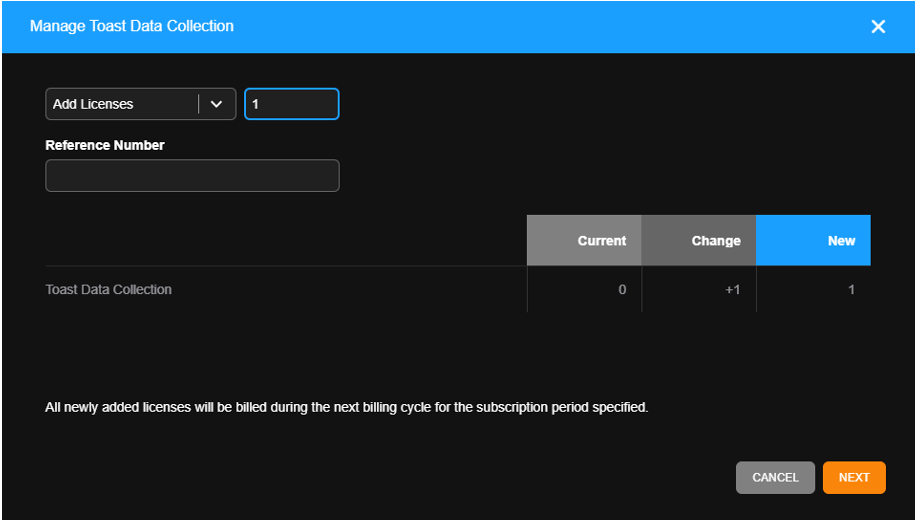
- In the Manage Products section, select Add New, select Toast Data Collection, and click Next.


- Input the number of Toast Data Collection licenses you would like to add and click Next.
- Review the billing changes and Confirm.
NOTE: One Toast Data Collection license per OWS location is needed.

- In the Manage Products section, select Add New, select POS Terminal Licenses, and click Next.

- Input the number of POS Terminal Licenses you would like to add, and click Next.
- Review the billing changes and Confirm.
NOTE: One POS Terminal License per POS terminal is needed.


- On the OWS location being integrated, press the Edit button.

- Under Licenses, select the Toast Data Collection tab, then enable Toast Data Collection and press Next.
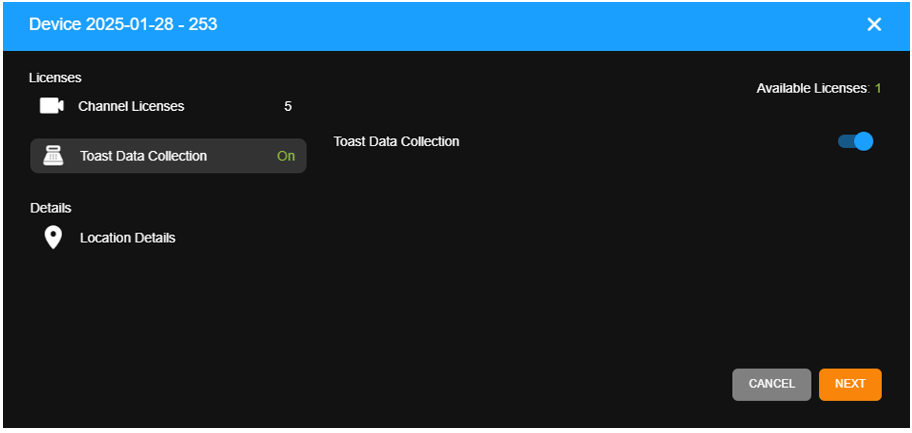
- Review the table and Save the changes.

After Toast Data Collection has been added, cameras must be mapped to terminals.
Map Terminals and Cameras
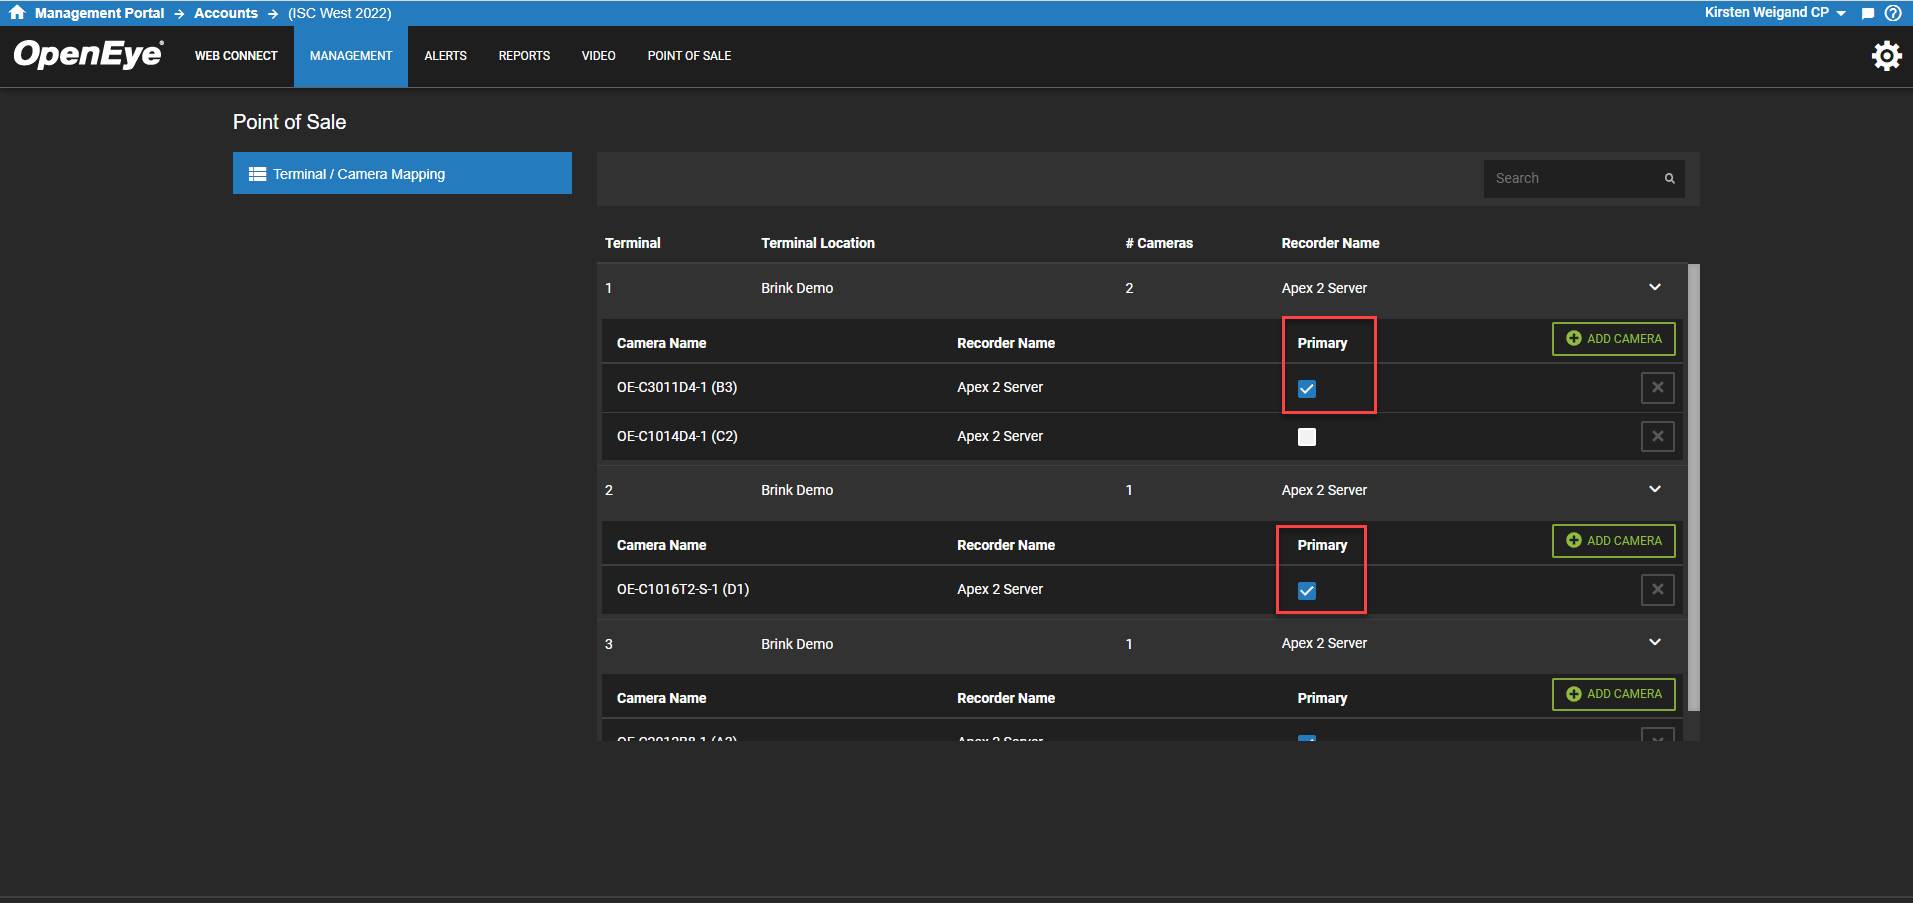
- Click Point of Sale from the Management dropdown menu.

- Click the arrow next to the terminal you wish to select.
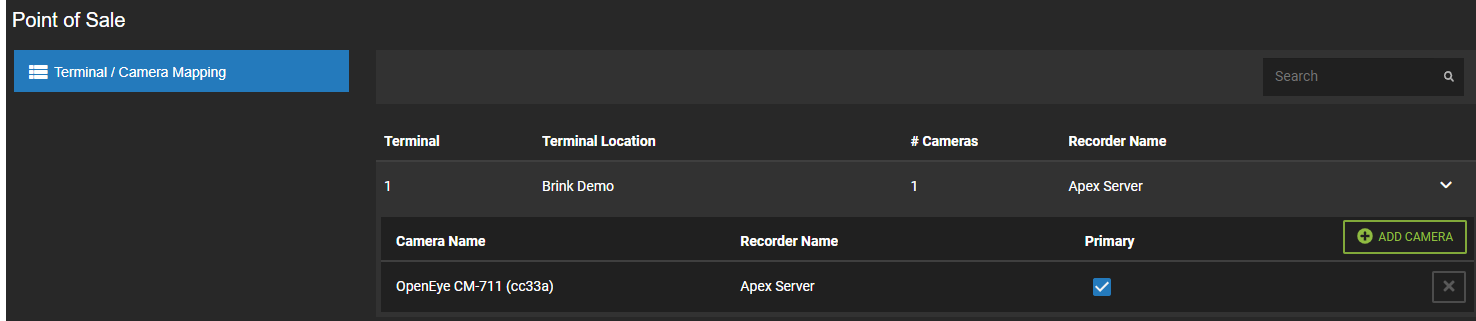
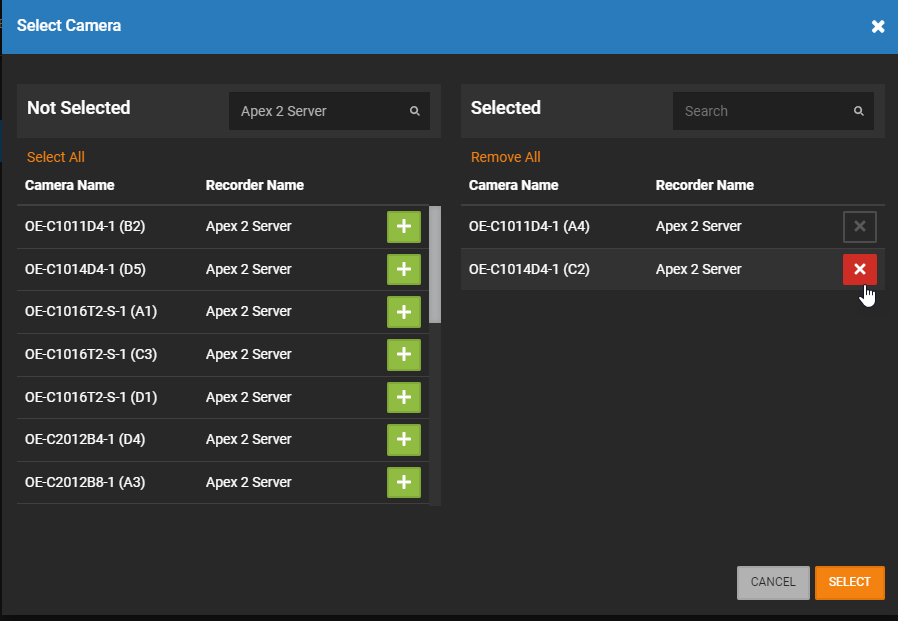
- Click Add Camera.
- Click + in the Not Selected column to add a camera to the Selected column.
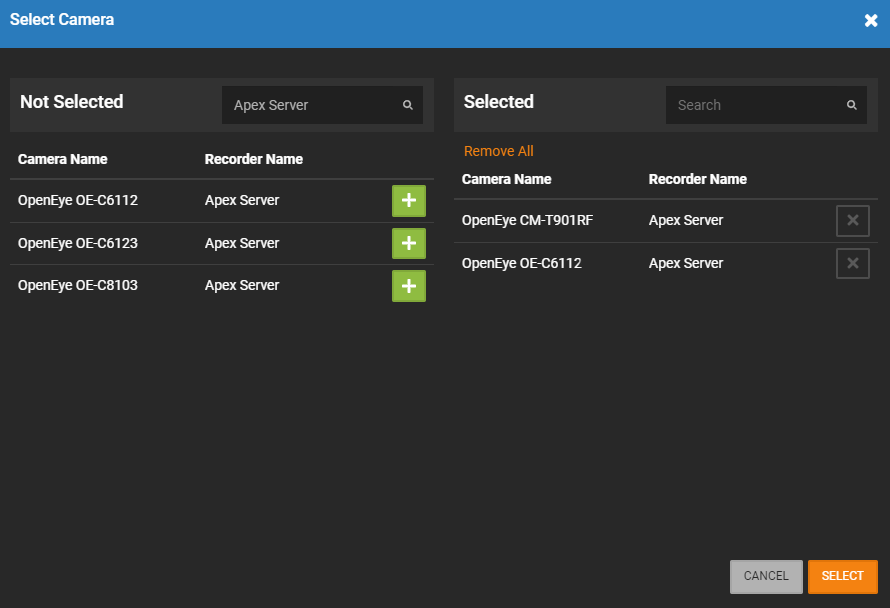
- Click Select.
NOTE: Use Search to find a location in either the Not Selected or Selected lists.
NOTE: Click X in the Selected column to remove a location and put it back in the Not Selected column.
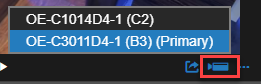
- After selecting cameras, choose a primary camera for the terminal by checking the Primary box.
NOTE: The number of cameras that can be mapped to one terminal is 4 total.
After running a search, the receipt view will populate. Within the video section, there will be a camera picker icon and when clicked, the mapped cameras will be displayed allowing you to choose between them. The primary camera is called out within that pick list. View Receipt and Video for more details.
Best Practice: Deploy fisheye cameras or cameras with corridor mode to capture a complete view of merchandise and point-of-purchase areas.