Creating a USB Recovery Drive
Check Version and Download File
- Reference How Do I Check My OS Version to identify which image your device needs.
- Download the correct image file here.
Download and Run Recovery Application
-
Plug your USB into your PC.
NOTE: A Windows Recovery requires a 32GB or larger USB drive.
NOTE: A Linux Recovery requires a 4GB or larger USB drive.
- Download rufus from the Rufus section found here.
- Run the executable.
- Click Yes if prompted by Windows UAC.
- Click the SELECT button to browse to the image ISO.
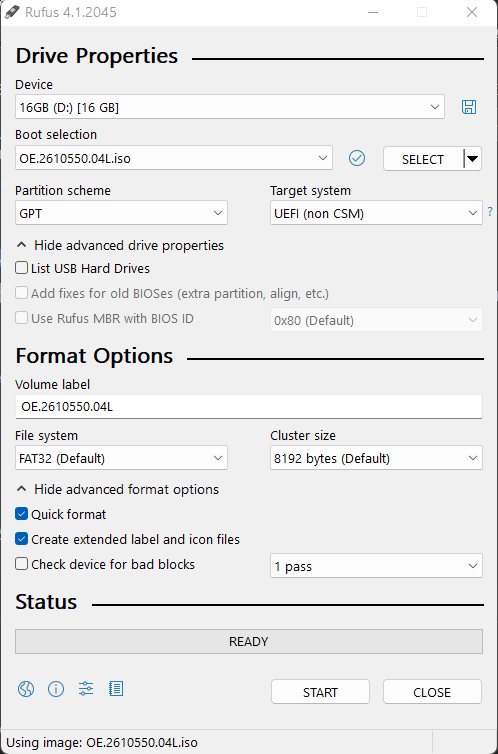
- Copy the settings matching the Operating System of the recorder.
Linux:
Windows:

NOTE: Device label will vary from above images based on ISO versions.
- You will be prompted with a warning that all data on the USB drive will be destroyed. Click OK to proceed in creating the recovery media.
- Once complete, close the application, eject the USB, and remove it from the PC.