How to Add Cameras in Bulk Using DHCP Utility and Network Camera Manager
New cameras on an External Switch connected to the camera switch port can be added in bulk using the DHCP Utility and Network Camera Manager (NCM).
Use the DHCP Utility to Temporarily Hand out IPs to All Cameras
- Connect all cameras to your POE switch and connect your POE switch to the recorder's Camera NIC.
- Navigate to Setup > Support tools.
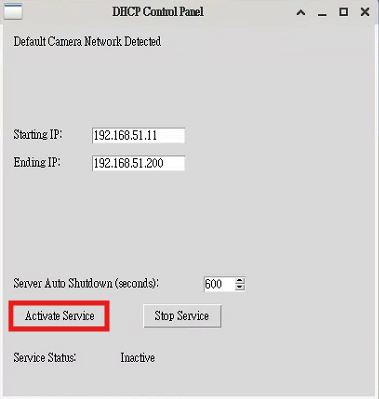
- Launch DHCP Service Utility from the shortcut on the desktop.
![]()
- Click the Activate Service button and allow a few minutes for the cameras to pull DHCP IPs.
Use Network Camera Manager to Assign Camera Passwords and Set Static IP Addresses
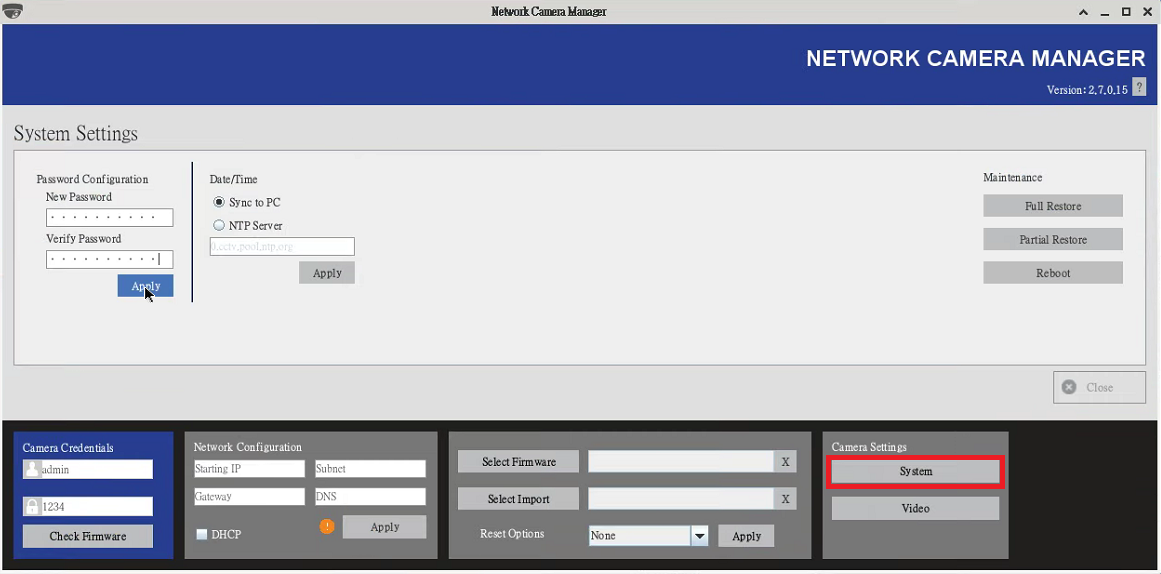
- Launch Network Camera Manager from the icon on the desktop.
![]()
- Select all the cameras in the Network Camera Manager list, then click the System button.
- Enter your desired camera password and click Apply.
- Click the Close button to return to the previous screen.

- Type in the new password in the camera credentials field in Network Camera Manager.
- Select all of your cameras, enter your Starting IP address, Subnet, Gateway and DNS, and click Apply.
NOTE: You must fill out all of the fields before clicking Apply.
All of your cameras are now set to static and you can proceed with Adding Cameras via Discovery.