Server Software Installation
This should be used for software-only installation for Windows systems. For other systems, should refer to the Getting Started information.
System Requirements
Check the Server Software (Apex) System Requirements before beginning installation.
NOTE: Before installing Windows Apex Server Software, make sure WMIC for Windows 11 systems is installed on your Windows 11 system.
Server Software Installation and Setup
Apex Setup Wizard
NOTE: Installation of Apex Server Software requires administrative permissions.
- Launch the Apex install with administrative privileges.
- If prompted by Windows UAC to allow this app to make changes to your PC, select Yes.
- The Apex Setup Wizard will launch; select Next through the wizard, select the options available, and then Install.
- When the installation is finished, select Finish to close the installer.
Apex Initial Setup and Licensing
Once Apex has been installed, you can configure the system using your preferred browser (Google Chrome is recommended) or by launching the Apex Server Home icon on your desktop.
![]()
NOTE: If port 80 is already in use on the system, type localhost:8888/login in the web browser URL.
When the login screen is loaded, log in by entering your OWS Username and Password, or the local default credentials.
Default Admin Username: admin
Default Admin Password: 1234
After logging in for the first time, you will see the First Time Wizard that will allow you to change your password.

NOTE: ReportStar is not currently supported on software only installs. OWS health monitoring replaced this function in version 1.3.
Once you have completed the First Time Wizard, you are taken to the Cameras page in setup, and a green banner at the bottom of the window will display that your installation is currently in Trial Mode.

When the login screen is loaded, log in by entering your OWS Username and Password, or the local default credentials.
- Click Setup
 in Live View, and then System Settings and the Licensing tab.
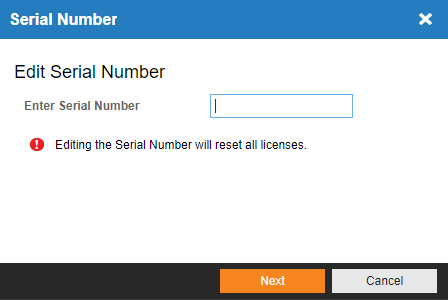
 - In the resulting Licensing tab, click Edit under Recorder Serial Number and enter the serial number provided by OpenEye, and then click Next to complete licensing.
Adding Apex Server Software to OpenEye Web Services (OWS)
Setting Up Storage for Recording
NOTE: Any drives that are set up to record in Apex Server Software will delete any other data on that drive or partition. Because of this, Apex Server Software does not automatically allocate drives for recording and must be setup manually in Setup > System Settings > Storage.
The Storage tab displays all partitions or drives available for recording.

Adding Storage Space
NOTE: Adding Storage Space only applies to select hardware models running Windows. Contact the appropriate OpenEye Sales Representative for more information.
- Click Setup.
- Select System Settings under General Configuration and the Storage tab.
- Check the Enable box for any drive required.
- Click Save.
Disable Recording Drives
- Click Setup.
- Select System Settings under General Configuration and the Storage tab.
- Uncheck the Enable checkbox to disable a specific drive.
- Click Save.
NOTE: The recorder will leave 10% free space on a drive by default; it is not recommended to lower this setting below 10% as this space is used for managing recorded data’s FIFO (First In, First Out) process.
NOTE: The C drive or Operating System partition should not be added as a recording drive.
Setting Up IP Cameras
NOTE: Apex Server Software currently supports ONVIF Profile S, Arecont, Hanwha, AXIS and RTSP.
NOTE: Use Multi-Camera Edit if you wish to change the recording method of cameras globally, or select an individual camera and the Live / Recording tab to change individually.

NOTE: Only cameras that have not been added to the recorder will be discovered on the network. If using an OpenEye encoder, channels are not discovered until a video source is plugged in.
NOTE: You can click the Help icon ![]() in the Camera menu in the Web Client for more information on how to use Live and Search.
in the Camera menu in the Web Client for more information on how to use Live and Search.