MV-Series NVR Cloud Managed Appliance Quick Start Guide - Discontinued
OE-MV NVR Quick Start Guide Hardcopy
Click the link if you need to download the original hardcopy of the OE-MV NVR QSG included with the boxed contents.
Getting Started
- Connect the network cable intended for remote connections to the Client Network Port.
NOTE: The Camera Network Port is intended for use with a dedicated camera network.
- Connect the supplied mouse using a USB port.
- Connect a monitor using the HDMI® port.
- Plug the supplied power cord into the recorder and connect it to a power source.
See Setup Wizard for logging into the server software and connecting to OpenEye Web Services (OWS).
After completing the Setup Wizard, and logging in to OWS, see Registering a Recorder to an OWS Account to connect the recorder to OWS.
Default Administrator Username and Password
When the server software is launched, the user will be prompted to log in. On Linux systems, this will launch automatically after powering on the recorder. On Windows systems, users will need to sign in to Windows, then launch Apex Server Home from the desktop.
The default Administrator usernames and passwords for are listed below:
NOTE: Once registered to OWS, a user’s OWS credentials can be used to log in, in addition to the default credentials listed below.
LINUX SYSTEM LOG IN
Username: admin
Password: 1234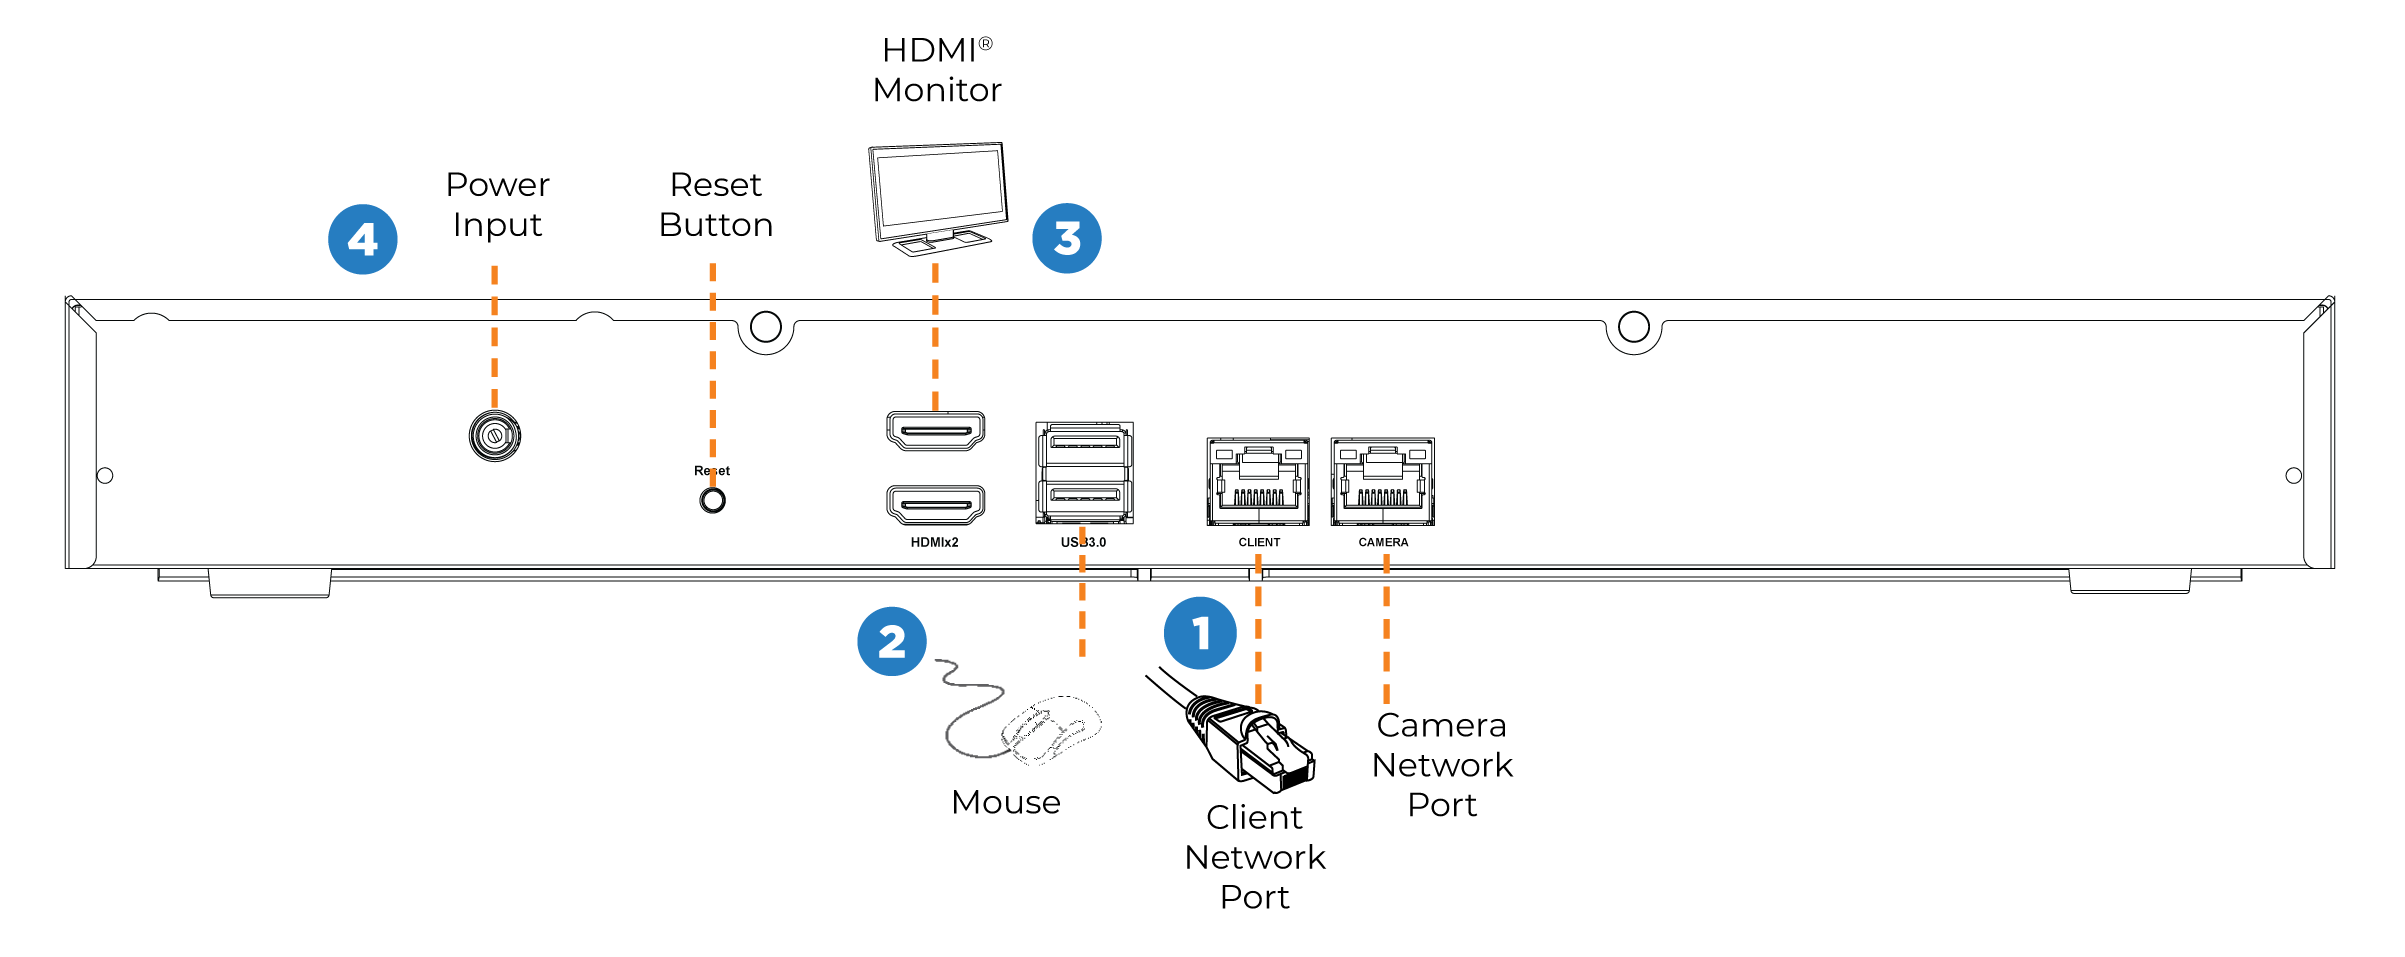
Adding Cameras Through the Camera Network Port
- Click Setup (Gear Icon).

- Under General Configuration, click Cameras.
- Click Add Cameras.

- Under the Discovery tab, click Discover Cameras.
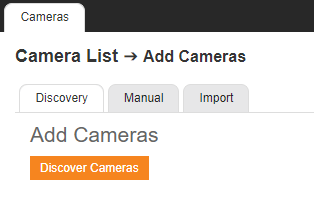
- Check the appropriate boxes to select the device(s) to be added.
- Enter the appropriate credentials (username and password) for the devices to be added, and then click Add Selected Cameras.

Adding Cameras Manually
- Click Setup (Gear Icon).

- Select Cameras under General Configuration.
- Click Add Cameras.
4. On the Add Cameras page, click the Manual tab.
5. Enter the appropriate connection information including Protocol, IP Address, Port, Manufacturer, Model, Username, Password, and Camera Name. For adding with RTSP, follow the details here.
6. Click Save or Save and Add New to add another camera.
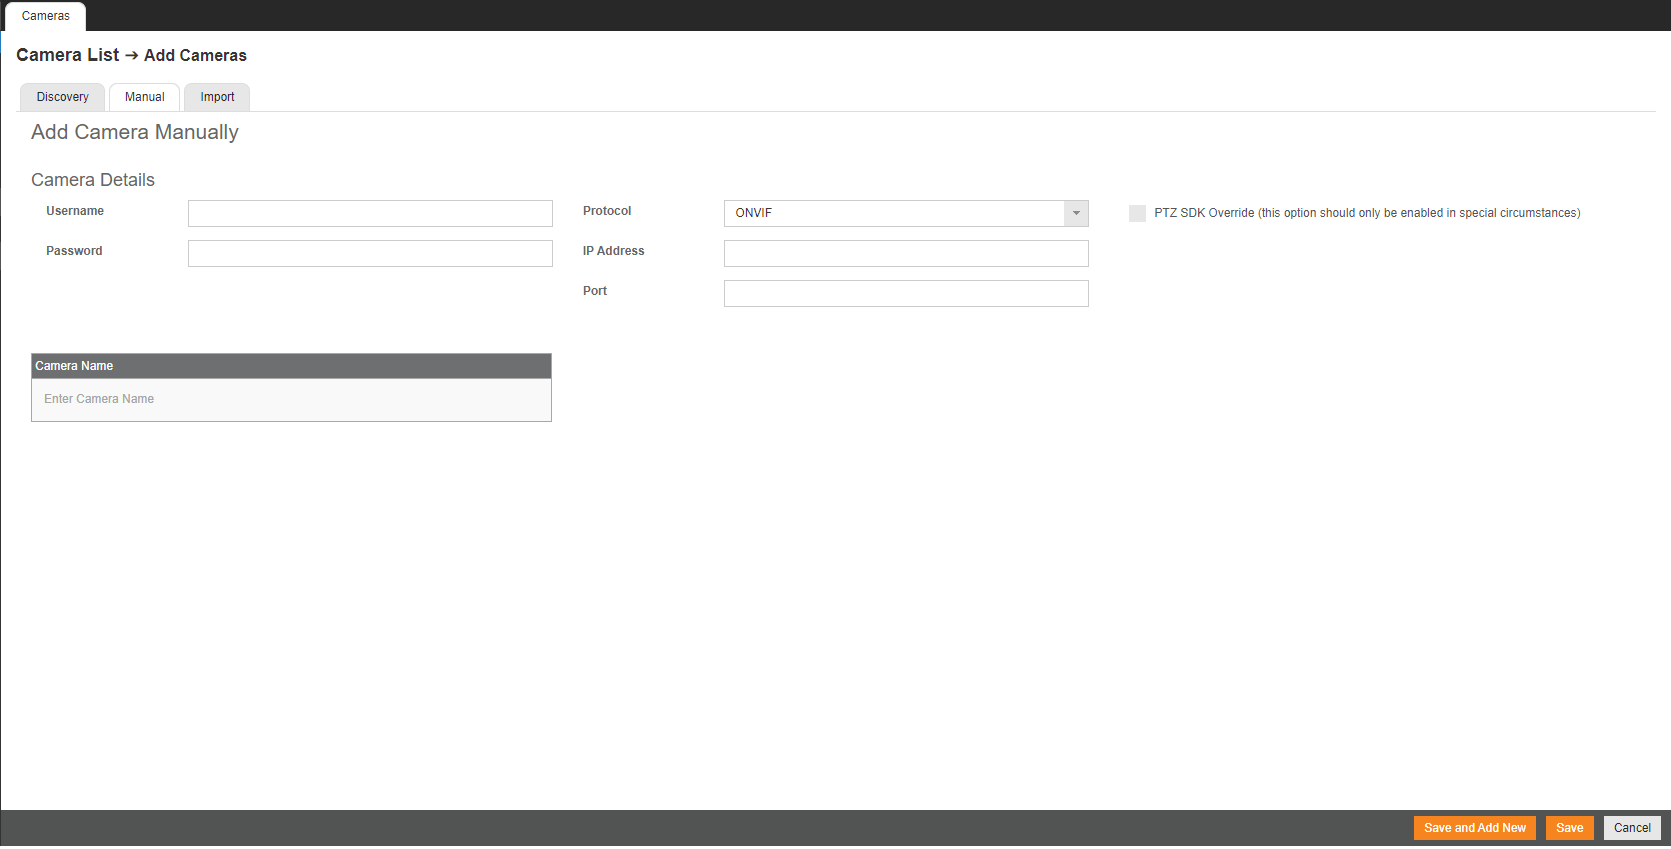
NOTE: For Protocol, select ONVIF or RTSP.
NOTE: When using RTSP, specify the individual URL streams for your cameras. For instructions regarding these streams, consult the cameras's manual.
See Advanced Camera Management for cameras that may not be detected automatically.
Network Settings
| Remote Communication Port | 80 (8888 used if 80 is blocked) |
| Client Network Port IP Address | DHCP |
| Camera Network Port (External Switch) | 192.168.51.1 / 255.255.255.0 (Gateway and DNS blank) |
Best Practices
- This product must be powered only from the type of power indicated on the label. If uncertain of the type of power from the building, consult product dealer or local power company.
- This equipment must be connected to a properly grounded outlet.
- This device is to be connected only to PoE networks without routing to the outside plant.
CAUTION: Risk of explosion if battery is replaced by an incorrect type. Dispose of used batteries according to the instructions.
Maintenance must be performed by qualified personnel only.