Cloud Camera Add Device Wizard
Adding a New Cloud Camera with Add Device Wizard
|
|
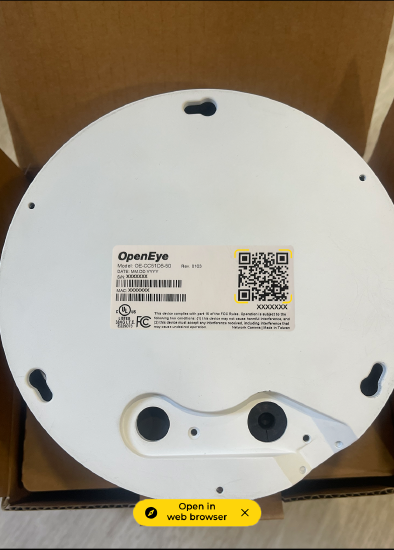
NOTE: If the camera QR code is inaccessible after installation, scan the QR code label found on the box.
- Scan the QR code found on both the camera and on the camera box to launch the Add Device Wizard.
- A separate QR code included on a slip inside the packaging directs users to the quick start guide and does not register the cameras to OWS. Please scan the QR on the bottom of the camera or box to access the Add Device Wizard.
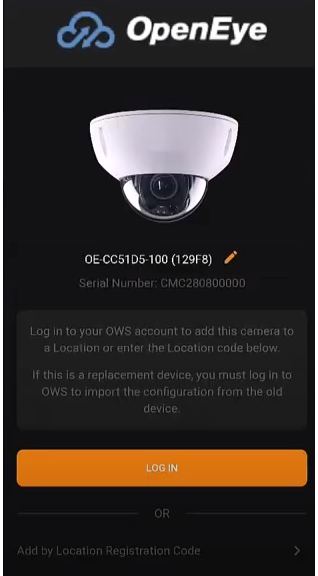
- Click Log In.
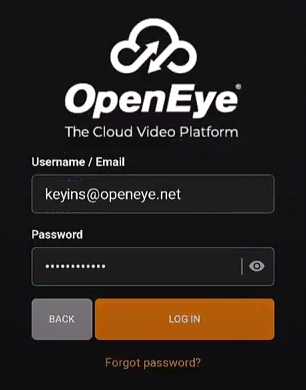
- Enter your OWS Username / Email and Password, and click Log In.
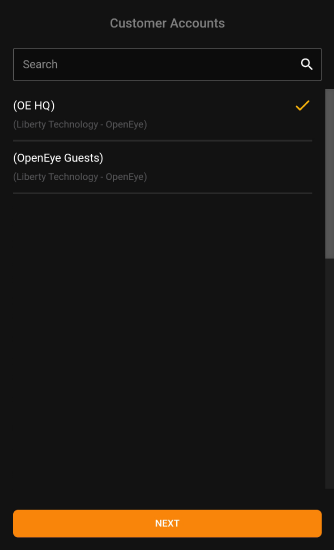
- Select a Customer Account from the list and click Next.
NOTE: Only Customer Accounts with Subscription Management enabled will appear in the Customer Accounts list.
- Enter a name for the cloud camera.
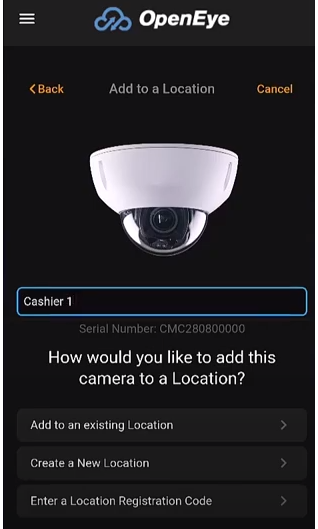
After naming the camera, select Add to an existing Location, Create a New Location, or Enter a Location Registration Code.
Add to an Existing Location
If there is already an existing Location for the cloud camera:
- Click Add to an existing Location after naming the camera.
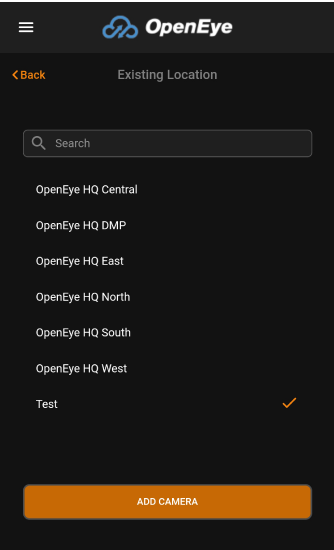
- Select the location from the list.
NOTE: If you can't see the Location in the list, click Search and enter the location name.
- Click Add Camera.
Create a New Location
If there isn't an existing location for the cloud camera:
- Click Create a New Location after naming the camera.
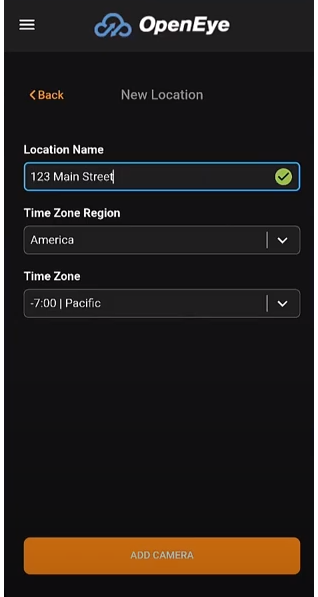
- Enter a Location Name, select a Time Zone Region and Time Zone from the dropdowns.
- Click Add Camera.
Add by Location Registration Code
You can use a Location Registration Code before logging in or after naming the camera.
- Click Add by Location Registration Code at the Log In screen, or click Enter a Location Registration Code after entering a camera name.
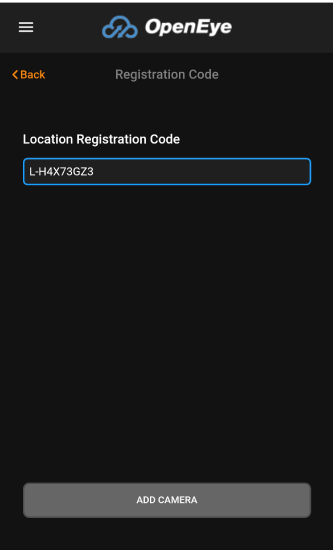
- Enter the Location Registration Code.
NOTE: The Location Registration Code can be found on the OpenEye Web Services Web Connect page or Locations > General Info.
- Click Add Camera.
After adding a cloud camera, it can be found as a device in Management > Locations > Locations.
How to Add Cloud Cameras from Locations
Navigate to Locations
New cloud cameras can be added to the device list in Management > Locations > Locations.

Adding a Cloud Camera
New cloud cameras can be added by clicking on the three dots  next to a Location and selecting Add a Cloud Camera.

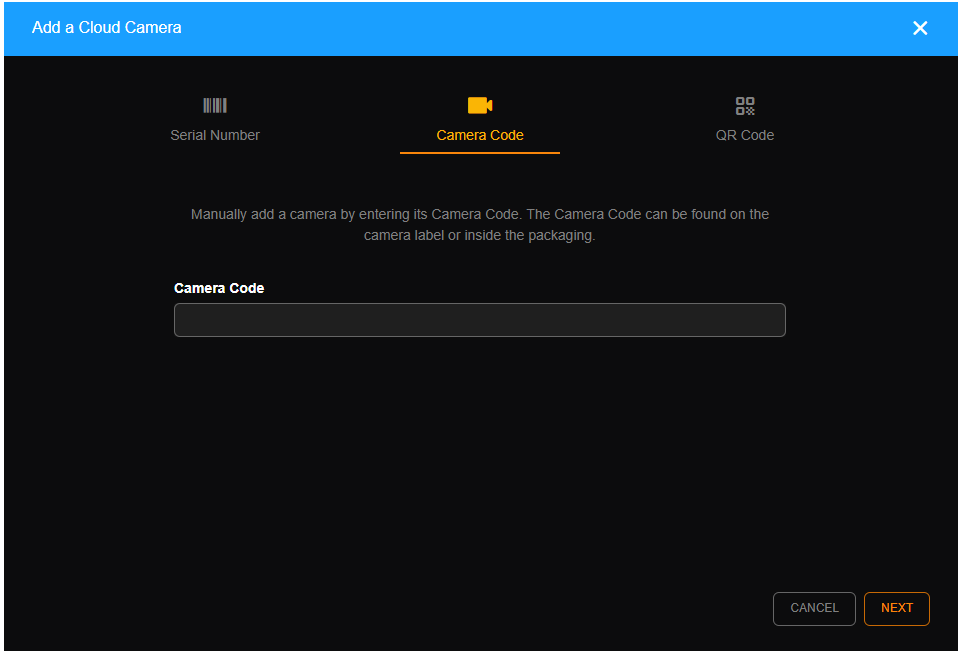
Add a Cloud Camera by Camera Code
Manually add a camera by entering its Camera Code. The Camera Code can be found on the camera label or inside the packaging. Click Next.
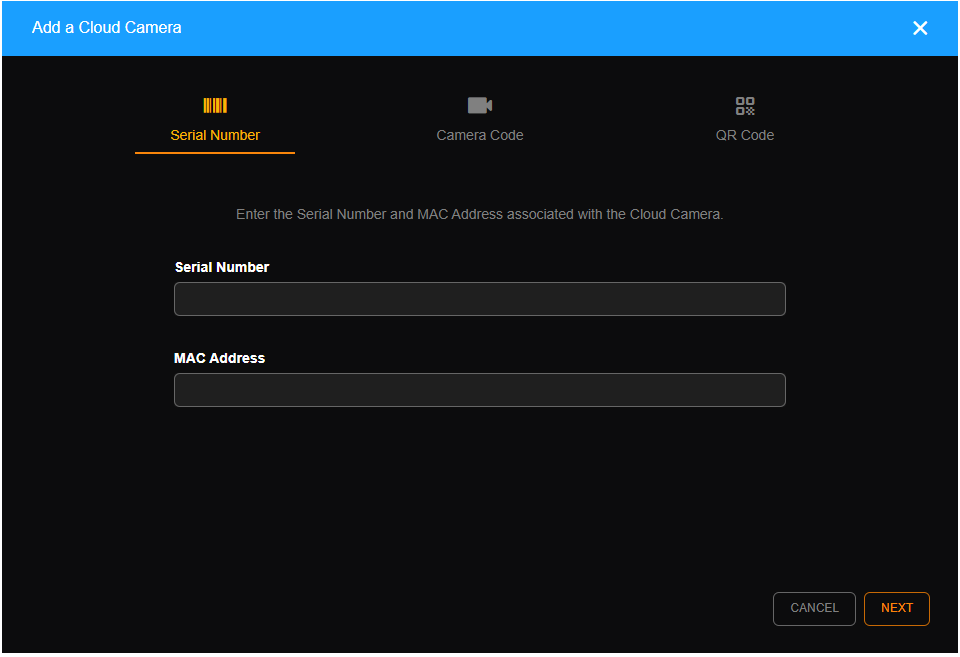
Add a Cloud Camera by Serial Number and MAC Address
Enter the Serial Number and MAC Address associated with the Cloud Camera. This information can be found on the camera label. Click Next.
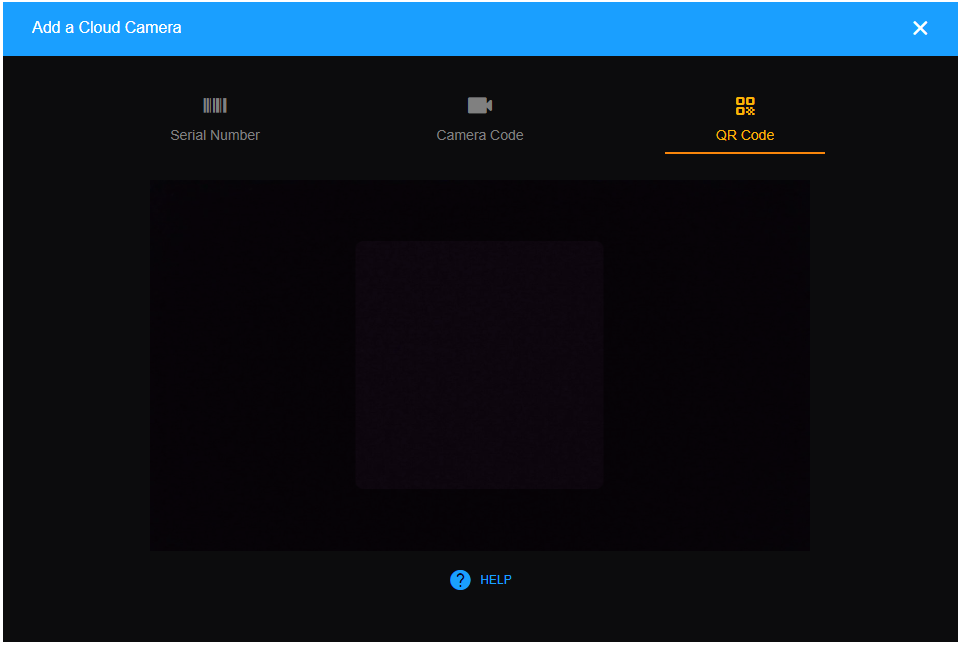
Add a Cloud Camera by QR Code
Use a camera to scan the QR Code found on the camera or packaging label. Click Next.
After the device has been successfully added, click Add Another Camera to add another cloud camera, or Done to leave the page.
NOTE: The device's software will update after leaving the Add a Cloud Camera page. Do not disconnect the device's power.
Click View Live Video to view video from the cloud camera in a new pane.

Click Refresh if video does not initially display.
