
Add Device Wizard
Manually Updating a Windows Recorder
- After logging in to a local Windows recorder, navigate to [IP Address]/support/firsttimewizard or localhost/support/firsttimewizard
- Click Reset First Time Wizard.

- Launch the Add Device Wizard after the recorder finishes rebooting.
Launching the Add Device Wizard
- Select Add Device Wizard if using the optimized setup instructions below, or select First Time Wizard if you encounter an issue with the Add Device Wizard. Click Continue.

- Click on Add Device Wizard.

- Click I Accept on the License Agreement and click Continue.

- Choose a language from the dropdown.

- Select either Set up as a new device or Set up as a replacement device.
NOTE: Use the second option for an RMA device or if it has been reimaged. This option imports configuration settings from a file. See RMA Setup Guide for more information on replacing a device.
Set Up as a New Device
- Click on Set up as a new device to add a new Windows recorder to a location.

- Enter Create new password, and Confirm new password. Click Continue.

- Enter a Device Name. Click Continue.

- Click Log in to Web Services or enter a Location Registration Code. If logging in, enter OWS Username and Password. Click Continue.

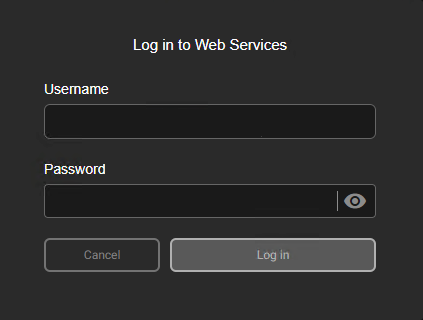
NOTE: Click on Do not add to Web Services to add the recorder to a location after the device wizard. Go to Step #12.
- When logging in, enter the 2-Step Verification code. Click Verify.

- Choose an Account from the dropdown. Click Select.

- Select the location or add New Location. Click Continue.

- (Optional): If creating a New Location, Enter Location Name, Time Zone Region, and Time Zone. Click Continue.
NOTE: Time settings under Setup > General Configuration > System Settings > General Settings > Time Settings are disabled when a device is configured through the Add Device Wizard. To update time settings through locations, go to Locations > General Information.

- (Optional): If creating a custom camera password, select Yes, and enter a default camera Password. Otherwise, click No to finish.

NOTE: The Default Camera Password will be used to set the password for cameras which require a password change on first use. This will not change the password of any camera already added to this device, or any camera with the password already set.
- Click Done to exit the wizard.

Set Up as a Replacement Device
- Click on Set up as a replacement device to set up an RMA or reimaged device. Click Continue.

- Click Log in to Web Services or enter a Account Registration Code. If logging in, enter OWS Username and Password. Click Continue.

NOTE: Click on Do not add to Web Services to add the recorder to a location after the device wizard. Go to Configuration Step #6.
- When logging in, enter the 2-Step Verification code. Click Verify.
- Enter the Serial Number of the Old Device to be replaced. Click Continue.

- Check I understand to replace device. Click Continue.

WARNING: Alert Rules, Reports, User Groups, etc. from the old device will overwrite the settings in the new device.
- Click Browse to select a config file. Select either:
- Complete Restore to restore to the same device or replacement device. Click Continue.
- Partial Restore to use the configuration file as a template for other devices. Unique camera identifiers will not be copied. Click Continue.
NOTE: Entering a default camera password can be skipped when importing a configuration file.

- Once the device settings have been reset, click Done to exit the wizard.
