How to Covert a Multisensor Device from a Single Channel to a Native Multi-Sensor/Encoder Integration
NOTE: If any multi-sensor devices were added as a single channel ONVIF device before updating to OWS Server Software version 2.6, the device may display the same video on all sensors.
To change multi-sensor device from a single channel to a native multi-sensor/encoder integration:
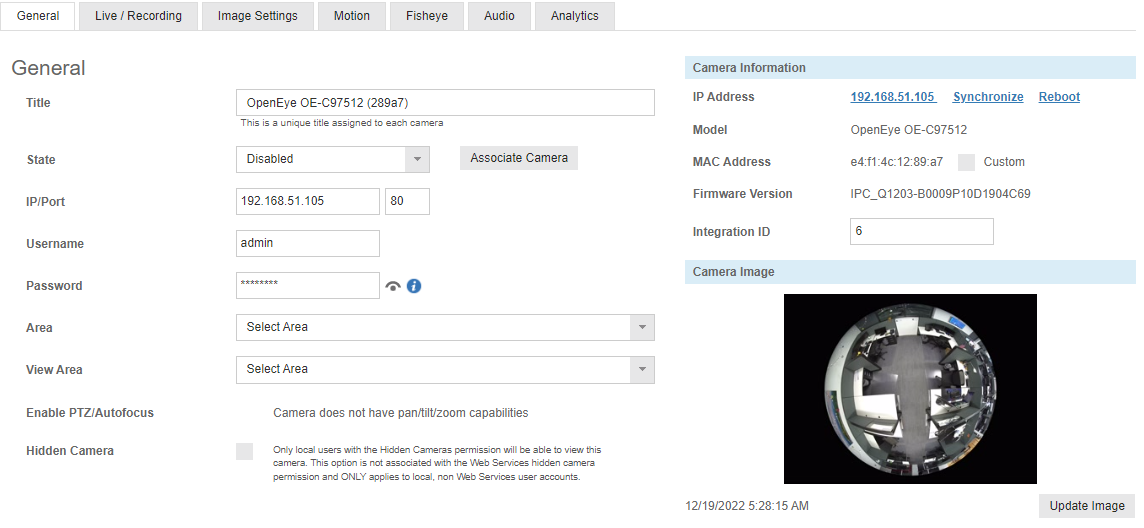
Using Multi-Camera Edit to Update Camera Thumbnails and Disable Cameras
Before Disabling and Adding devices, updating camera thumbnails to have as a visual reference when associating cameras is recommended:
NOTE: The Camera list can be sorted by IP Address by using the Sort By dropdown.  This will display all of the sensors/cameras with the same IP together.
- Go to Setup
 > Cameras.
 - Click Multi-Camera Edit
 above the camera list.
 - Check which cameras to update or select Select All.

- Click Update Thumbnails
 .
. - To disable multiple cameras at the same time, click Next
 in Multiple-Camera Edit and use the dropdown and select Disable.
 - Click Save
 .
.

Disabling a Single Multi-Sensor Device
Adding the Multi-Sensor Device via Discovery
NOTE: Discovery will only work on a newly installed device. For disabled devices, see Manually Add the Multi-Sensor Device.
Manually Add the Multi-Sensor Device
NOTE: ONVIF or Hanwha devices have to be added manually.
- Click Setup (Gear Icon).
- Select Cameras under General Configuration.
- Click Add Cameras.

4. On the Add Cameras page, click the Manual tab.
5. Enter the appropriate connection information including IP Address, Port, Manufacturer, Model, Username, Password, and Camera Name.
- Use the Protocol dropdown menu to select the native integration of the multi-sensor camera.

- Click Save or Save and Add New to add another camera.
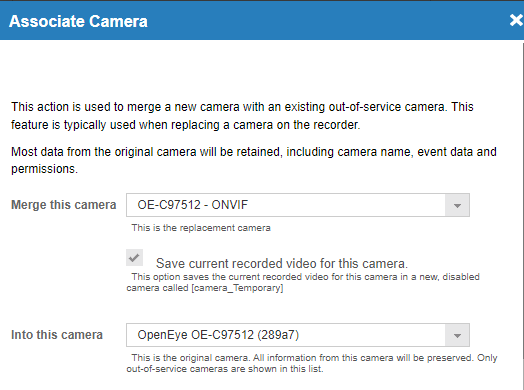
Associating Disabled Cameras with the Multi-Sensor Device
NOTE: Associating a disabled device with a newly added device will associate previously recorded video.


