Dealing with cameras on a default static IP
Setting cameras to a static IP
By default, a new OpenEye camera has an IP address of 192.168.51.2 if it does not receive an IP address from a DHCP server.
If the address needs to be changed to match the overall camera network, it is necessary to connect to the camera web page to adjust the network settings.
From a Linux-based recorder:
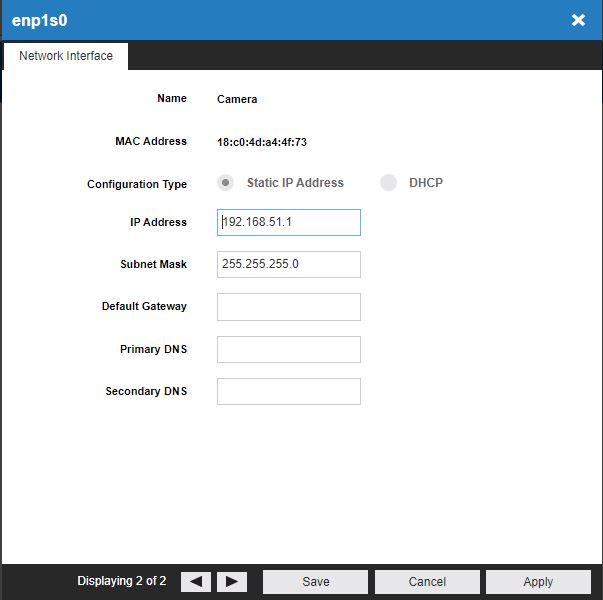
- To find a camera on the default IP address, first, make sure the recorder is connected to the network the camera is on. Once connected, ensure the recorder’s Camera adapter is set to the default of 192.168.51.1 with a subnet of 255.255.255.0
.
- Once that has been completed, go to the Cameras section in the recorder settings and select the "Advanced" button at the top to open the Network Camera Manager (NCM).
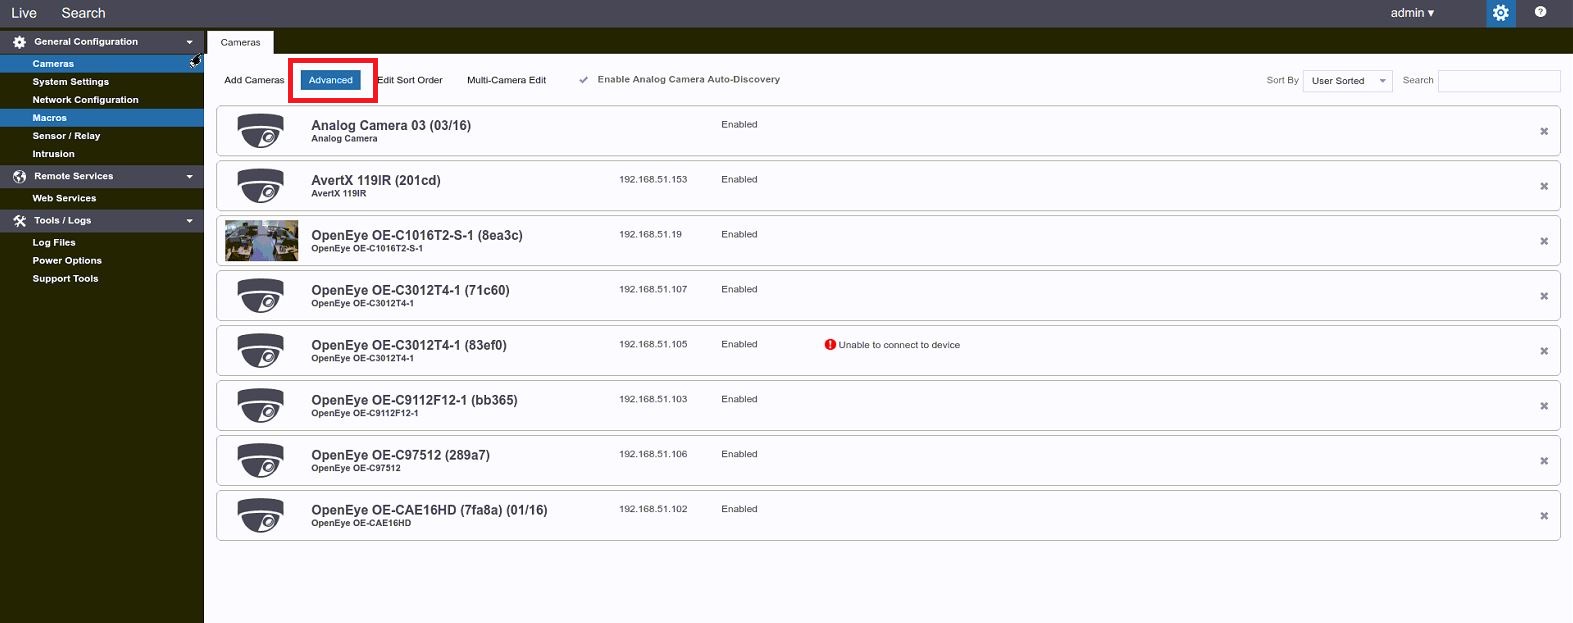
- NCM will then begin to scan and find the camera on the default address of 192.168.51.2. Clicking the "Load" button next to the camera will open the camera web page and allow logging into the camera.
From a Windows device:
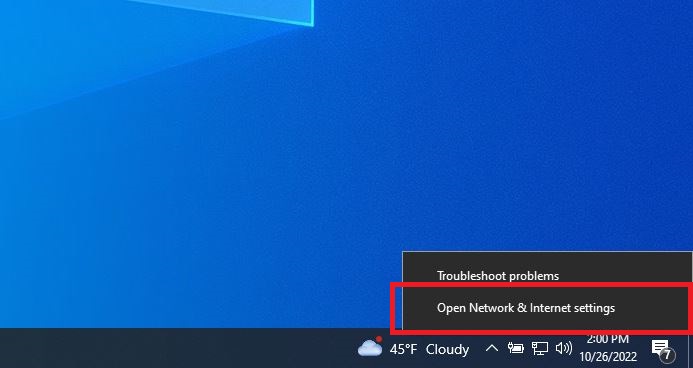
- First, make sure the recorder is physically connected to the same network switch as the camera. Once connected, set the camera adapter to the correct IP information to reach the camera. To do this, right-click on the networking icon in the Windows taskbar and select "Open Network & Internet Settings".
- From there, select "Ethernet" on the left-hand side menu of the window that opens, and then choose "Change adaptor options".
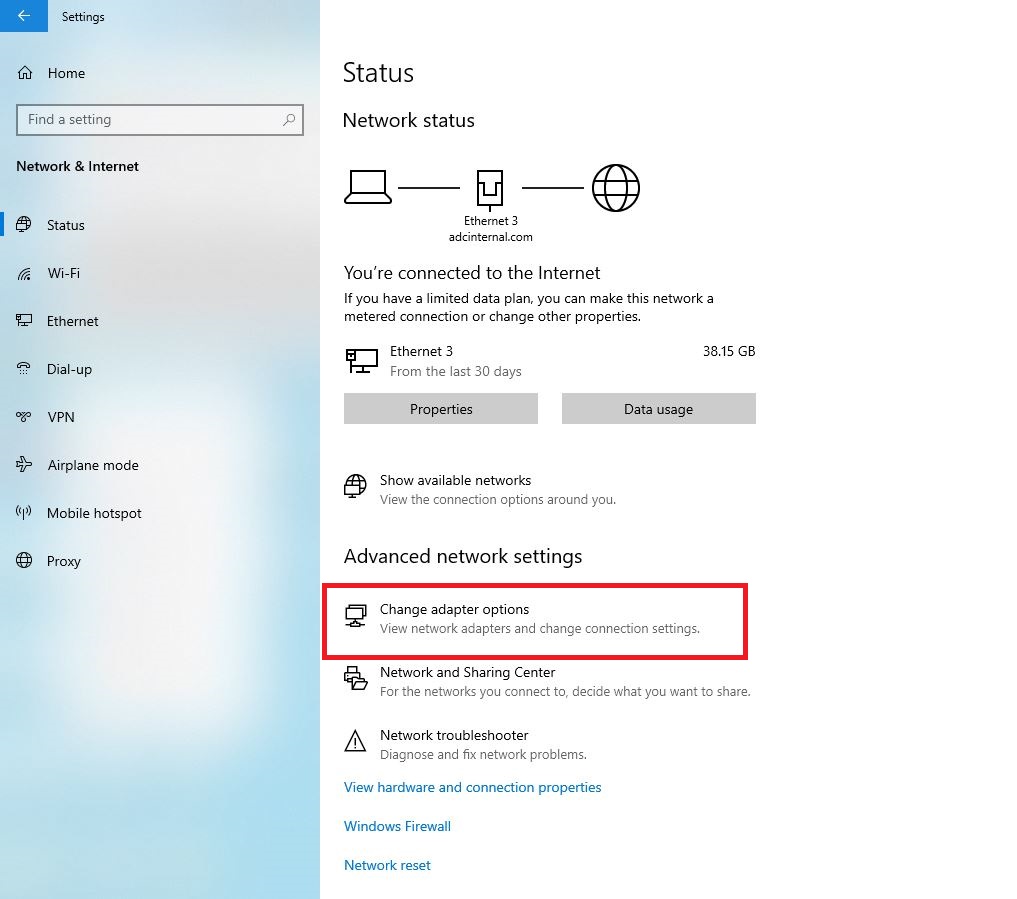
-
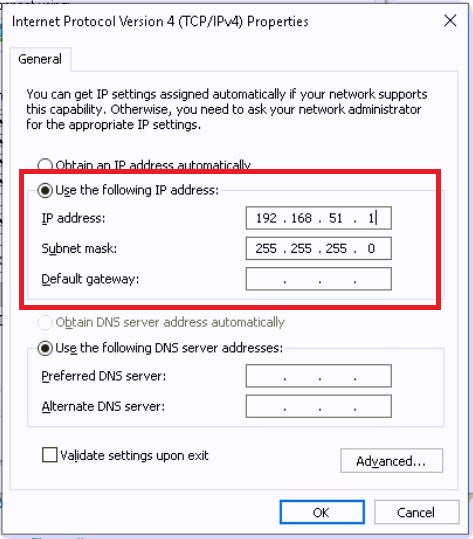
This should open yet another window. From here, select the "Ethernet" option. (Please note: If there is more than one adapter showing, select the one that does not show as disabled, or has a red X on the icon). This will open the settings window for this network connection. Select "Properties", then select "Internet Protocol Version 4 (TCP/IPv4)" from the list and double-click it.

- From this window, select the button labeled, "Use the following IP address". Once selected, the area to manually input your IP address information should unlock. From here, you should then be able to set the IP address to 192.168.51.1, and the subnet mask to 255.255.255.0. Leave everything else blank and select OK.
- Use Network Camera Manager to discover the camera or access the camera by opening a web browser and going directly to [+http://192.168.51.2/+].
- Once the camera has been set up properly, change the Ethernet port settings to how they were before.
Note: If there is more than one camera at default IP on the network, an IP conflict can occur, which can cause severe issues when trying to connect to the camera. To avoid this, please connect and configure one camera at a time.