Day and Night Reports
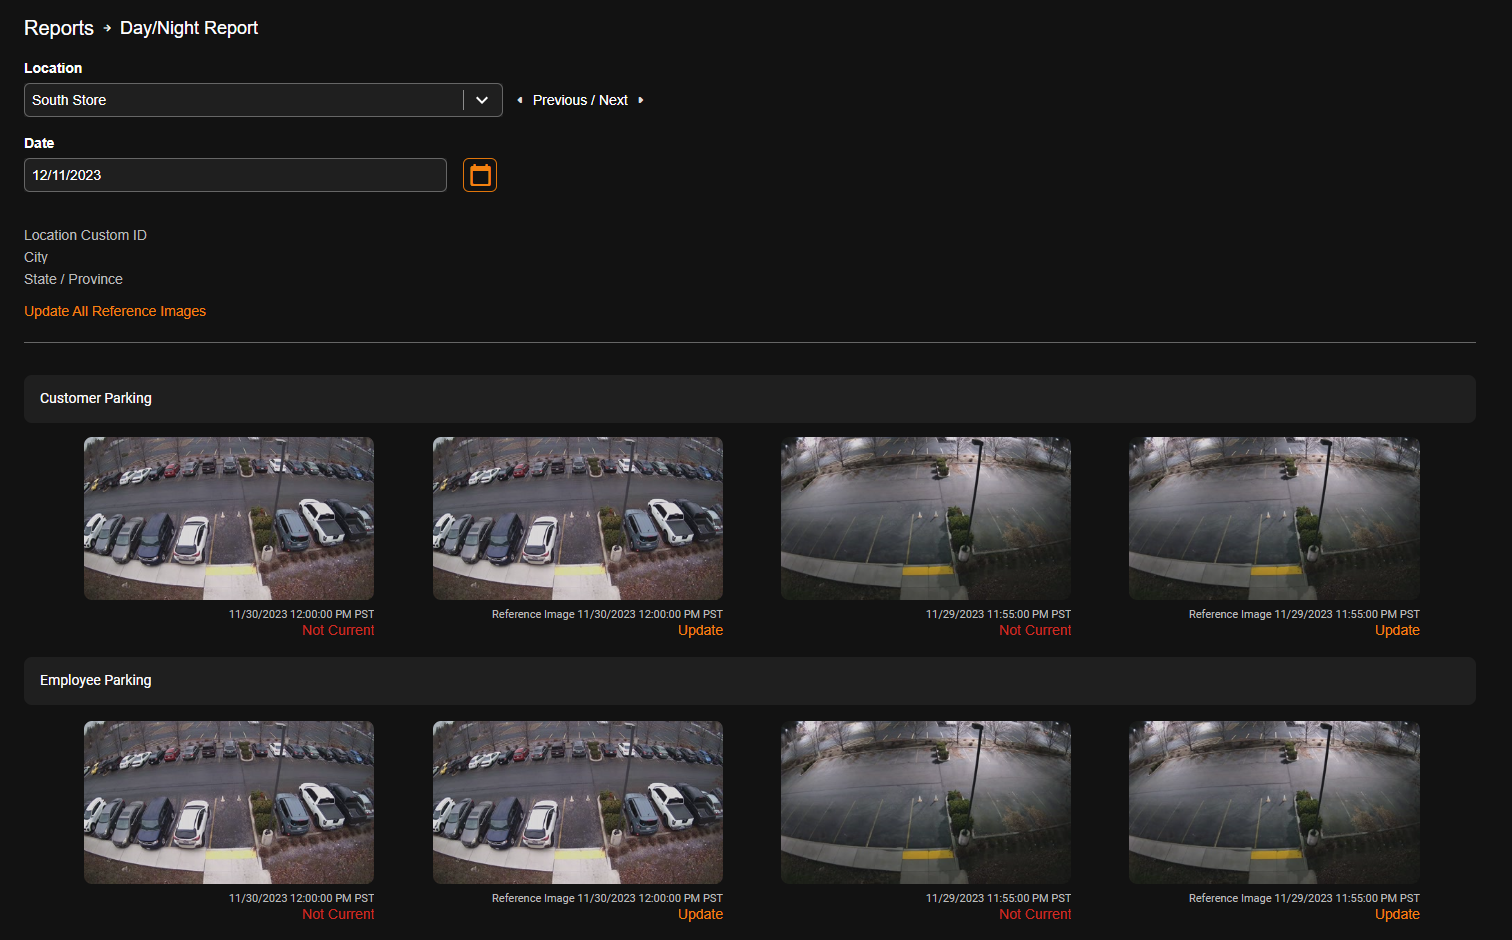
The Day / Night or Image Verification Report shows a day and night image from each camera and compares that to a reference image for each. This provides an easy way to identify changes to a camera’s field of view due to dirt, branches, or other image issues.
Common use cases include: spot tampering or vandalism quickly, review for foliage or anything else that may have accidentally blocked the view, and verify camera functionality at the start of a security shift.
Best Practices
- Set reminder emails at opportune times of day to ensure cameras are capturing the best images possible.
- Create default reports to share with admins, managers or user groups.
- Add user groups so new employees can be easily added and get access to important reports.
|
|
Creating a Day/ Night Report
- Click Reports in the top navigation bar.
- Click New Report.
- Choose the report type and click Next.
- Enter a Report Name and Report Description.
- Click Confirm when finished.
NOTE: After creating or configuring a report, you can click View Report  from the left-side menu to go directly to the report.
Adding Locations to a Day / Night Report
- Click Reports on the top navigation bar.
- Click Edit
 next to the report you want to edit.
 - Click on the Locations tab if available.
- Click on Add Location Group or Add Location.
- Click the plus icon
 to add a location group or location.
NOTE: To apply the report to every location connected to the OWS account, select Enable Auto Include. 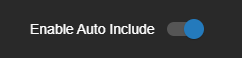 This includes all existing and future locations.
- Click Select when finished.

Adding Users to a Day / Night Report
- Click Users / Notifications.
- Check the box to Enable Email Reminder Notifications, then do the following:
- Select Time of day to send the email.
- Select How frequently to send from the dropdown menu.
- Select Monthly, Weekly, or Daily to choose how frequently to receive an email notification, and then check when to send.
- Click Add User or Add Group.
- Click
 to select the groups for the User account from the pop-up menu.
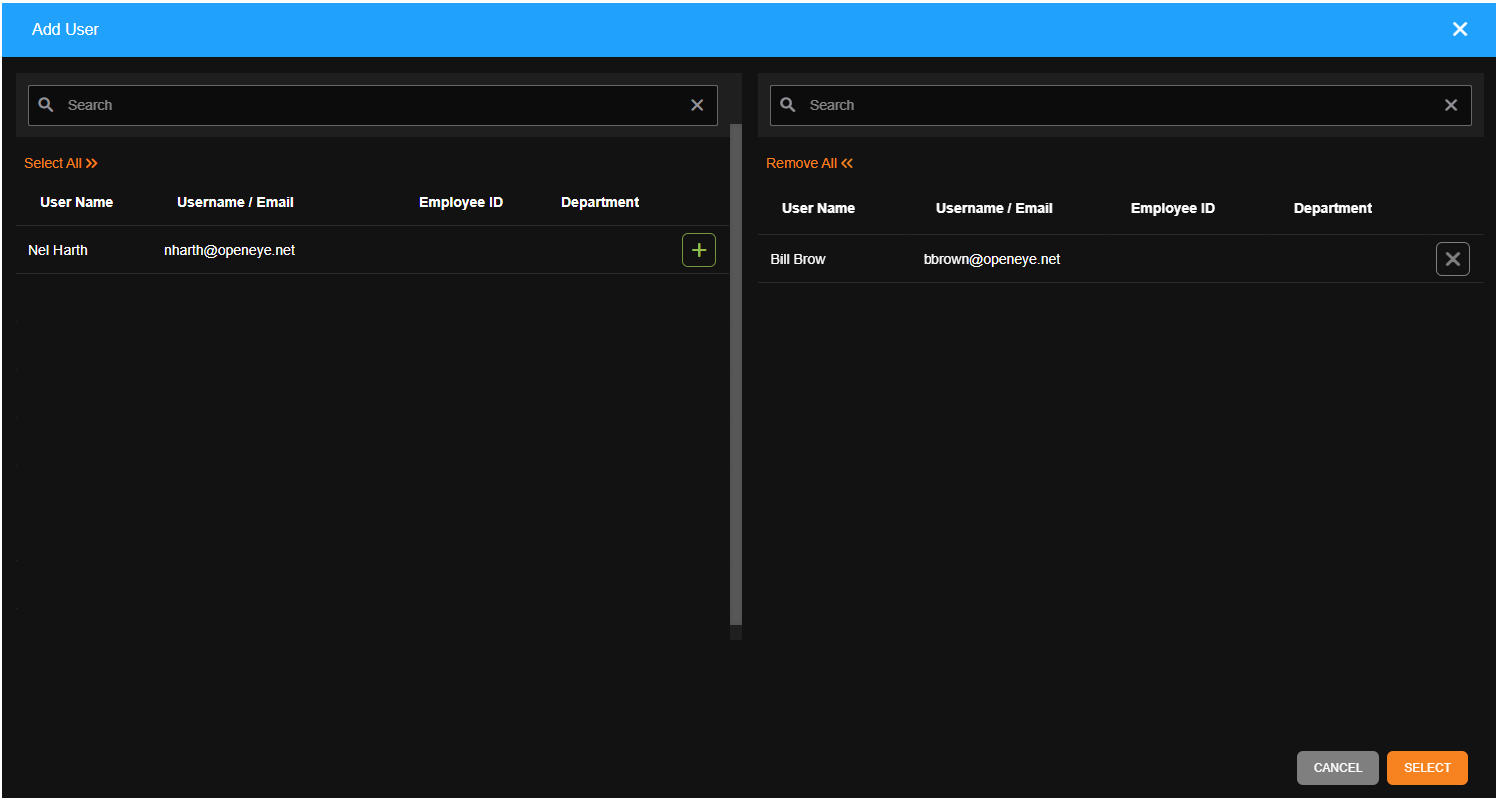
- Click Select when finished.
Note: Adding Users to a report automatically grants them permission to view reports for cameras and recorders they have access to based on their User Group permissions.
- Check the box under Email Alert for each user or group intended to receive the email reminder notification.