Camera Audio Troubleshooting
The below troubleshooting guide details the recommended steps in troubleshooting your camera audio.
Check to See that Audio is Enabled in the Camera UI
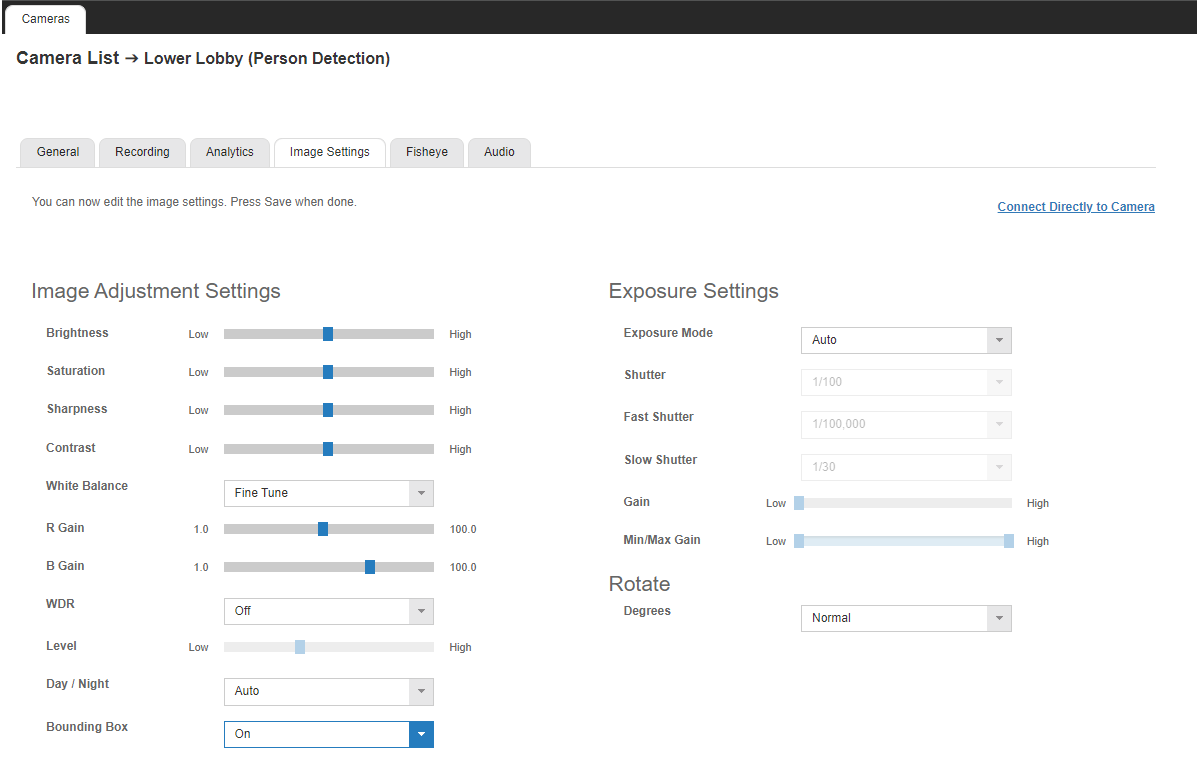
Steps 6-7 take place in the camera UI, which can be accessed by connecting to a recorder through camera link.
- Click Setup (Gear Icon).

- Under General Configuration, navigate to the Cameras menu.
- Select a camera by clicking on it.
- Click the Image Settings tab.
- Click Connect Directly to Camera.
- Once in the camera UI, view the Audio menu to ensure it's enabled. Set to either Simplex (listen-only) or full-duplex (talk and listen simultaneously) depending on the application.
- Set Bit Rate setting to uLaw and adjust gain appropriately. Input gain will control the sensitivity or volume of the audio it picks up (higher is louder, lower is quieter). Setting it too high can cause static or white noise.

Check the Web Browser
Make sure you can hear audio in the browser. Some cameras require a certain web browser such as Internet Explorer to display video and provide audio.
NOTE: You may have to click a live audio button or something similar to start playing audio.
If you still cannot hear audio at this point, you will want to check that your line amp microphone is connected properly or test it on another device like a computer.

Review Recorder Settings
Once you have verified audio in the browser you can move to the Recorder Settings.
To configure Audio for an individual device, connect to a recorder, click Setup > Cameras and select the device you want to configure from the list. Click on the Audio tab and select the desired option.
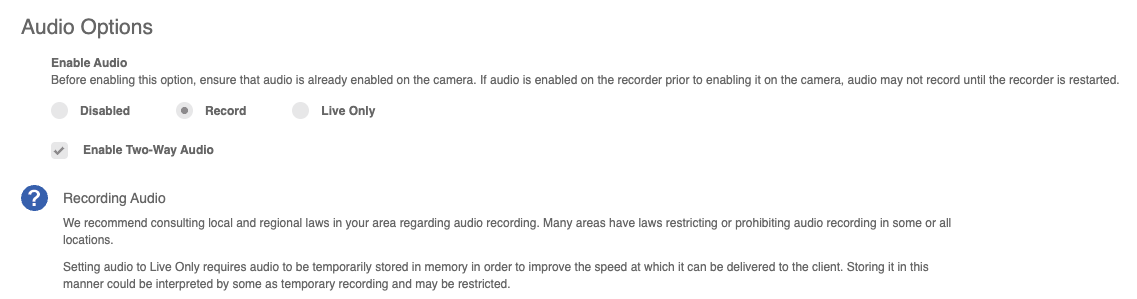
Disabled – No audio is received, transmitted or recorded by the device.
Record – All audio is recorded by the device.
Live Only – Audio can be received and transmitted through the device but is not recorded.
Enable 2-Way Audio – Audio can be transmitted through compatible device models.
- Select Record or Live Only to enable audio recording on a specific IP device.
- Check Enable 2-Way Audio to transmit audio through the IP device.
- Click Save or Apply.
Important Notes
Audio must be enabled on the IP device itself with the G.711 or AAC codec in order to record audio from the device. Check the manufacturer's manual on how to enable audio on the IP device.
We recommend consulting local and regional laws in the appropriate areas regarding audio recording. Many areas have laws restricting or prohibiting audio recording in some or all locations.

To test that the camera is recording audio, you can export a clip, making sure to check the Include Audio box, or you can listen to the live audio using the Desktop Client or the OpenEye mobile app.
Listening to Audio in the OWS Clients
OpenEye Web Services (OWS) Video Player
In the OWS Video Player, click the Audio  button below the timeline bar.

OpenEye Mobile App
In the OpenEye Mobile app, connect to the recorder and tap on the camera to view the camera in one camera grid layout. Tap the Audio button in the lower right-hand corner.

Desktop Client
Connect to the recorder, right-click on the camera in the grid and then mouse down to Audio and click Play Audio.

For both clients, if you still cannot hear audio from the camera, reboot the recorder and then test it again in the Desktop Client or the mobile app.