How to grant QSRSoft access to your OWS Account
To integrate with OpenEye Web Services, QSRSoft requires a service account to be created at the Channel Partner layer, the Tenant ID for your Channel Partner account, a Location ID added to each recorder to be used, and the Tenant ID for the customer's company. Please follow these steps to set up the integration:
Create the QSRSoft Service Account User Group
1. User Groups can be created from Management > User Management > User Groups.
- Click Add New User Group.

- Enter the Name QSRSoft and any Description for the new User Group.
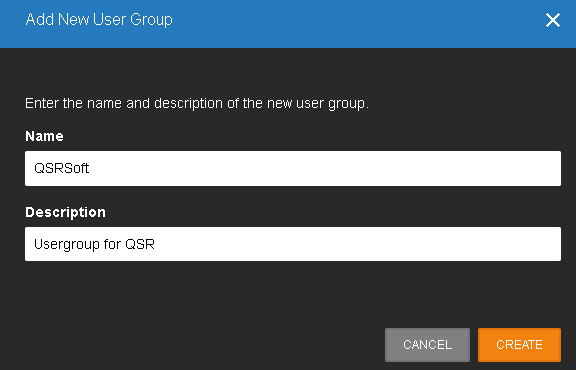
- Click Create.
- Click Web Services Permissions
- Click Client Access drop down menu
- Enable the following options:
- View Live Video
- View Recorded Video
- Thin Client and Video Player
- QSR Security Application

- Click Save Changes
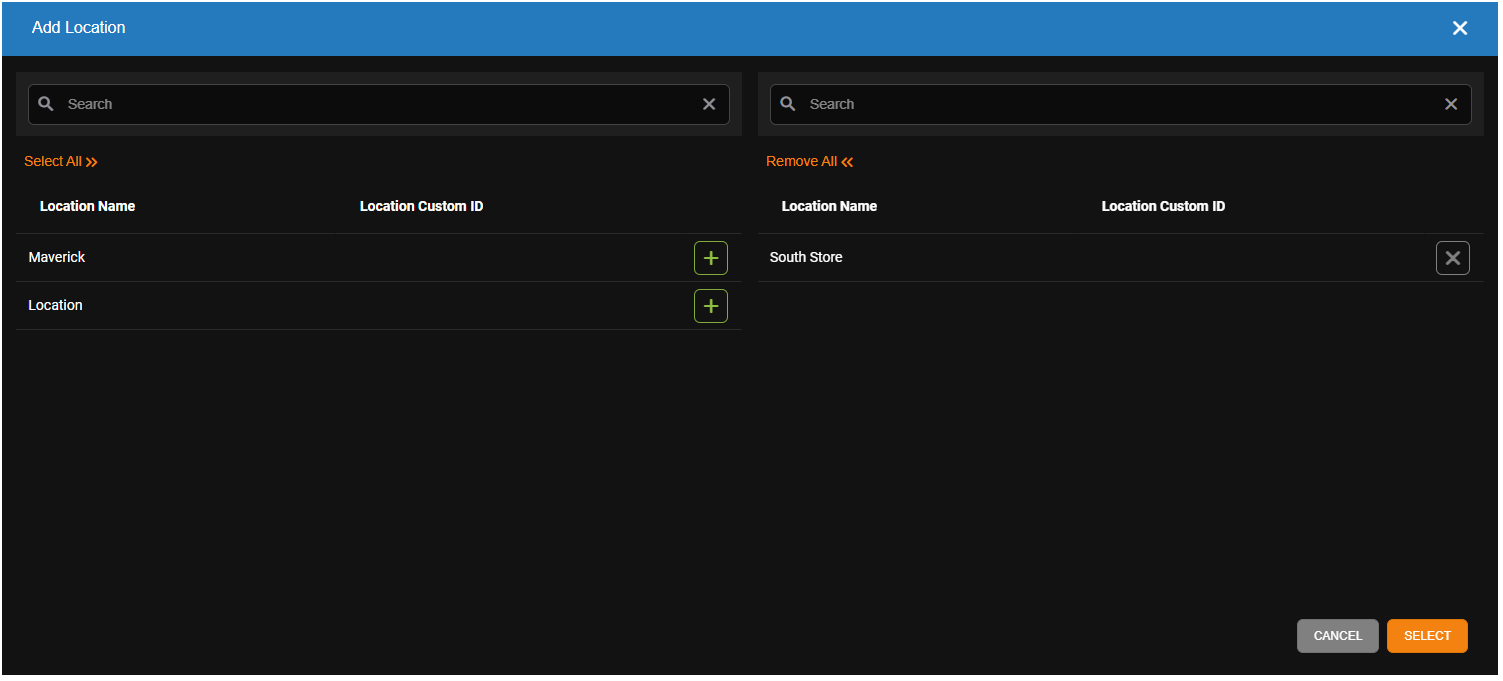
- Click Locations / Cameras
- Click Add Location

- Select the accounts that you would like to give QSRSoft access to and click Select.
- Click Video Clips Permissions
- Select Export Video to Web Services and click Save.

Create the QSRSoft User
- You will need to create a valid email address within your organization that you will provide to QSRSoft. QSRSoft will use that email address to access OWS.
- Users can be added from Management > User Management > User Group.
- Click Add New User.

- Enter a desired First Name and Last Name.
- Enter the Email Address you created in step 1.
- Use the Add User to Group dropdown menu to assign the new user to the QSRSoft user group.

- Click Add New User after the required fields are entered.
- An Activation Email will then be sent to the Email Address you entered. Click on the Activation Link contained within that email.
- Set a password on the account.
- Contact your QSRSoft representative and provide them the Email Address and Password you created.
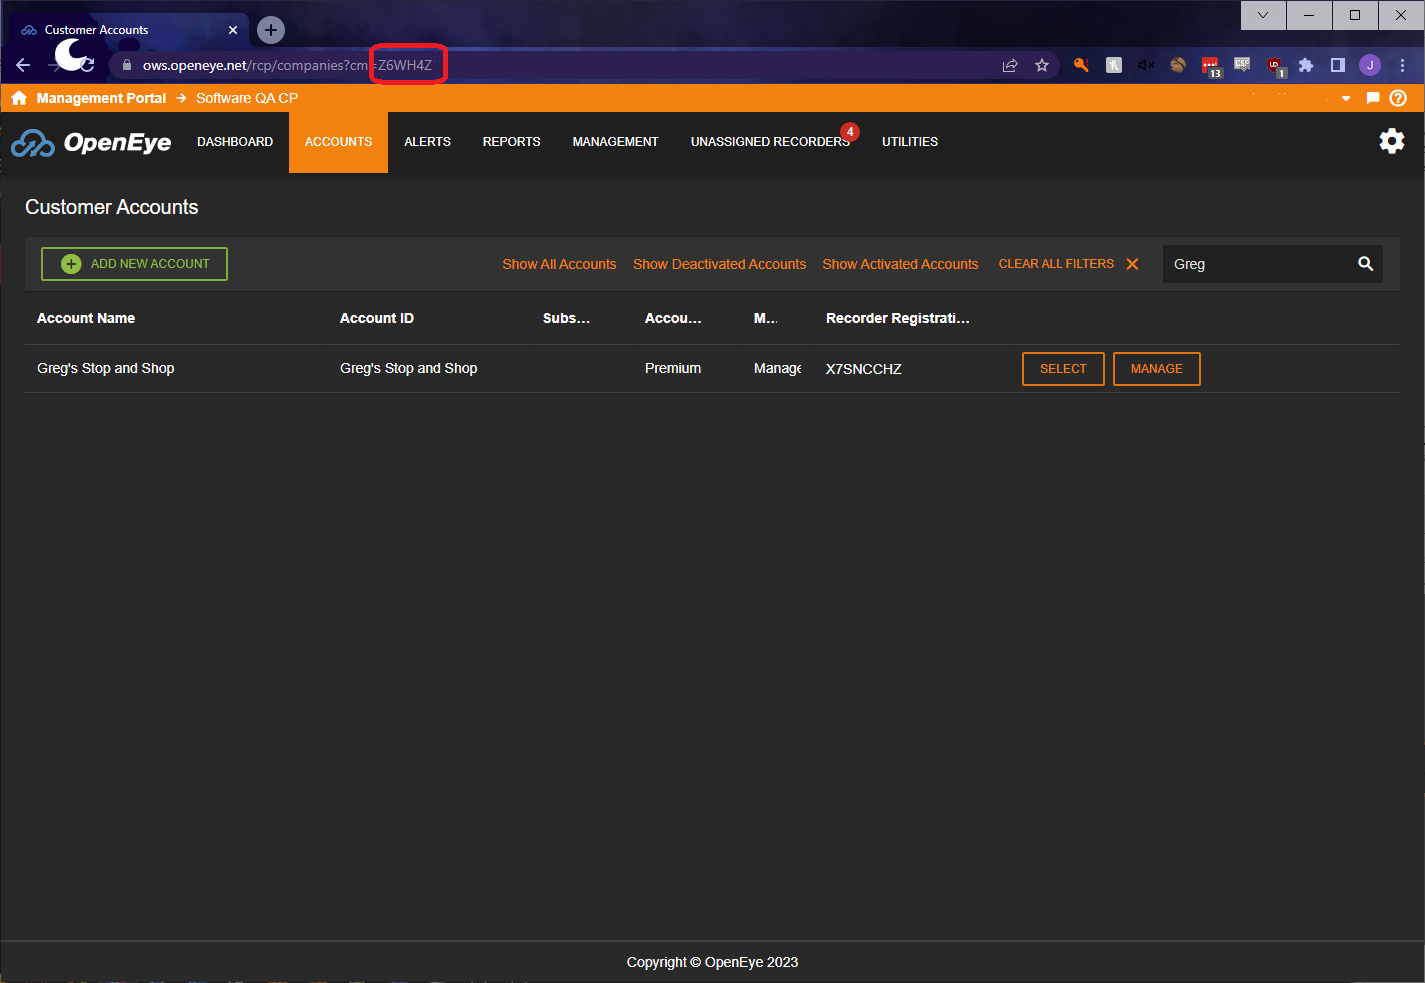
Finding the Tenant ID
- At the Channel Partner layer of your account, check the URL bar at the top. The Tenant ID is the series of six letters and numbers preceded by cm=
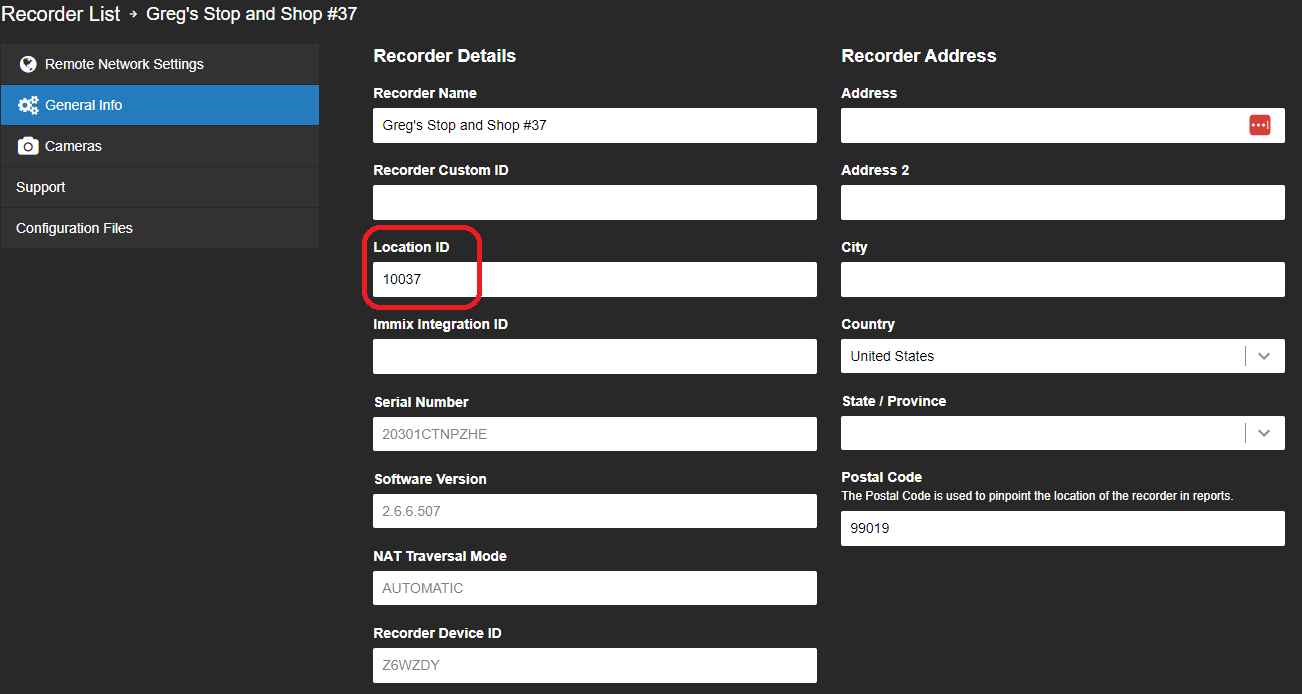
Adding a Location ID to a Recorder
- Open the End User account with the recorders that QSRSoft will access.

- Click Manage.
- Select Recorders, then click Recorders.
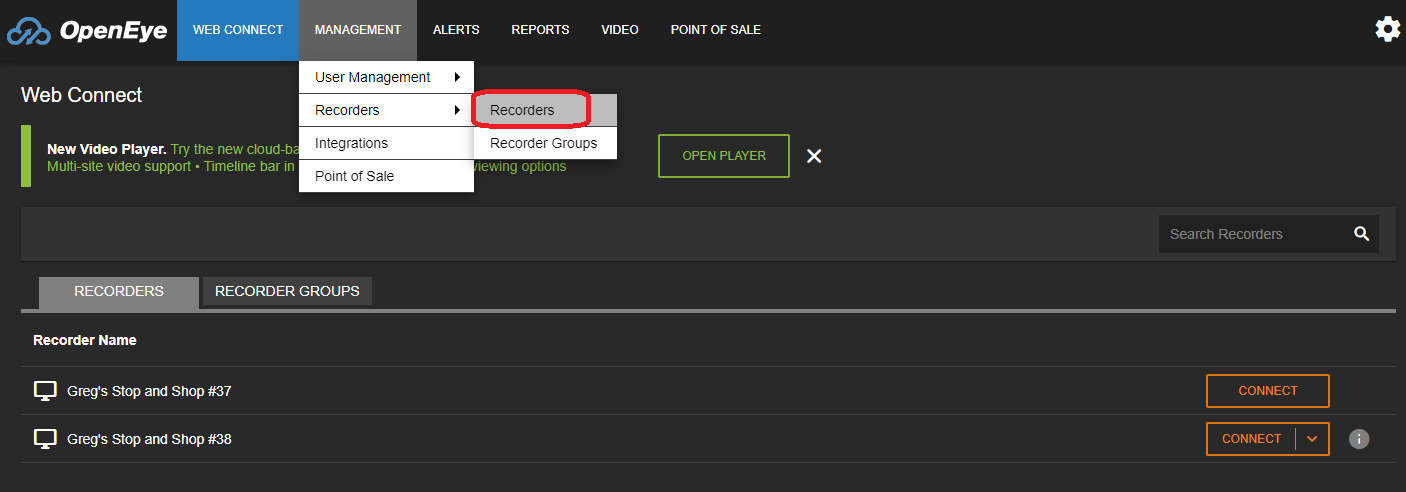
- Click Edit on the recorder you want QSRSoft to access.
- In the Location ID field, enter any alphanumeric value that you would like to use. Make sure to note the ID and provide it to QSRSoft.