RAID Maintenance (Linux OS)
Follow these steps to repair a Linux-based recorder with RAID1 or RAID5 array failure(s):
Repair a RAID1 Array:
- Identify the Drive in the Console
- Log in to the local console
- Go to Setup > Support Tools and click Launch Support Tools
- Click on the Terminal icon
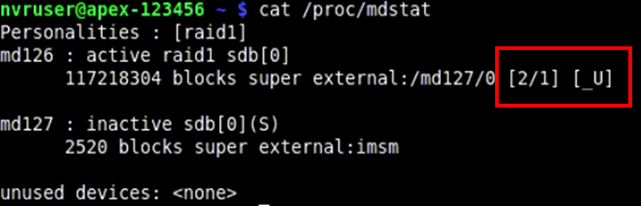
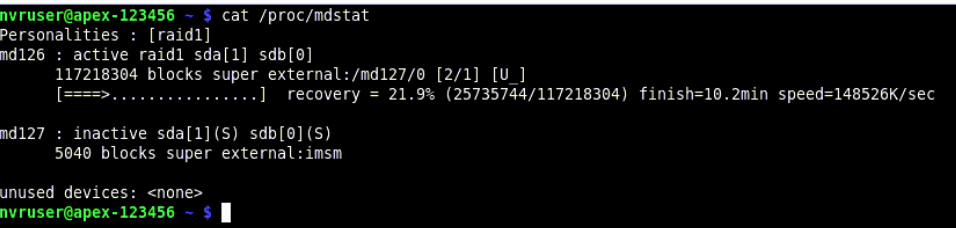
- From the terminal type in cat /proc/mdstat and hit Enter to view RAID1 status -
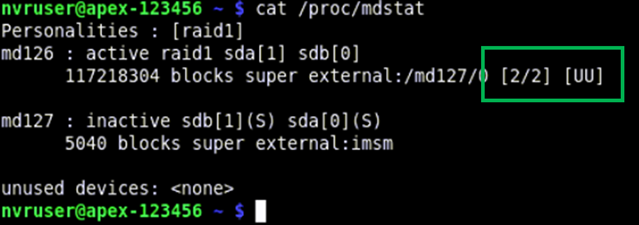
Note: Both storage devices are listed: md126 is the container, and md127 is the root storage.
Note: [2/2] [UU] indicates both drives are present and active. [2/1] [_U] indicates one drive is missing and the RAID1 array is in a Degraded state.
- To Identify which drive needs to be swapped out, enter the following command: lsblk -o NAME,MODEL,SERIAL,WWN,HCTL
Note: A RAID1 array should include two identical drives: sda and sdb
- Record the serial number of the listed drive
- Exit Support Tools and login. Go to Setup > Power Options and click Power Off
- Replace the Failed Drive
- Disconnect the power cord from the console and remove the chassis lid
- Locate the drives labeled 0 (zero) and 1 (one) on the SATA cables; disconnect the power and SATA cables and remove the drives.
- Check the serial number of each drive; the drive with the serial number matching the serial number you recorded should be reinstalled and the other drive should be replaced with an identical uninitialized drive.
- Reinstall the lid and reconnect the power cable.
- Use the Configuration Utility
- Press CTRL+I to enter the configuration utility. A banner will report the degraded volume
- Select the replacement drive to begin the rebuild
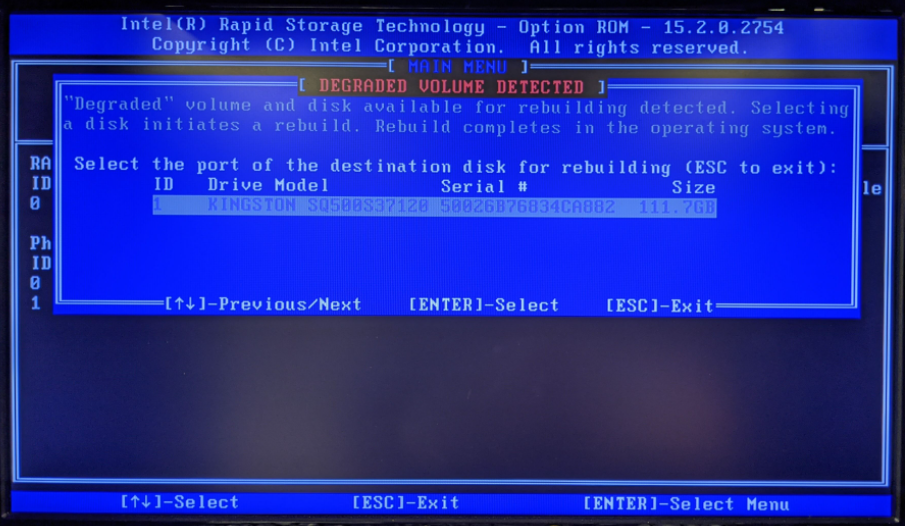
- Exit configuration utility
- Press CTRL+I to enter the configuration utility. A banner will report the degraded volume
- Use BIOS
- Press DEL to enter BIOS for setup
- Enter password: dvr4321
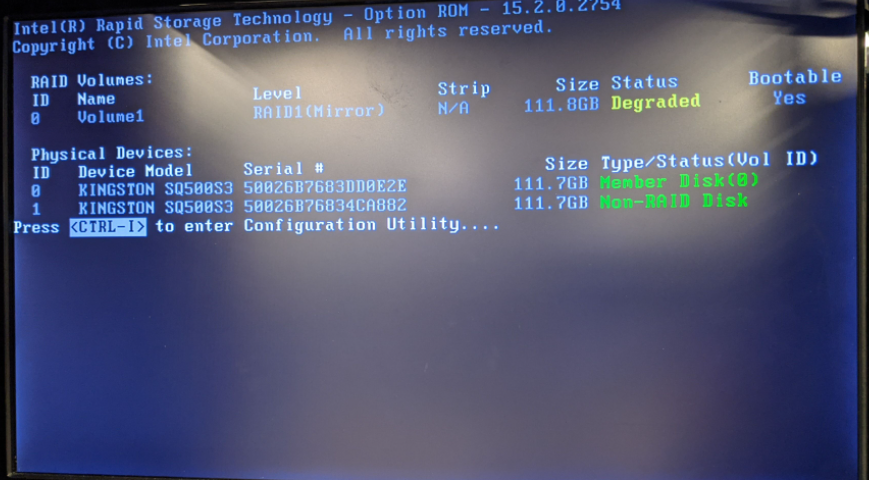
- Select Intel® Rapid Storage Technology
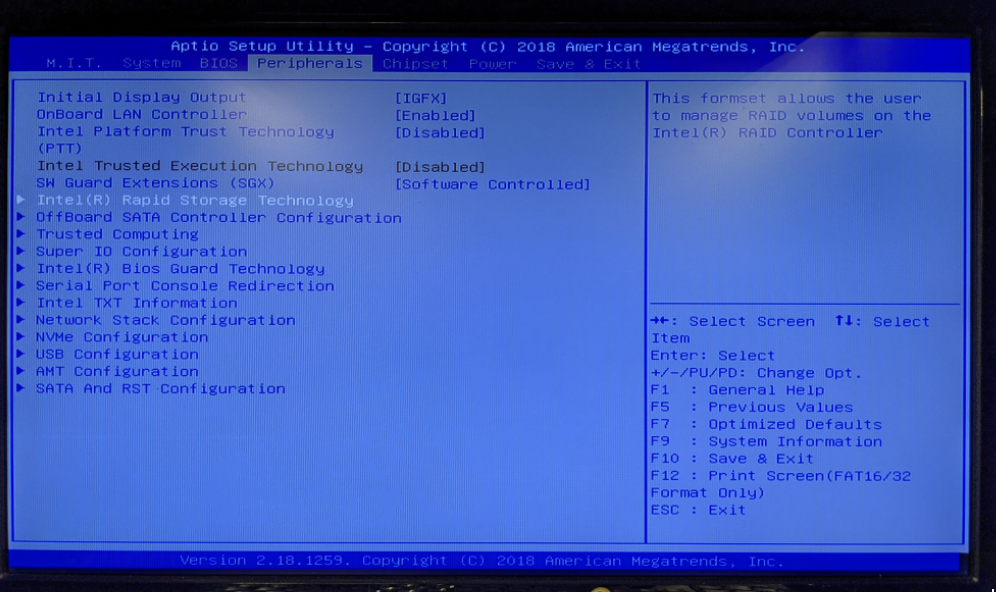
Note: The menu location of Intel RST may differ between motherboards
- Select degraded volume
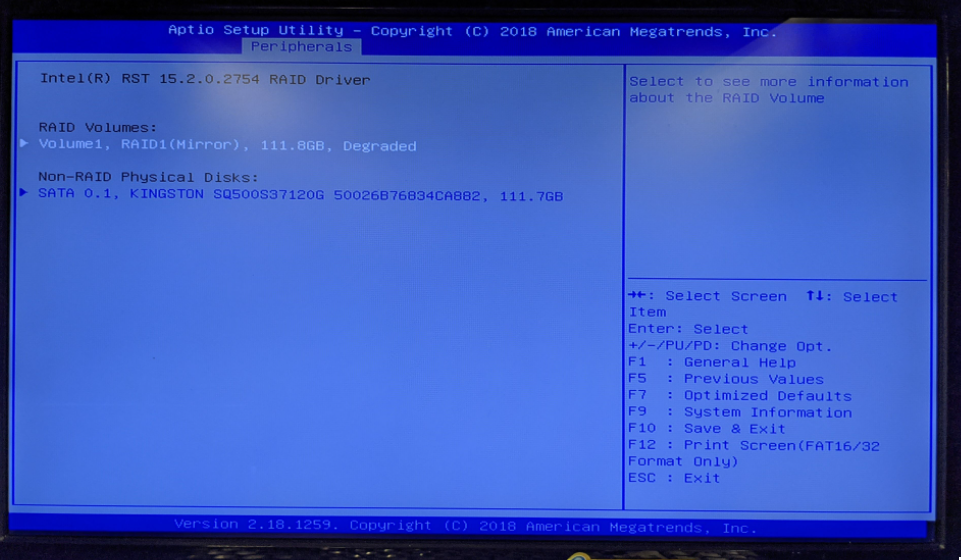
- Select rebuild then select the replacement drive
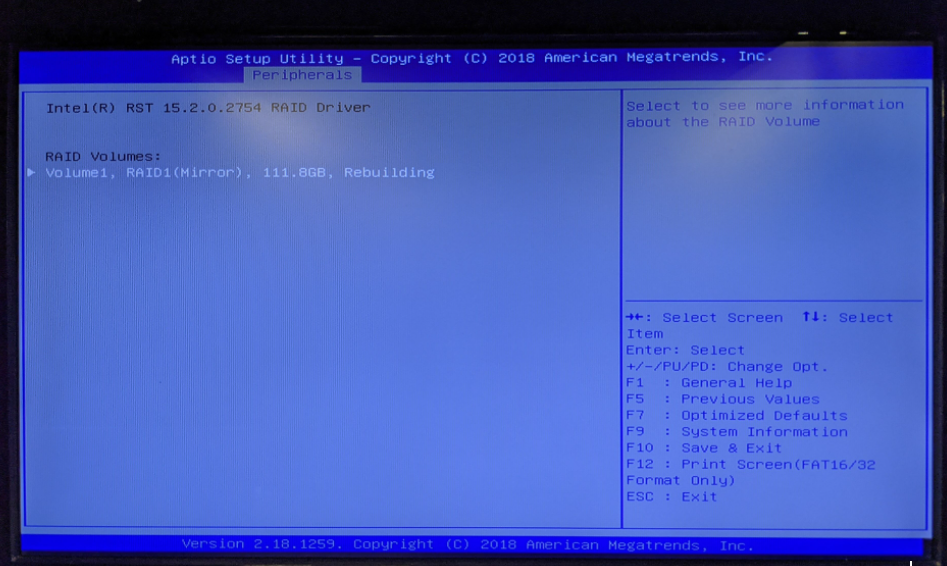
- Save and exit BIOS
- Confirm Rebuild
- Log back in to the console
- Go back to Setup > Support Tools and click Launch Support Tools
- From the terminal, type cat /proc/mdstat and hit enter to view the raid1 status which will display the time to complete the rebuild process
Note: Depending on the RAID size, the rebuild for the boot OS array should take approximately 15 minutes
- Allow the system to rebuild the array
- Once completed, the raid1 status will be "Normal"
Repair a RAID5 Array:
- Log in to the console
- Go to Setup > Support Tools and click Launch Support Tools
- Click on the Browser icon
- in the address bar, enter http://127.0.0.1:81 and log in using default credentials
Note: Default username is admin and password is 0000
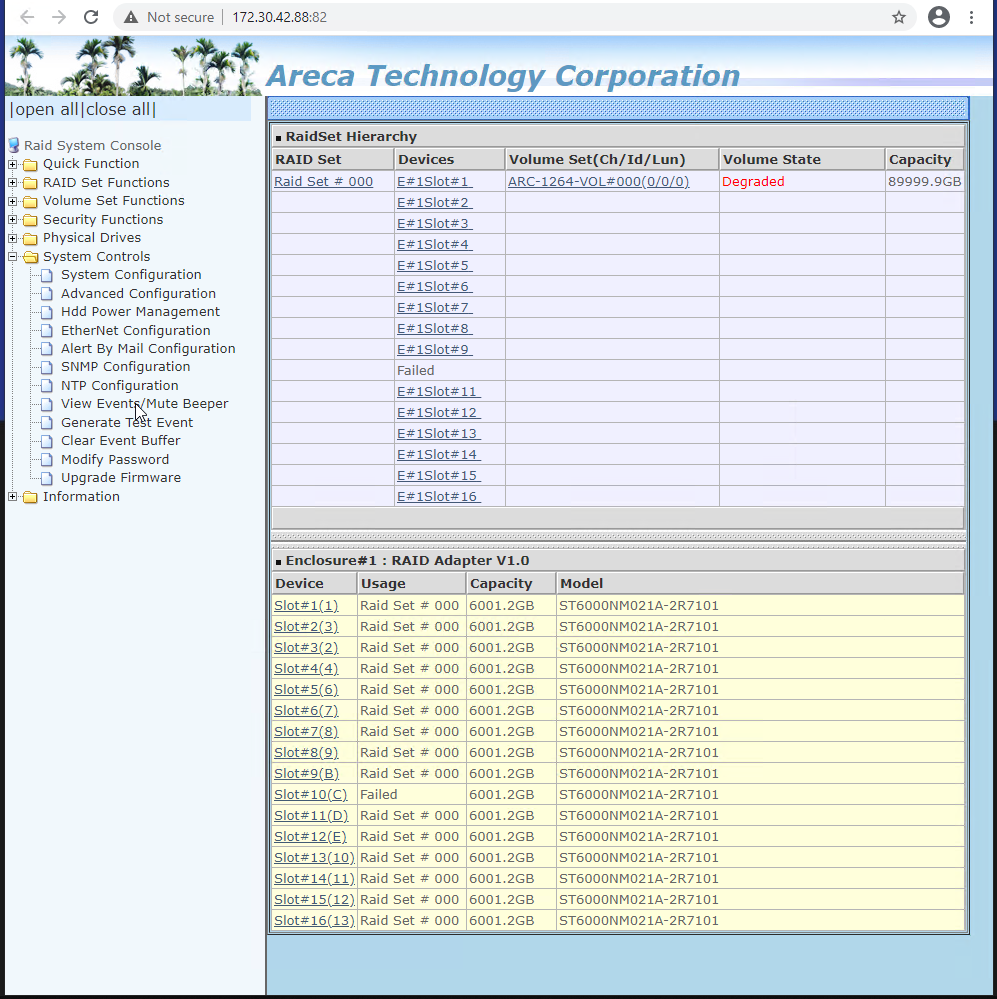
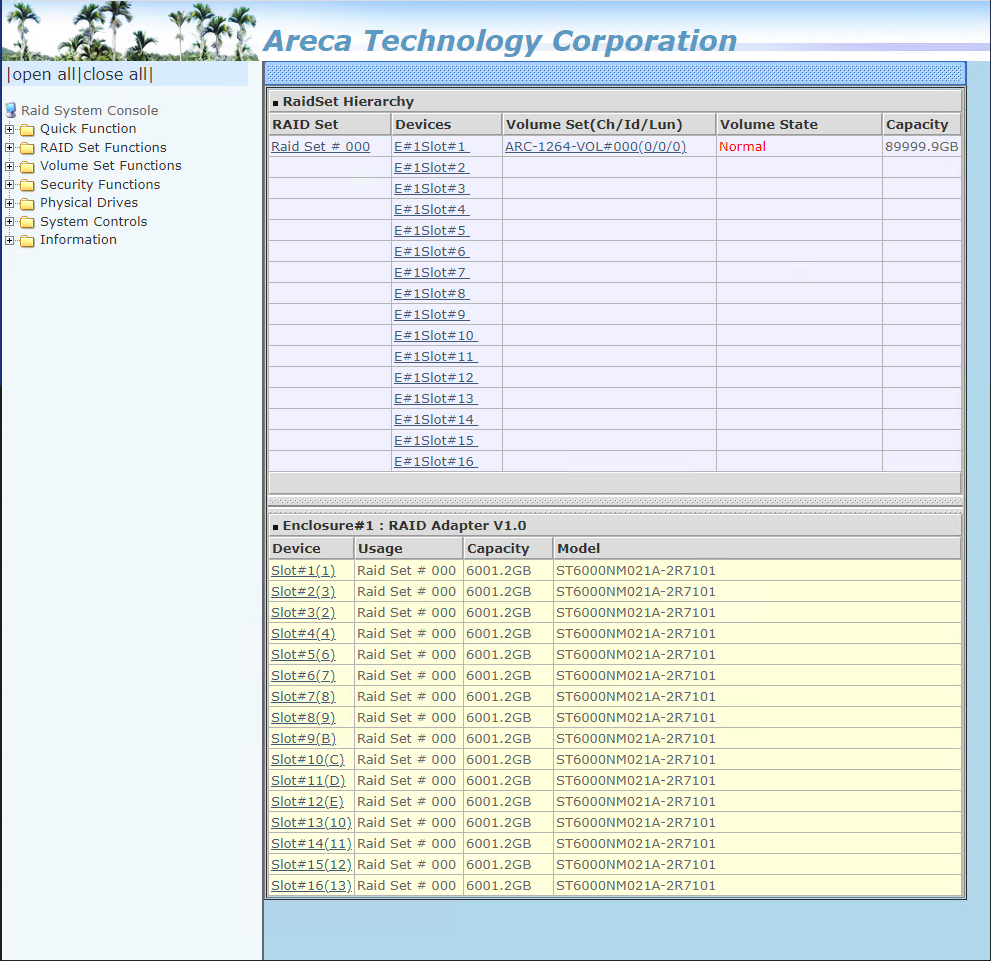
- Click or Expand SAS/SATA RAID controllers and select the system's controller

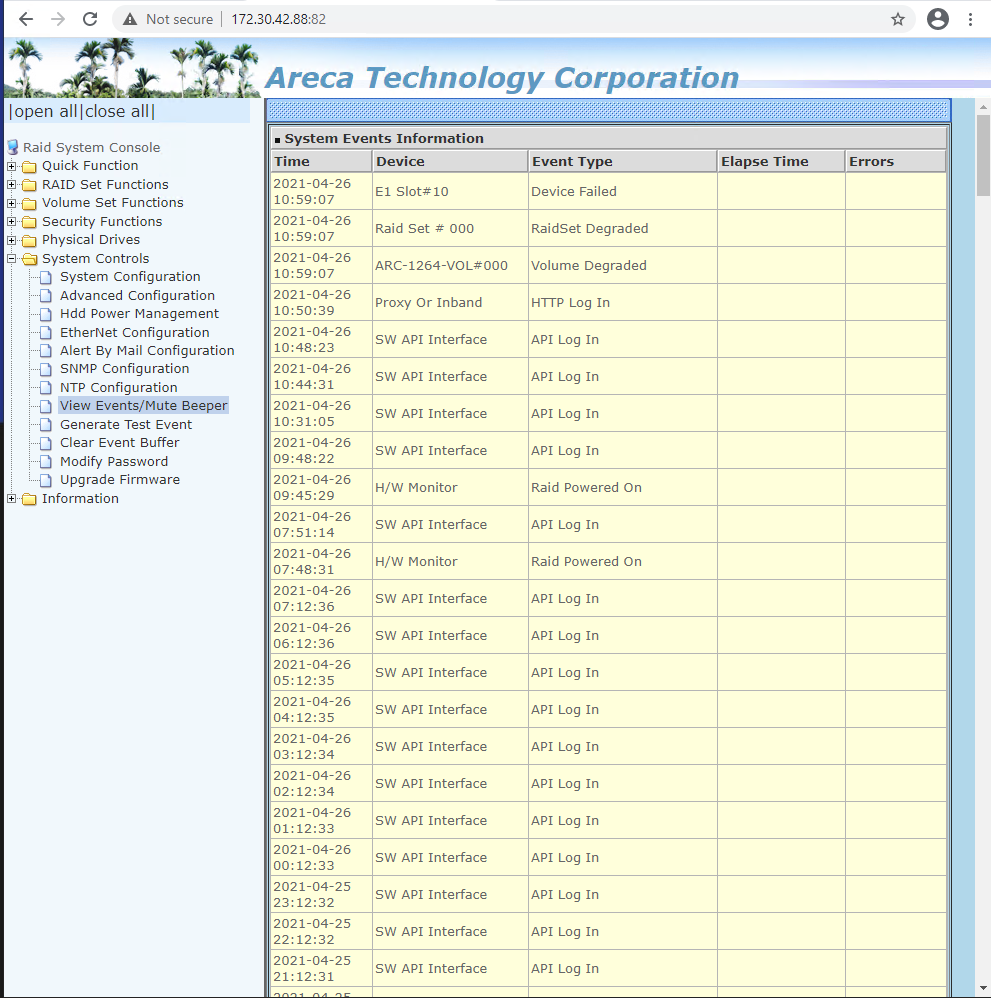
- The card configuration/status page will display the volume state of the array and list any failed drive in the Devices column
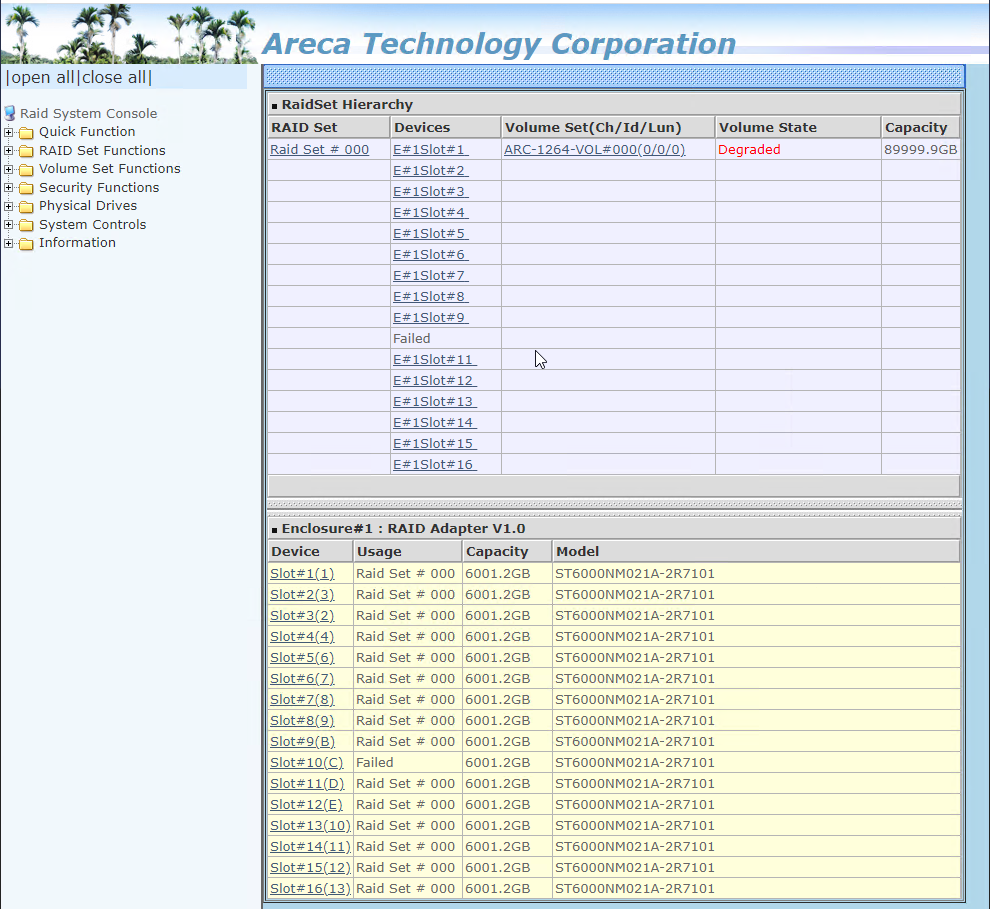
Note: Any disk in need of replacement will be listed as "Failed." An audible beep and a red light will indicate a failed disk
- To mute audio beeper, expand System Controls and click View Event/Mute Beeper
Note: Muting the beeper will display a log page with failure details
- Remove failed drive and install an uninitialized drive of identical make and model
Note: Array rebuild starts as soon as drive spins up and could take hours or days dependent on the size and activity of the array
Note: If rebuild does not automatically start see next section on how to Create a Hot Spare
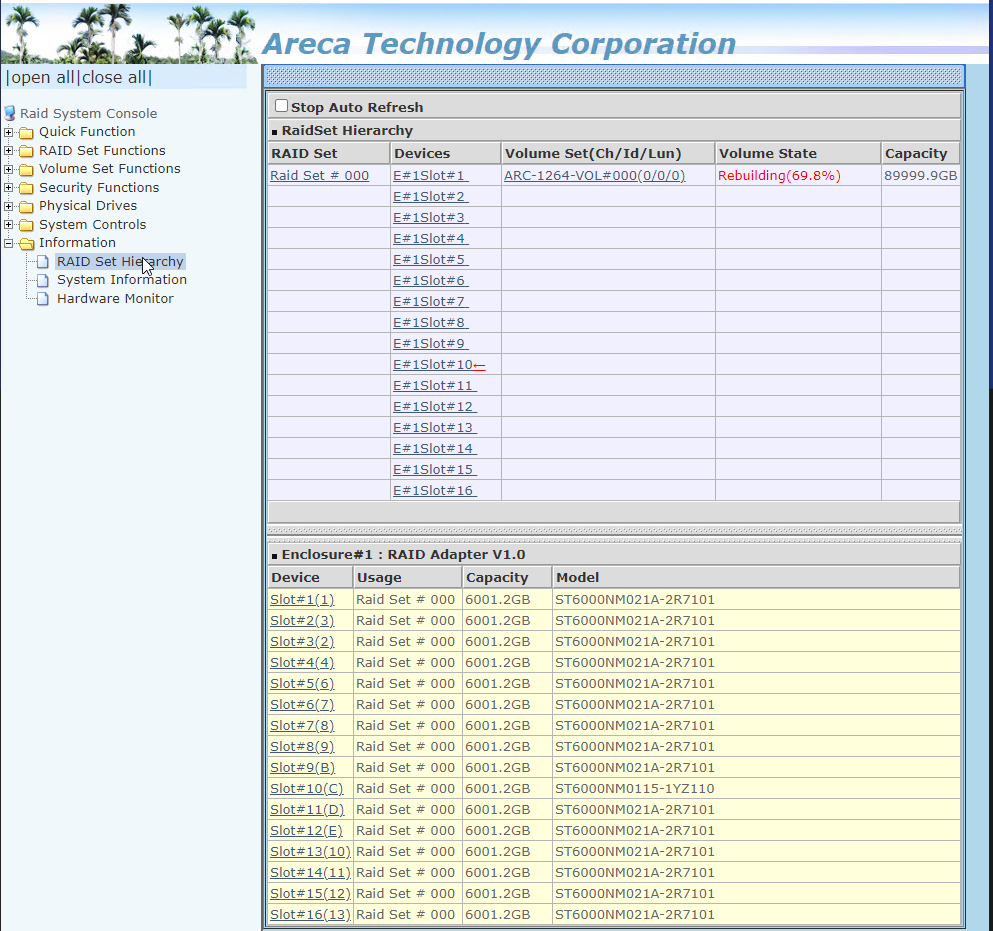
- When the rebuild is finished, the Volume State displays as "Normal"
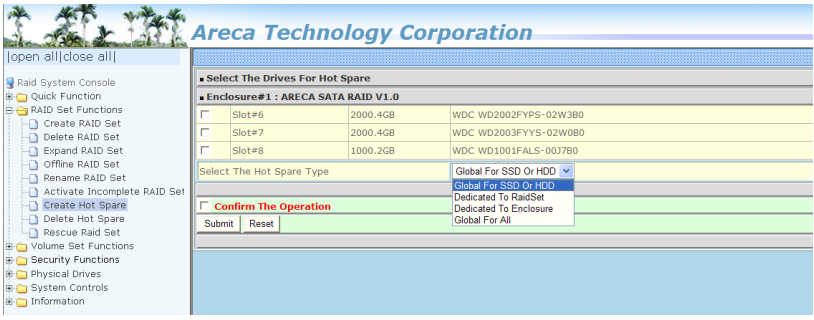
Create a Hot Spare:
Follow these steps if the automatic rebuild does not trigger after installing the replacement drive:
- Click RAID Set Functions
- Click Create Hot Spare
- Select the drive
- Select Global For All
- Click the Confirm the Operation checkbox and click Submit