RAID Maintenance (Windows OS)
Repair a RAID1 (Redundant Array of Independent Disks) Array:
-
Identify the Drive in the Console
- Log in to the console as NVRAdmin.
- Launch Intel® Rapid Storage Technology from the start menu.

- At the prompt, click Yes to view Status.
NOTE: If a failure is not detected, the message "Your system is functioning normally." will display under current status.

NOTE: If a failure is detected, the message "Your system is reporting one or more events, and data may be at risk. Refer to the details below for more information" will display under Current Status.

- If a failure is reported, click the top drive icon under Storage System View.
- Make note of the Controller, Port location, and Serial number of the working drive.

- Click on the icon for the failed drive.
- Make note of the Serial number.

NOTE: In case of a failed drive, Controller and Port location will display as "Unknown."
-
Replace the Failed Drive
- Disconnect the power cord from the console and remove the chassis lid.
- Locate the drives labeled 0 (zero) and 1 (one) on the SATA cables; disconnect the power and SATA cables and remove the drives.
- Check the serial number of each drive; the drive with the serial number matching the serial number you recorded should be reinstalled and the other drive should be replaced with an identical uninitialized drive.
- Reinstall the lid and reconnect the power cable.
-
Confirm the Rebuild
- Log back in to the console.
- Go back to Intel® Rapid Storage Technology Status page.
- Click Rebuild to another disk.

- Select replacement drive on the Rebuild Volume pane.

- Click Rebuild.

- When the rebuild is finished, the Current Status displays the message "Your system is functioning normally."

NOTE: Array rebuild starts as soon as the drive spins up and can take up to 15 minutes to complete.
Repair a RAID5 Array
- In the Windows Start menu, click to expand the MRAID folder and launch ArcHttpSrvGUI.

- Click Yes at the prompt.

- The application will open in the System Tray. Open the System Tray and double click the icon to launch in a web browser.
- Click to expand SAS RAID Controllers and select the listed controller to open the web management interface.

- Log in using the default credentials; Username: admin Password: 0000
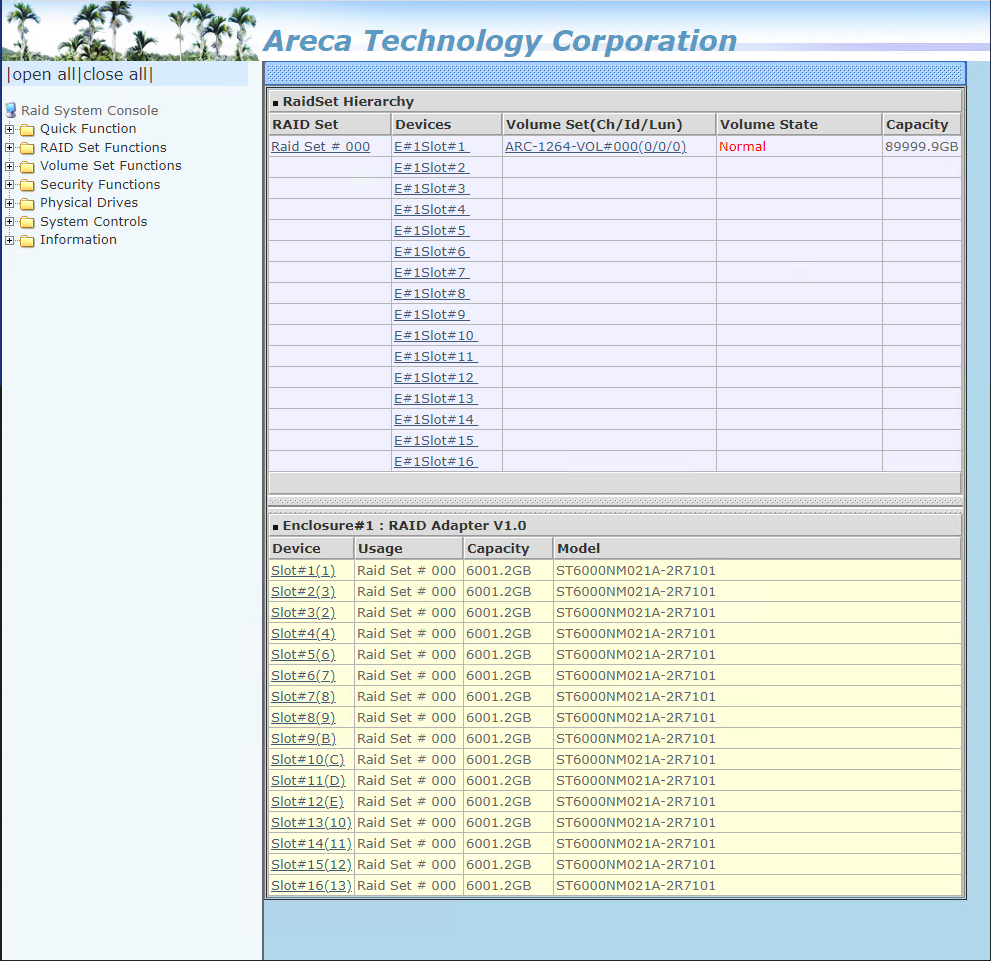
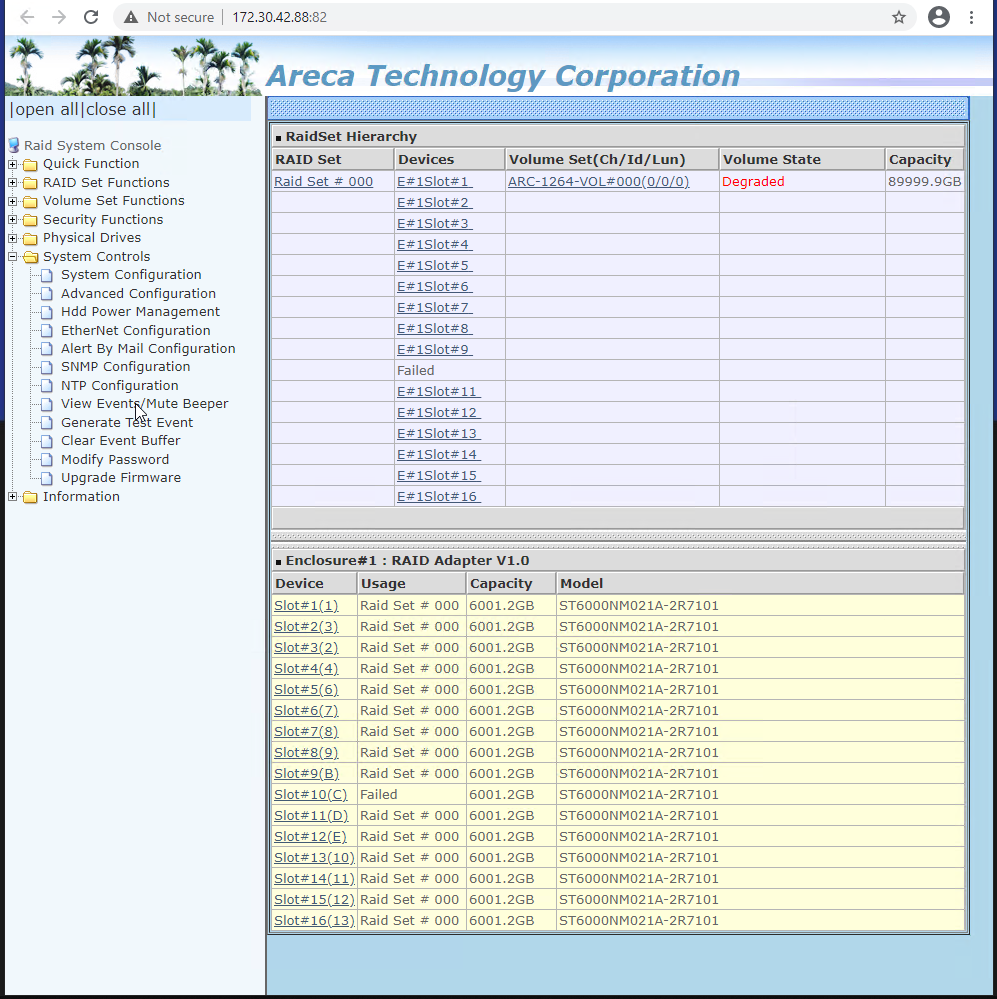
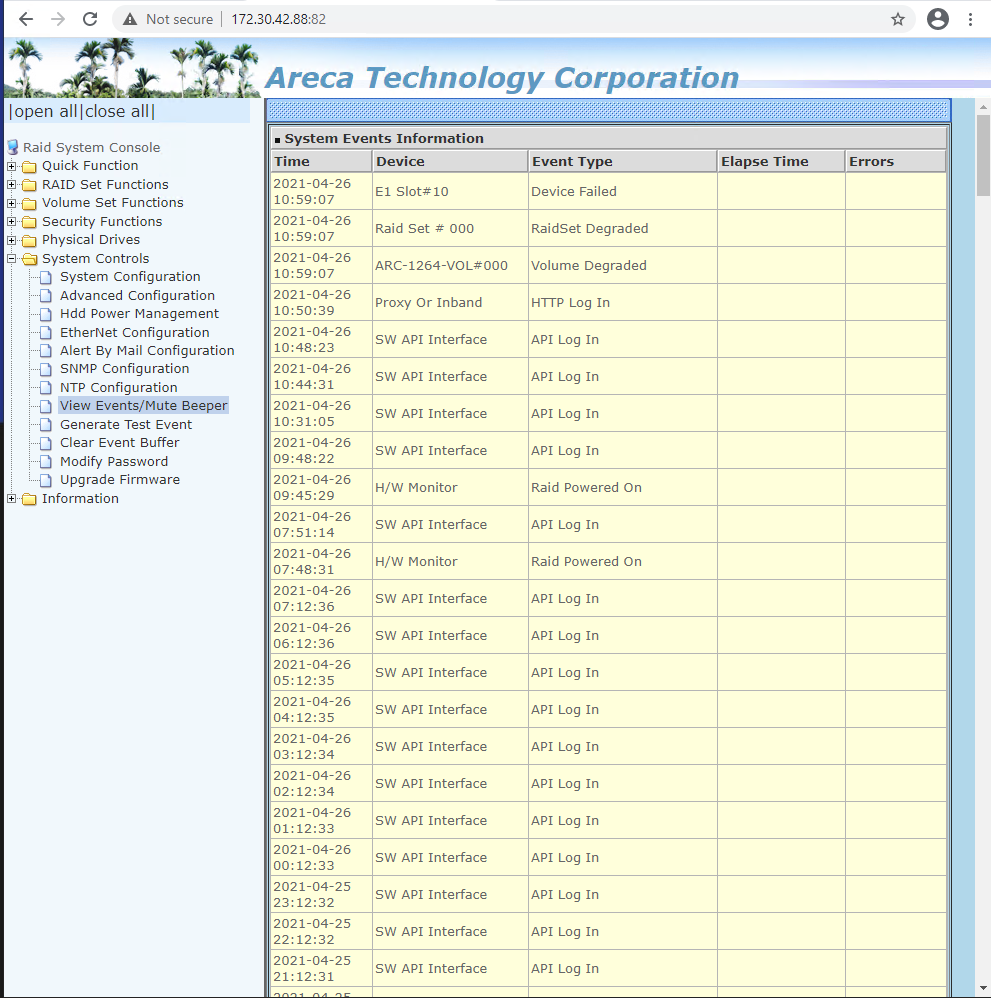
- The card configuration/status page will display the volume state of the array and list any failed drive in the Devices column.
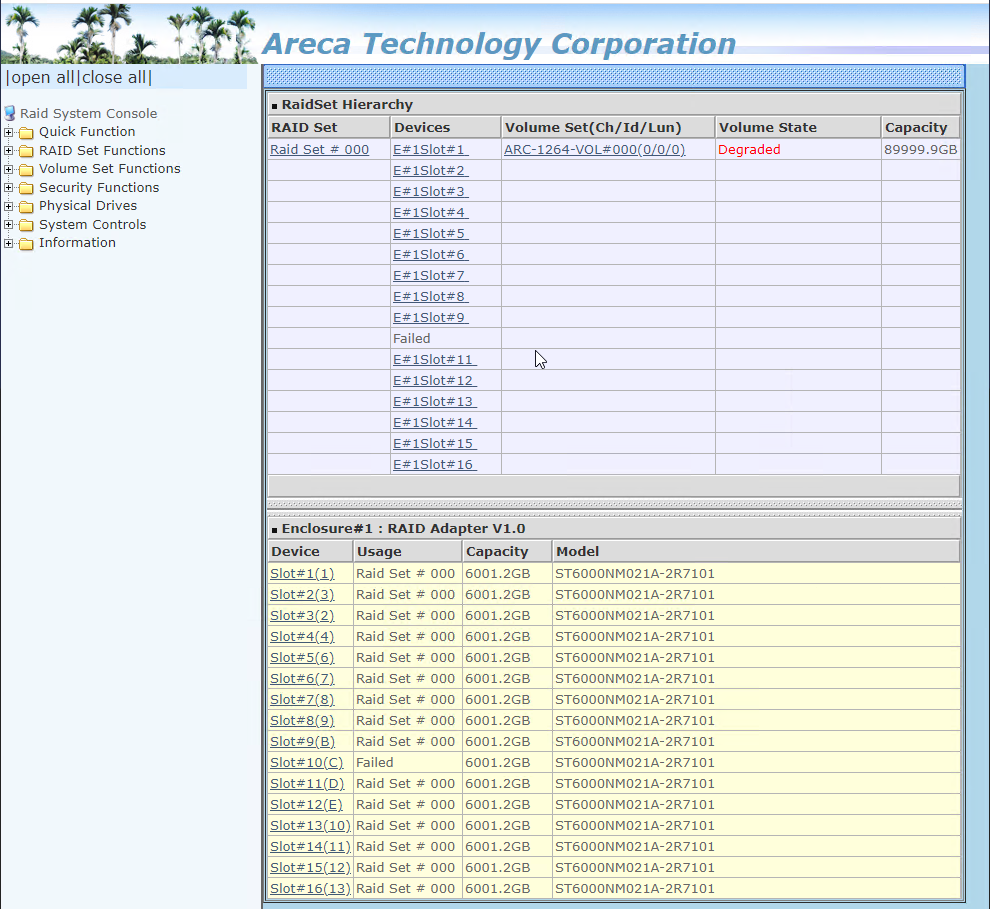
NOYE: Any disk in need of replacement will be listed as "Failed." An audible beep and a red light will indicate a failed disk.
-
To mute audio beeper, go to System Controls and click View Events/Mute Beeper.
NOTE: Muting the beeper will display a log page will failure details.
- Remove failed drive and install an uninitialized drive of identical make and model.
NOTE: Array rebuild starts as soon as drive spins up and could take hours or days dependent on the size and activity of the array.
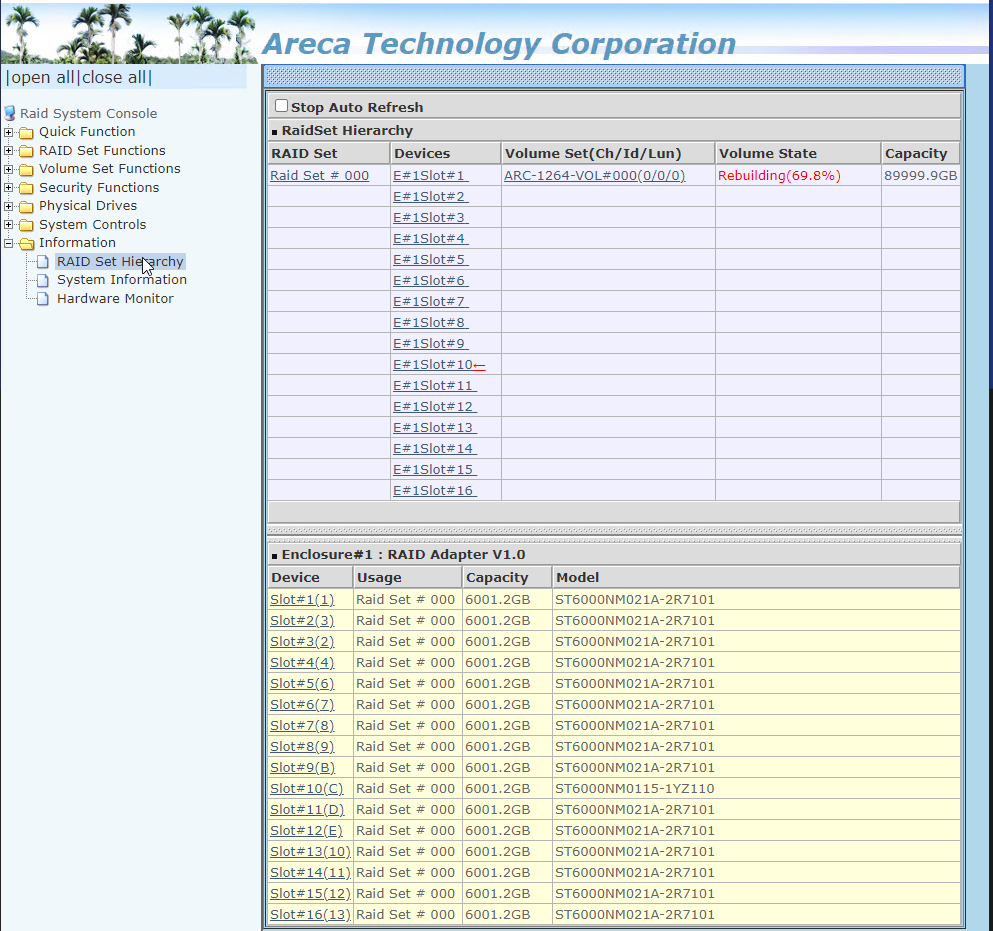
- When the rebuild is finished, the Volume State displays as "Normal".