Timeline Search in Command Station
Timeline Search Screen
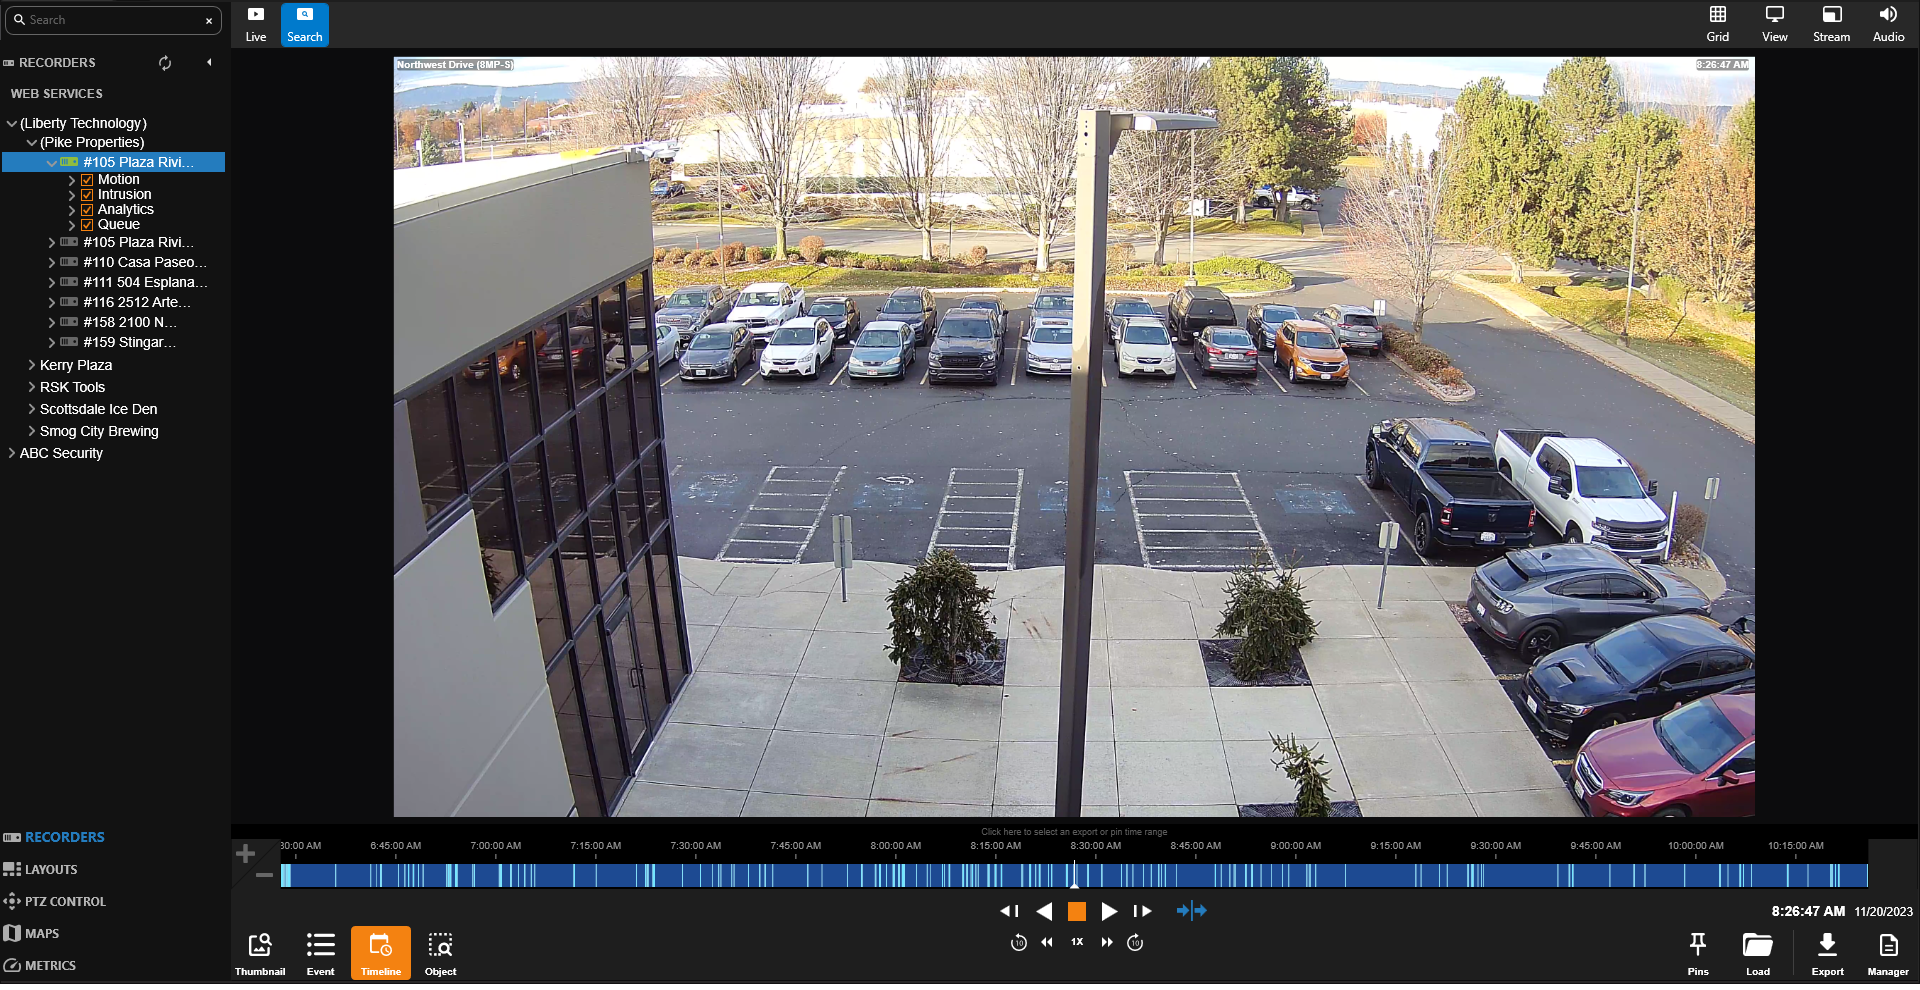
Timeline is the default search option in Command Station. Recorded video is represented chronologically on a timeline, allowing you to quickly see when motion events have occurred. This also allows you to jump directly to a time with a click rather than manually inputting a time.
Timeline Search Playback Controls

- Pause / Stop – Pause or Stop the video playback.
- Skip Backward – Move to the previous frame of recorded video.
- Play Backward – Play recorded video backward.
- Play Forward – Play recorded video forward.
- Skip Forward – Move to the next frame of recorded video.
- Play Events - Play through only the events (indicated in light blue on the Timeline Bar)
- Playback Speed – Control the speed of video playback.
- Jump Video – Jump video backward and forward in 10 second intervals.
NOTE: If only motion events are collected on the recorder, they will display on the timeline as light grey. The colors displayed on the timeline bar include:
- Dark Blue = Continuous recorded video
- In most cases this is a lower resolution and frame rate
- Light Blue = Motion / Event footage
- In most cases higher resolution and frame rate
- Light Grey = Motion / Event footage only
- In most cases higher resolution and frame rate

- Pins Manager – Mange exported pins
- Load – Load archive files in the archive viewer.
- Export Manager – Manage your video exports.
- Export – Export still images and recorded video as seen in the current search playback.

- Export Bar – Quickly export a clip of video with the click and drag feature across Timeline Search.

- Date and Time Picker – Use to specify a date and time to search recorded video.

- Now – Jump video to current day and time.
Keyboard Controls for Video Playback
The arrow keys and space bar can be used to control video playback.
Space Bar – pause/play video
While video is playing:
Left Arrow – reduce playback speed
Right Arrow – increase playback speed
While video is paused:
Left Arrow – advance frame left
Right Arrow – advance frame right
Add Camera(s) to the Search Viewing Pane
When the Search screen is opened, the cameras that were in the Live Screen Viewing Pane will appear. However, cameras can be arranged separately in the Search screen to facilitate the desired search.
In the Search screen, double-click a camera in the Recorder List.
—OR—
Drag the recorder connected to the desired cameras from the Recorder List to the Viewing Pane to display all connected cameras.
—OR—
Click and drag a camera from the Recorder List to the Viewing Pane.
Customize the Camera Tile Grid
Changing the grid of the viewing pane allows for viewing multiple cameras. All cameras will begin playback of recorded video at the time specified on the horizontal Timeline Search Bar.
- Click the Grid button.
- Click on the desired camera grid.
- Assign the available cameras to the desired Camera Tiles.
Select Date and Time
For a more convenient search process, you are able to select a specific date and time to begin recorded video playback.
- In the Search screen, click the Time and Date link in the Timeline Search Bar.
- Choose a date within the selected month.
- Use the up and down arrows to specify a time on the selected date.
- Click Save.
Once a specified time and date has been selected, slide the Timeline Search Bar left or right to change the playback start time if desired.
Perform a Timeline Search
- If desired, customize the Camera Tile layout or screen grid in the Search screen of the Viewing Pane.
- Click and drag the timeline to move to a desired time.
-OR-
Double-click directly on the desired time on the timeline.
- Use the Play / Pause, Stop, Play Forward / Backward, and Skip Forward / Backward playback controls to control video playback during your search.
Play Back Recorded Audio in Timeline Search
- To play back audio in Search, select a channel in the tree view in Timeline Search.
- Click the speaker icon next to the name of the channel to enable playback.
- Volume can be adjusted in the top right corner of the search window.
- Click Play in Timeline Search to begin playing back audio.
NOTE: Only channels with audio enabled for recording will show the speaker icon next to the camera name.