Recorder Installation
Connections
Connect the mouse and cameras to a recorder before powering it on.
Mouse
To attach the mouse to your recorder, connect the mouse to a USB port located on the back of the machine.
Mouse actions:
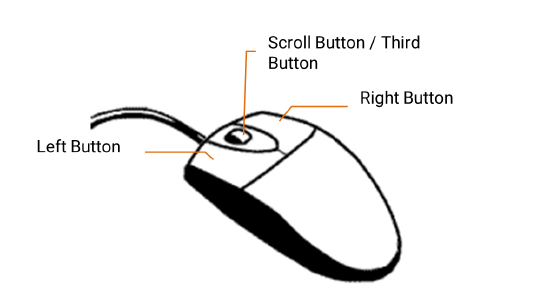
Click means to position the mouse cursor over an item and to single click the left button.
Right click means to position the mouse cursor over an item and to single click the right button.
Double-click means to position the mouse cursor over an item and to click the left button twice.
Select or Check means to position the mouse cursor over a radio button, checkbox, or list item and click on it.
The scroll wheel in between the two buttons is used for added navigation functionality. By moving the wheel with index finger (scrolling), quickly move through multiple pages, lines, or windows. The wheel may also function as a third button allowing the user to quickly click or double-click an icon or a selected item.
Monitor
An HD Out / HDMI OUTPUT / HDMI® Port connection is available to connect a monitor:
 HDMI® Output
 Display Port
 VGA Output
Attach the monitor(s) to the rear of the recorder using the cable supplied by the monitor manufacturer. Refer to the monitor manual for detailed information on how to set up and use it.
NOTE: In some instances, the HDMI® port will not initialize the monitor to display the BIOS. Using the Display Port output will resolve this issue.
NOTE: The monitor must be capable of a minimum screen resolution of 1024x768 and support 32 bit color.
Connecting Cameras Using a PoE Port
Connect PoE IP cameras to recorders equipped with an on-board Power over Ethernet (PoE) switch. OpenEye and other ONVIF Profile S IP cameras can be connected to the recorder using the PoE switch and begin displaying video immediately (some additional configuration may be necessary).
Connect one end of the camera and the other end of the cable to the network switch or recorder.
Check the status of the link indicator and activity indicator LEDs. If the LEDs are unlit, check the LAN connection.
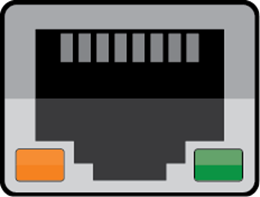
- The Orange activity light flashes to indicate network activity.
- The Green link light indicates a good network connection.
Connecting Cameras Through the Camera Network
Apex automatically detects ONVIF Profile S compliant IP cameras if:
- The cameras are set to a discoverable IP address - 192.168.51.2 – 254
This is easily accomplished using Network Camera Manager (NCM):
i. Download NCM from OpenEye.net.
ii. Connect your PC to the switch with your cameras.
iii. Enable ONVIF detection for 3rd party cameras.
iv. Input login credentials in Cameras Credentials section.
- Camera(s) and Camera Network Port are connected to a DHCP network:
If the camera is a 3rd party device, it needs to be set to DHCP. If using a DHCP server, the IP address of the Camera Network Port needs to be set to a static IP address within that range.
NOTE: Setting a static IP address on a DHCP network should only be done by a network administrator.
NOTE: If using both networks, Client and Camera, only the Client network should have a gateway.
Logging In and Registering the Recorder
See Setup Wizard for logging into the server software and connecting to OpenEye Web Services (OWS).
After completing the Setup Wizard, and logging in to OWS, see Registering a Recorder to an OWS Account to connect the recorder to OWS.
Operating the Recorder
Turning On the Recorder
- Press the power button on the front of the recorder.
- The recorder will run a series of self-tests. If asked to respond to any messages, follow the instructions carefully.
Turning Off the Recorder
- Go to Setup and select Power Options.
- Click Power Off.
System Recovery
System Recovery, Re-Image, and Image Update
Apex System Recovery Instructions
NOTE: Contact support for more information about installation and system recovery.