OE-C1014D4-S Quick Start Guide
Click the link if you need to download the original hardcopy of the OE-C1014D4-S Quick Start Guide included with the boxed contents.
Box Contents
OpenEye C1014D4-S cameras come with self-tapping screws and plastic anchors, mounting template, a torx tool, and a waterproof cable connector. Identify the following components to make sure everything has been properly included with your new recorder. If any of the following items are missing, contact the dealer to arrange a replacement.
|

OE-C1014D4 -S Dome Camera
|
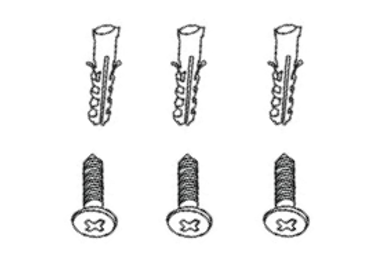
Self-Tapping Screws and Plastic Anchors x3
|
|

Mounting Template
|

Torx Tool
|
|
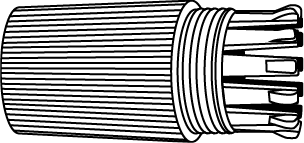
Waterproof Cable Connector
|
|
Connections
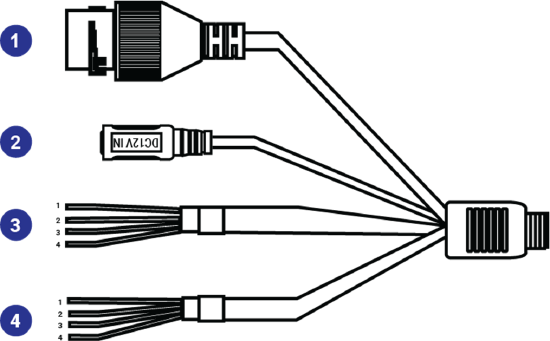

| 1 |
RJ45 |
For network and PoE connections |
| 2 |
Power (12vDC) |
Power connection |
| 3 |
Audio I/O |
Gray |
Audio Out |
| Purple |
Ground |
| Green |
Audio In |
| Brown |
Ground |
| 4 |
Alarm I/O |
Yellow |
Alarm Out + |
| White |
Alarm Out - |
| Orange |
Alarm Input |
| blue |
Ground |
| 5 |
Reset |
To restore the camera to factory defaults:
- Disconnect power for 30 seconds.
- Reconnect power and wait 30 seconds.
- Press and hold the reset button for 20 seconds.
|
| 6 |
MicroSD Card Slot |
Supports up to 512GB microSD card for Edge storage.
Do not add or remove the microSD card when the camera is powered on.
|
Power Connection
For an adequate power connection, use a 12vDC adaptor. Alternatively, you can power the camera by PoE if a Power Sourcing Equipment (PSE) switch is available. Ensure that the camera’s power cable is correctly and firmly connected.
NOTE: OpenEye recommends against using more than one power source at a time. Do not use a PoE power source when providing the camera with 12vDC power.
If using Power over Ethernet (PoE), make sure Power Sourcing Equipment (PSE) is in use in the network.
Default Username and Password
*OpenEye IP cameras ship without a default password.
Username: admin
The admin user password can be set using the following methods:
- OpenEye recorders running Apex 2.6 or newer will automatically set a new unique password when added in setup, if a new password has not already been set.
NOTE: You can set your Default Camera Password under the General Settings page within Setup > System Settings > General Settings. For instructions on defining your unique camera password, visit Default Camera Password.
- Connect to the camera directly through a Web Browser and follow the onscreen prompts.
- Use the Network Camera Manager (NCM) Utility.
NOTE: More on the NCM Software can be found at Network Camera Manager.
NOTE: Refer to your recorder manual or quick start guide for instruction on adding cameras.
Assigning an IP Address
OpenEye IP cameras are set to DHCP by default. If a DHCP server is not detected after 2 minutes, the camera will default to IP address 192.168.51.2. If you are not using a DHCP server, NCM will allow you to batch configure a static IP address. The default IP address for the camera network on your recorder is 192.168.51.1.
Selecting multiple cameras and entering IP address 192.168.51.2 will set an IP address on all selected cameras, starting at 192.168.51.2 and increase per camera.
- Open the Network Camera Manager application.
- Select applicable camera(s).
- Input starting IP address, Subnet Mask, Gateway, DNS.
- Apply changes.
- Wait 60 seconds before refreshing NCM.
NOTE: See Network Camera Manager for more information.
Connecting to the IP Camera
To access the camera setup menu, you need to open Network Camera Manager (NCM) utility. NCM is pre-installed on all OpenEye Recorders and is also available for download on the OpenEye website for installation on your personal computer or laptop.
- Open Network Camera Manager.
- Locate your camera on the Network Camera Manager list.
- To open the web browser, select the camera and click LOAD.
Product Features
Cameras
| Maximum Resolution |
2688 x 1520 |
| Frame Rate at Maximum Resolution |
30FPS @ 4MP | H.264/H.265 |
| Total Streams |
2 |
| ONVIF |
Profile S / G / T Compliant |
| Day / Night |
True Day / NIght w/ IR-Cut Filter |
| Wide Dynamic Range |
True WDR @ 4MP; 120dB |
Environmental and Power
| Power Consumption |
4.5W Max |
| Input Voltage |
12vDC / PoE |
| Pan / Tilt / Rotate |
Pan: 0° ~ 360°
Tilt: 0° ~ 68°
Rotate: 3° ~ 360°
|
| IP Rating |
IP67 |
| Impact Rating |
IK10 |


