Network Camera Manager
Network Camera Manager Software
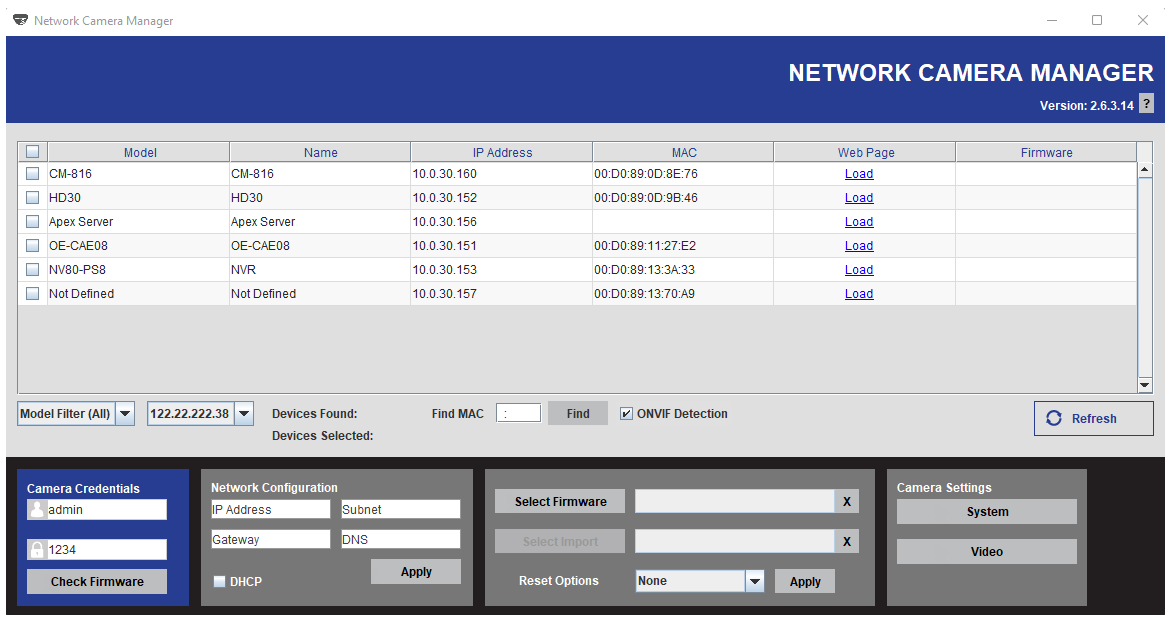
OpenEye’s Network Camera Manager (NCM) is a software utility which allows users to quickly and easily configure OpenEye IP Cameras. NCM allows users to update passwords, configure network settings, adjust image and video settings, update firmware, and more on one or hundreds of cameras at once.
All OpenEye Recorders have NCM installed before leaving the factory. NCM is also available for download from the OpenEye site at Network Camera Manager for installation on your personal computer or laptop.
Launching Network Camera Manager
Windows Platforms
Network Camera Manager can be found on the desktop.
Linux Platforms
In the Settings menu, go to the Cameras section and select the Advanced button.
For additional steps, see Launching Network Camera Manager.
Finding Network Devices
When launched, NCM will automatically begin scanning the network adapters for IP devices.
Click Refresh to rescan for new devices.
Best Practice: To narrow your search by Camera Model or Network, use the Model Filter and Networks dropdowns.

A Find MAC Address search is also available if you are looking for a specific device.
Enable ONVIF Detection to expand discovery to include supported ONVIF devices.
Viewing Network Device Web Page
- Click Load in the row of the device.
- Enter the Username and Password for the device.
Camera Credentials
Username and password are required to make changes to selected devices with Network Camera Manager. Change the password in Password Configuration.
Network Configuration
Set a static IP address on a camera or change the camera to DHCP.
- Check the box next to a camera or cameras and manually enter an IP Address, Subnet, Gateway and DNS for the camera.
NOTE: Selecting multiple cameras and entering a Starting IP address will set an IP address on all selected cameras, starting at the specified IP address and increasing by 1 per camera.
-OR-
Check DHCP
- Click Apply.
Get a Device Firmware Version
- Check the box next to the camera.
- Click Check Firmware to get the device firmware version.
Update a Device Firmware Version
- Check the box next to the camera.
- Click Select Firmware to get the device firmware version.
- Browse and navigate to the firmware file.
- Select Import and navigate to a config file.
- Use the dropdown to choose from the Reset Options.
- Click Apply.
Reset Options
- None - System will not reset after installing latest firmware.
- Partial Restore - Reset all settings after installing firmware excluding network settings.
NOTE: Selecting Partial Restore will retain network settings and the Admin user password on selected cameras.
- Full Restore - Reset all settings after installing firmware including network settings.
NOTE: Selecting Full Restore will erase the Admin user password on selected cameras.
Camera Settings
System
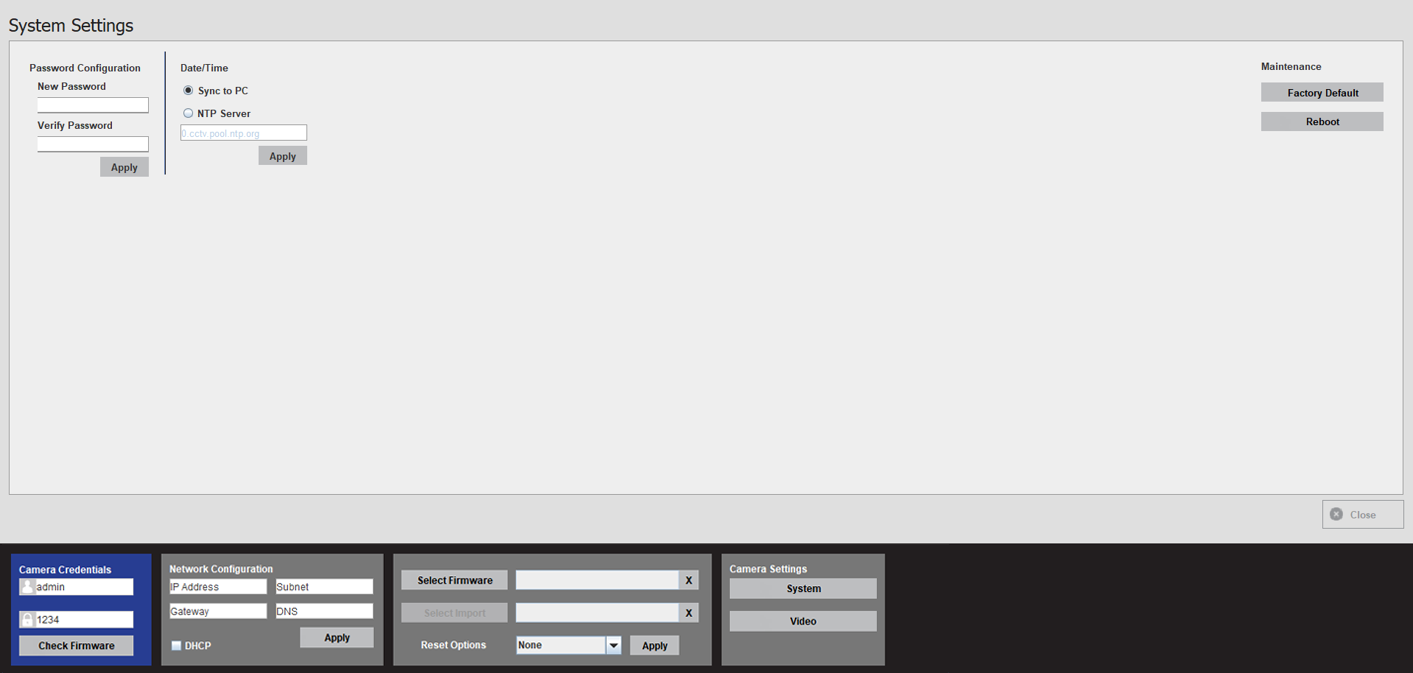
The System Settings menu allows users to update passwords, specify the Date / Time source, and perform maintenance such as rebooting and completing a partial or full factory default for selected cameras.

Password Configuration
Enter a New Password and then Verify Password. Click Apply to change the password.
Date / Time
Sync to PC - Camera date and time will be the same as your PC's date and time.
NTP Server - Select and enter the address of the NTP server you want to sync with. Click Apply.
Click Apply after changing the selection.
Maintenance
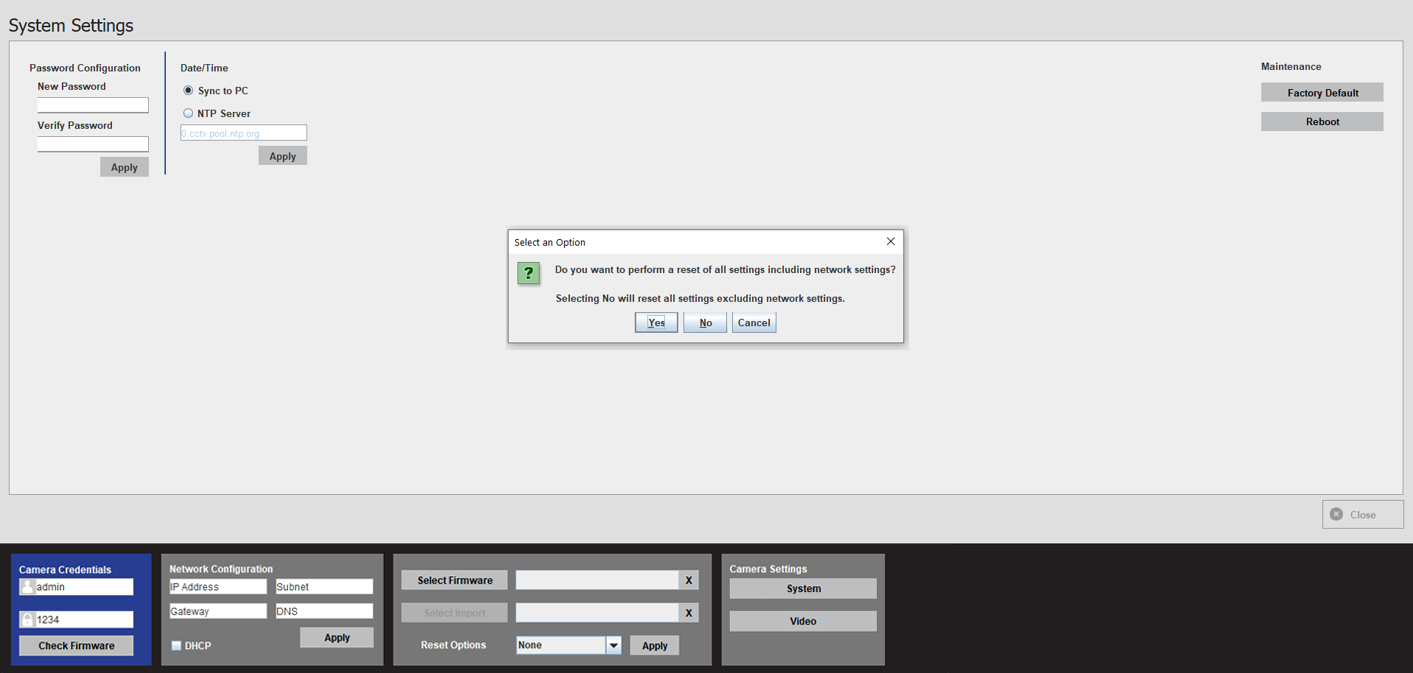
Factory Default - Return device to original factory settings.
NOTE: Selecting Factory Default will prompt you to confirm your choice:
Yes - Reset all settings including network settings.
NOTE: Selecting Yes will also erase the Admin user password on selected cameras.
No - Reset all settings excluding network settings.
NOTE: Selecting No will retain network settings and the Admin user password on selected cameras.
Reboot - Reboot selected cameras.
Video
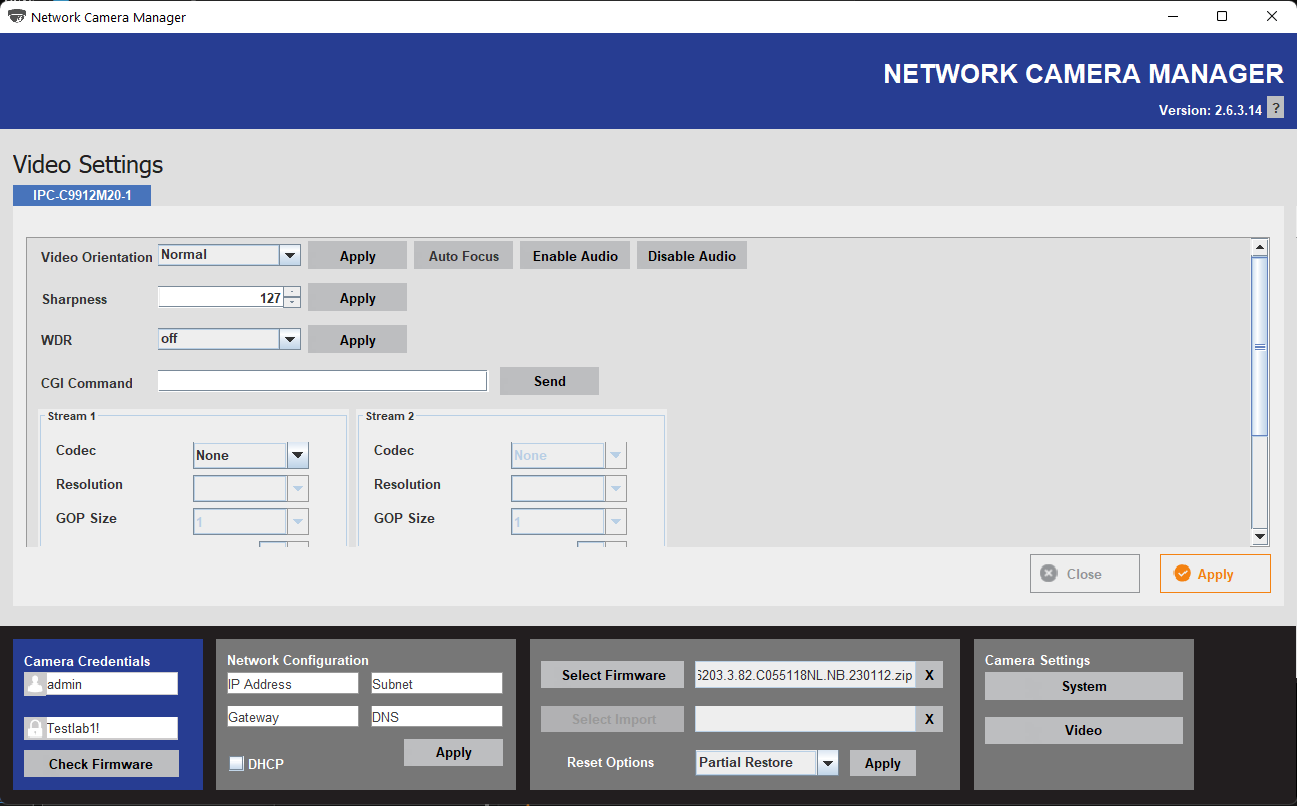
The Video Settings menu allows users to adjust select settings based on selected cameras, including video orientation, sharpness, WDR, codec, resolution, GOP, FPS, and quality.
- Use the buttons and dropdown menus to configure the available settings.

To make changes to another camera, click the camera model tab at the top of the screen.


