Using Just-in-Time Provisioning (JITP)
Configure ADFS Server
Before enabling Just-in-Time Provisioning (JITP), an administrator will have to configure settings on the ADFS server:
- Select the Relying Party Trust and select Edit Claim Issuance Policy.
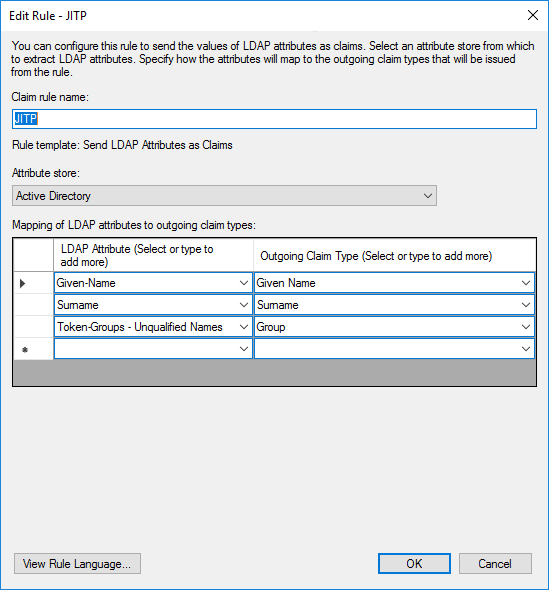
- As an admin, create a new Rule named JITP with the following LDAP Attributes:
- Rule Type: Send LDAP Attributes as Claims
- Given-Name: Given Name
- Surname: Surname
- Token-Groups - Unqualified Names: Group
NOTE: See Configure ADFS Integration Instructions for additional resources.
Enable JITP
- Go to Management > Integrations and click
 next to the integration.
 - Click Identity Management.
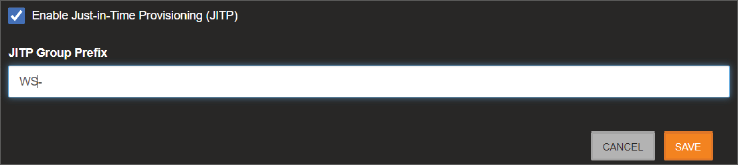
- Scroll to the bottom and check the Enable JITP check box.
- Specify the desired group prefix and click SAVE.
NOTE: Any integration group with the specified prefix will be added to OWS automatically as soon as a user in that group logs in.
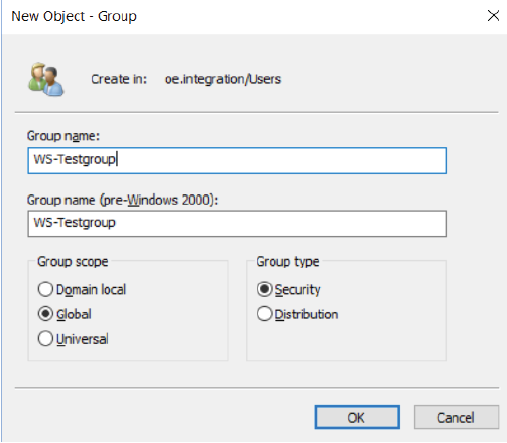
- In Active Directory Users and computers click on the Create a new group icon.
- Give the new group a name that starts with the prefix specified in step 4.
- Click OK.
- Double-click on an existing user or create a new user.
- Click on the Member Of tab.
- Click Add and add the group that was created in Step 6.
- Click Apply.
- Click OK.

- Log in to OWS if not already logged in.
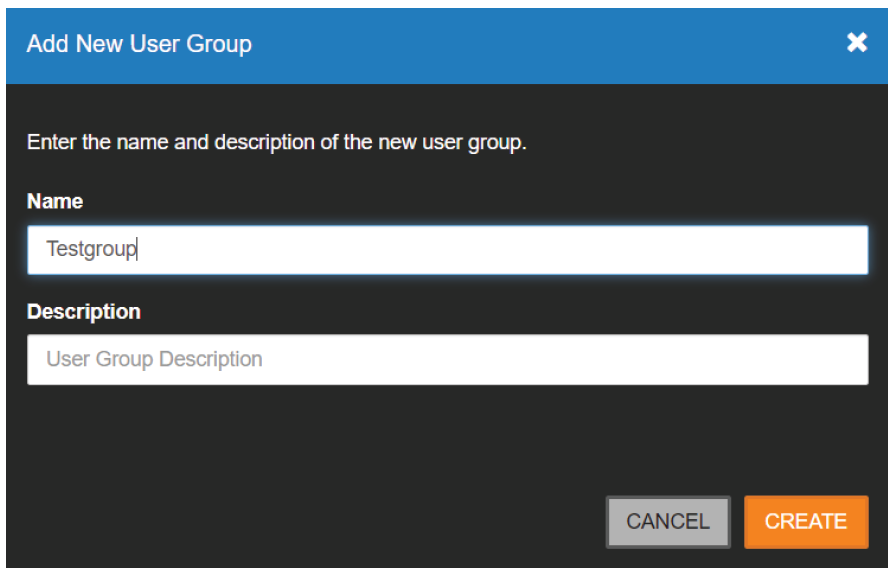
- Go to Management > User Groups.
- Click ADD NEW USER GROUP.
- Add a group with the same name specified in step 6 without the prefix (WS- by default).
- Click CREATE.
- Select desired Web Services, Location and Client permissions for the group.
NOTE: Any integration group with the specified prefix will be added to OWS automatically as soon as a user in that group logs in.


- Any user associated with the group will now be able to log in with the permissions set in step 18.