Enable Identity Management Integrations
Enable Integration
NOTE: Skip steps 1-14 if the user has already been added to Active Directory.
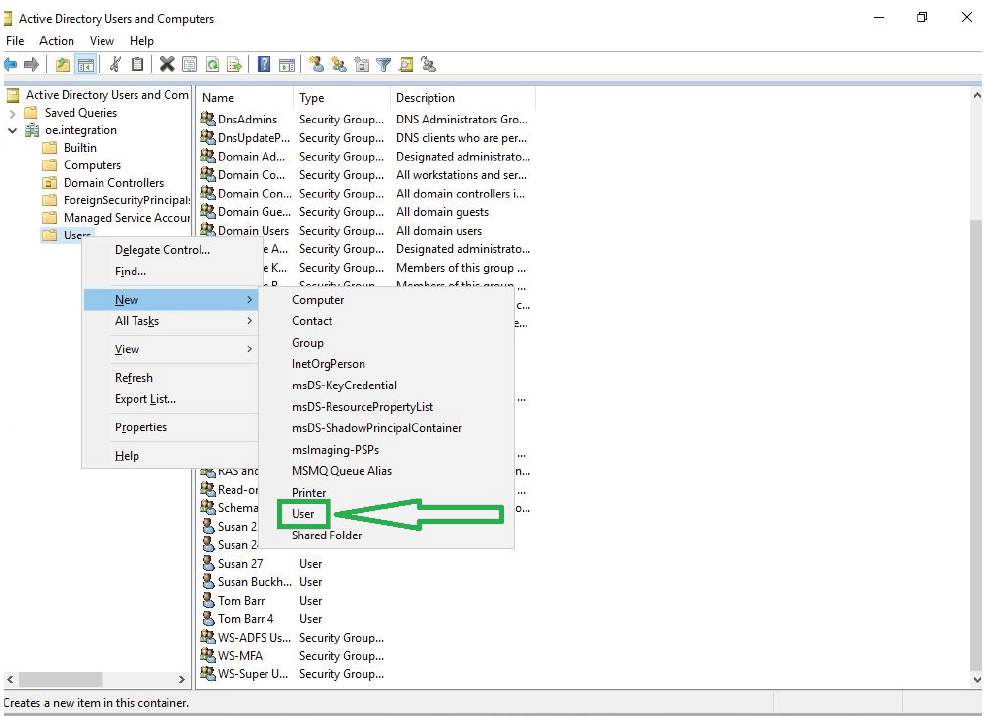
- Open Active Directory Users and Computers.
- Right click on Users, click New then select User.
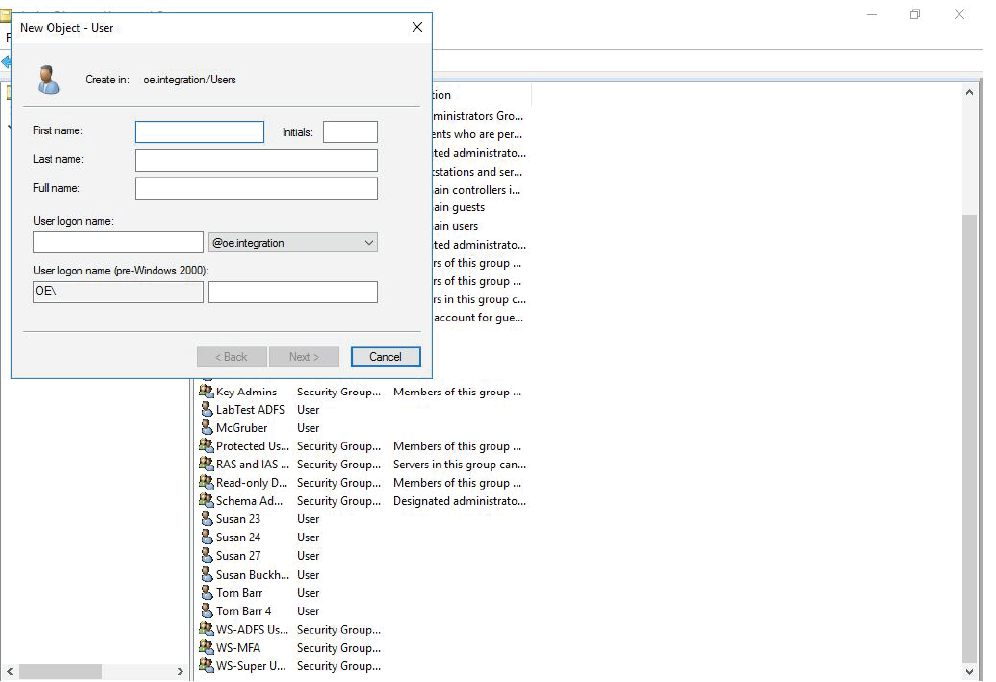
- Fill in user details; First Name, Last Name, and User logon name. Click Next.
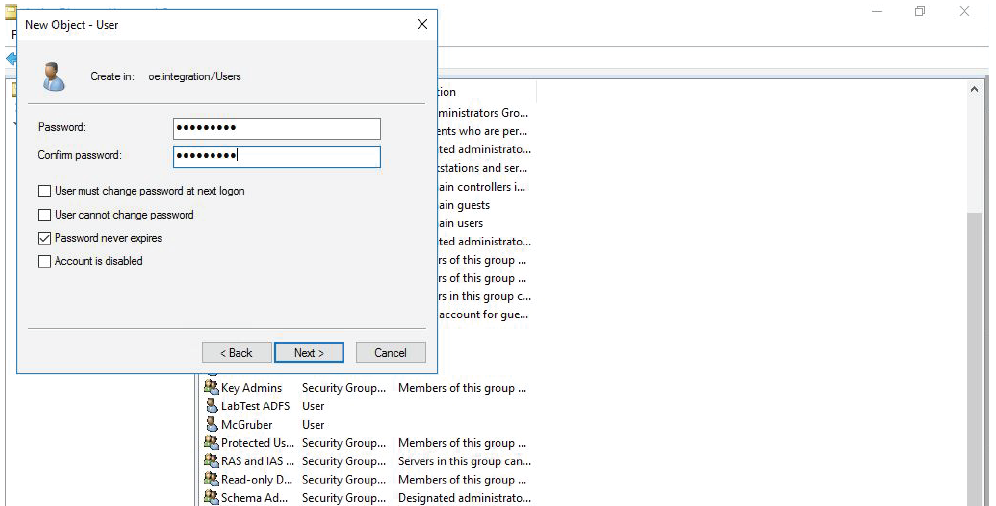
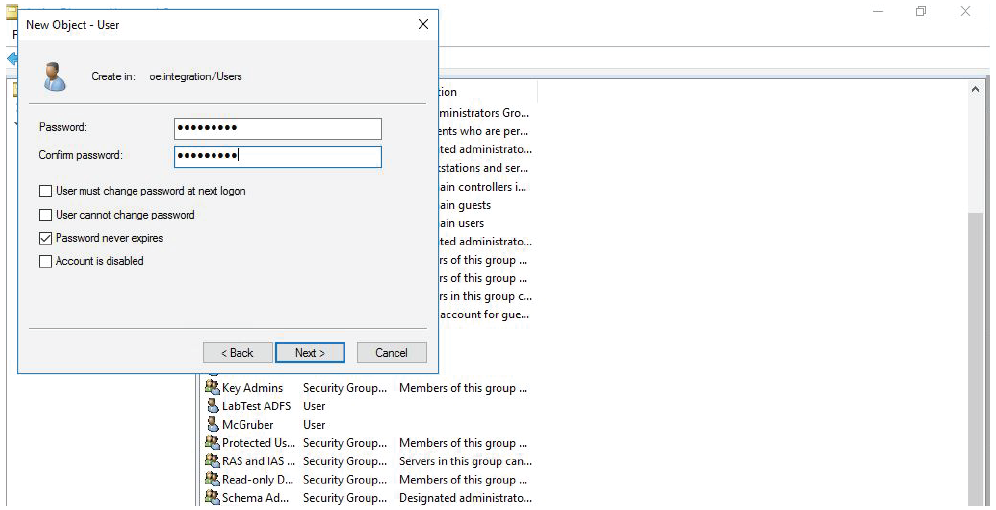
- Enter Password.
- Confirm password.
- Remove check from box for Users must change password at next logon.
- Add check to box for Password never expires.
- Click Next.
- A confirmation window will display.
- Verify Full name, User logon name, and The password never expires.
- Click Finish.
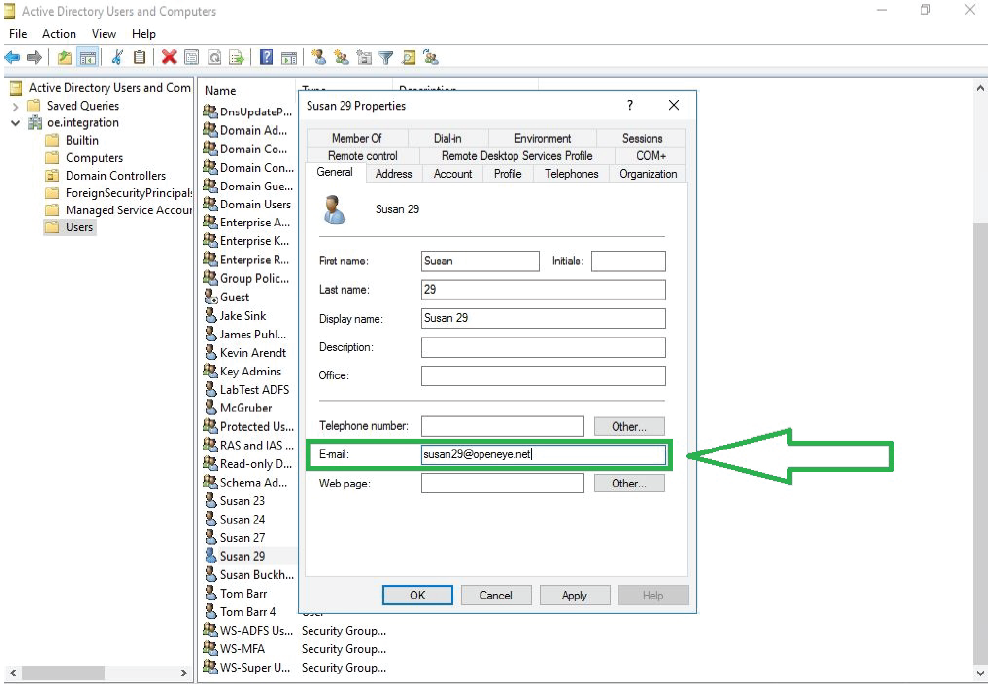
- In the list of users, right-click the user just created and click Properties.
- The General tab will be displayed; in this tab in the Email field, add an email address for the user.
- Click Apply.
- Open OWS in a web browser.
- Go to Management > Users.
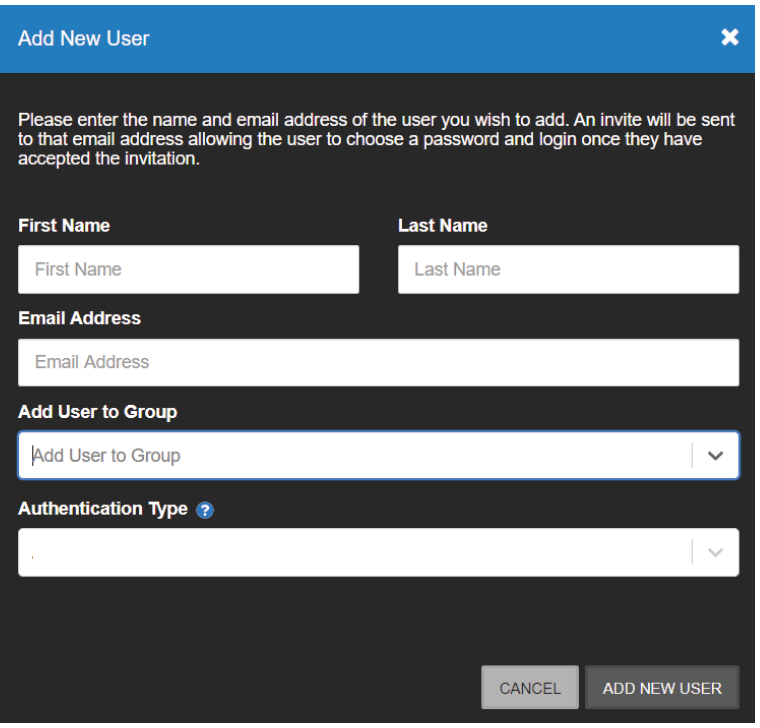
- Click the Add New User button.

- Fill in name.
- Fill in the same email address specified in step 12.
- Add the user to the desired group.
- Set the Authentication Type to the integration name.
- Click ADD NEW USER.
NOTE: When a user is provisioned by a 3rd party identity provider their initial email address is supplied. If that email address ever changes (due to legal name change or other reasons) then the identity provider can push that change and OWS will update the email address displayed for the user.