Motion Search in the Web Client
NOTE: The following information is for Motion Search available after connecting to a recorder via Web Connect (or the Apex Web Client). View search details here for the Cloud Video Player under the Video tab in OWS.
Motion Search
Motion Search allows you to look for motion in recorded video. By defining the region and the timeframe, you can derive motion activity for a defined time period.
NOTE: Motion Search allows you to search within a 24 hour time period.
Motion Search Controls
Display As: Display search results as thumbnails or as a list.
Columns: Display thumbnail results in 1, 2, 3, 4 or 5 columns.
Image Offset: Change time of display results between -4 seconds and 4 seconds.
OSD: Turn On Screen Display information On or Off.
Perform an Motion Search
1. Under Cameras, select a camera that displays the region to search.
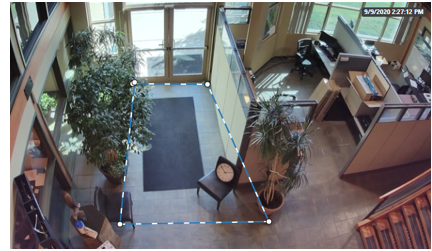
2. Draw a Motion Search Region in the Preview Window:
Left-click and drag to create a rectangular Motion Search Region
Left-click, release, and move to draw a custom polygonal shape one line at a time. Draw and click the last line to the starting point to complete the Motion Search Region.
Right-click to clear a shape.

3. Under Date / Time, select the Start, End and Sensitivity for the search.
4. Click Search to apply the filters.
5. Click an Event result to preview.
6. Click the image or Play video to review this video in Timeline Search.
NOTE: Hitting the back button on the browser in timeline search will load the previous event search results when switching between the two.
