Plate Recognizer Integration Instructions
|
|
NOTE: Plate Recognizer integration is only available with certain licensing tiers. See OWS Licensing for more information.
NOTE: Plate Recognizer integration is only available on Windows Apex recorders.
Plate Recognizer Integration Instructions
The Plate Recognizer integration allows Plate Recognizer to send license plate information to OpenEye OWS via the Event Receiver API (Analytics). This feature is only available on request. Please contact your sales representative for assistance.
- In OWS, click on Management > Integrations.

- Select Integrations.
- Click the Add New Integration button.

- Select Event Receiver API (Analytics) from the list and click Next.

NOTE: Integration Management is not available for all End User account types.
Authentication
Creating an API Key
- Select the Management > Integrations tab.
- Click Edit
 on the Event Receiver API (Analytics) Integration created above.
 - Select API Access Keys.

- Select Add Key.

- Click Add Key and you will be presented with the Secret Key. Enter a Key Name and click Add.
NOTE: This is the only time you will be able to view the Secret Key. Be sure to copy it somewhere. If the secret key is lost, a new API access token must be created.

Finding the External Camera ID
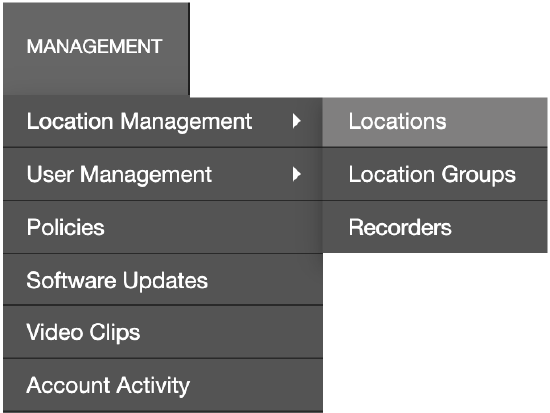
- In OWS, select Management > Locations > Locations.
- Select the location from the menu on the left and click Cameras.
- Copy the Camera External ID for the camera you would like associated with the integration.

Install Docker for Windows
Follow instructions from Docker on how to install Docker for Windows.
Install Stream for Plate Recognizer
NOTE: Plate Recognizer maintains additional instructions at: Plate Recognizer Guides
- Create a folder named Stream in the Documents folder in Windows.
- Log in to your Plate Recognizer account and access your Stream licenses at https://app.platerecognizer.com/service/stream
- Copy the License Key and API Token for later use.
- Go to the Plate Recognizer page for Manually Installing Stream
- In the Docker Command Generator section, enter the License Key and API Token from the previous steps.
- Select option Unless Stopped.
- Copy the run command that it provides.
Example:
docker run --restart=unless-stopped -t --name stream ^
-v "C:\stream":/user-data ^
-e LICENSE_KEY=xxxxxxxxxx -e TOKEN=xxxxxxxxxxxxxxxxxxxxxxx ^
platerecognizer/alpr-stream
- In Windows, press Windows Key + R to open the Run dialog.
- Type cmd and press enter to open the Command Prompt.
- Paste the run command from step 7 into the Command Prompt and press enter.
- The Stream Docker Image will download, install and run within Docker
Create Plate Recognizer .env File
- Create a text file called OpenEye.env in any desired location
- Within the OpenEye.env file, enter the following values:
- MIDDLEWARE_NAME=openeye
- AKI_TOKEN: AKI token for authentication.
- AKS_TOKEN: AKS token for authentication.
- Where AKI_TOKEN and AKS_TOKEN are generated after enabling Event Receiver API (Analytics) in your OpenEye account. Example: AKI_TOKEN:F3DG9VNNLW5N, AKS_TOKEN:oSTXy0kgDvOajDl6JaLNWUOjYmLQSLwC
Run the OpenEye Middleware
- In Windows, press Windows Key + R to open the Run dialog.
- Type cmd and press enter to open the Command Prompt.
- In the Command Prompt type:
docker run -it --env-file .env -p 8002:8002 --name stream-gateway --restart unless-stopped platerecognizer/stream-gateway
Where env-file is the full path to the OpenEye.env file created in the previous steps.
- The OpenEye Webhook container will start and run until stopped.
Configuring Plate Recognizer to monitor a camera
- In Windows, open the C:\Stream folder.
- Open the config.ini file.
- Scroll down to find the section.
- Change the camera-1 to be the External Camera ID you identified in the How Do I Acquire an External Camera ID above.
Example: changed to
- Change the url = to be the RTSP URL of the camera you want to use with Plate Recognizer, including the username and password:
- If you do not know the RTSP URL of your camera, refer to your camera manufacturer's website. The RTSP URL for most OpenEye cameras is rtsp://username:password@ip_of_camera/media/video1 or rtsp://username:password@ip_of_camera/h264
Example: rtsp://admin:password@192.168.51.10/media/video1
- Find the webhook_targets section and change it from my-webhook-1 to openeye
Example: webhook_targets = my-webhook-1 changed to be webhook_targets = openeye
- The camera section of the config.ini should now look similar to this:
[ [OE_WjZWVTlVfGYyMjQ3ZTEzLWVhMWEtNDFjMS1iNjYwLWIzNDliZmZkNjkzYw] ]
active = yes
url = rtsp://admin:password@192.168.51.10/media/video1
csv_file = $(camera)_%y-%m-%d.csvwebhook_targets = openeye
- If additional cameras are going to be used with Plate Recognizer, enter the information for it just below the first camera, in the same way as the first.
- Scroll down further in the config.ini and find the [webhooks] section.
- Change to be
- Then change the url to be the IP address of the local recorder, with port 5000
Example: url = 172.30.41.10:5000
- The webhooks section should now look like this:
[webhooks]
caching = yes[ [openeye] ]
url = 172.30.41.10:5000
image = yes
video = no
image_type = vehicle
request_timeout = 30 - Save and close this file.
- Open Docker Desktop and select Containers.
- Click the Stop button next to Stream, then click the Start button to restart the Stream Docker container.
- For additional information on customizing the Stream settings, contact your Plate Recognizer representative.
Plate Recognizer and Docker are now configured. Proceed to creating your Alert Rule for License Plates.