SightLogix Integration Instructions
Sightsensor HD Configuration
Adding a SightLogix SightSensor HD Camera to OpenEye Web Services
OpenEye Web Services (OWS) automatically detects installed cameras, but a camera has to first be associated with a recorder in order to send alerts.
To add an installed SightSensor HD camera to a recorder via OWS:
- Log in to OWS: https://ows.openeye.net/login#
- In Web Connect, click Connect, and select an available Direct or Standard connection from the dropdown.

- In Setup,
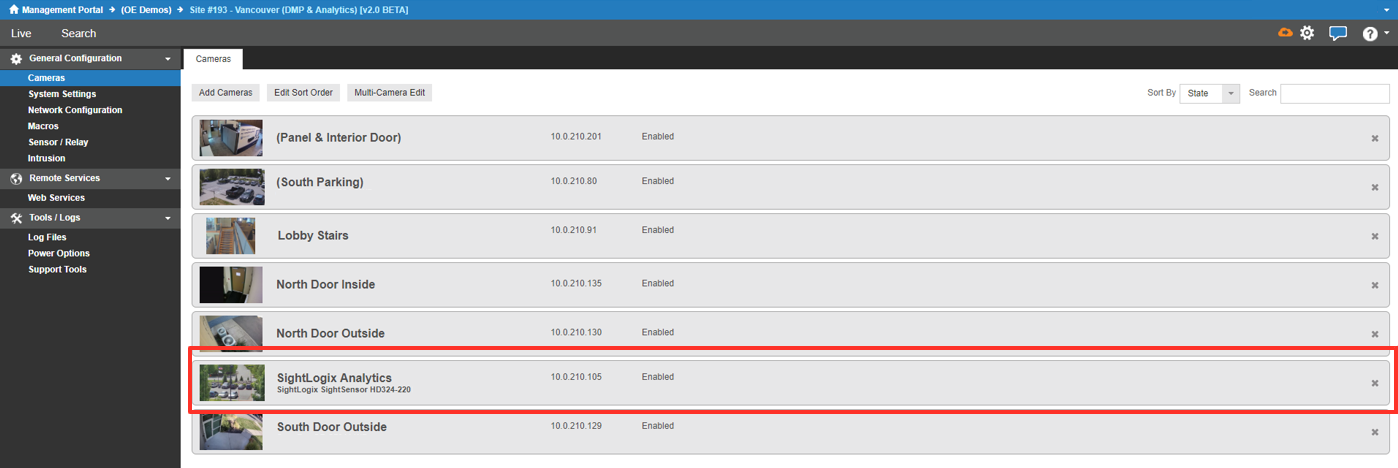
 go to General Configuration > Cameras.
 - Select Add Cameras.
- Check the box next to the SightLogix camera on the list of available cameras and click Add Selected Cameras.

- The SightLogix camera will be available in the camera menu in the Live screen.
NOTE: Cameras can also be added manually by selecting Manually Add a Camera. Username, Password, Protocol, IP Address, Port and Camera Name are required to manually add a camera to the list.
Enabling Camera Side Motion Detection
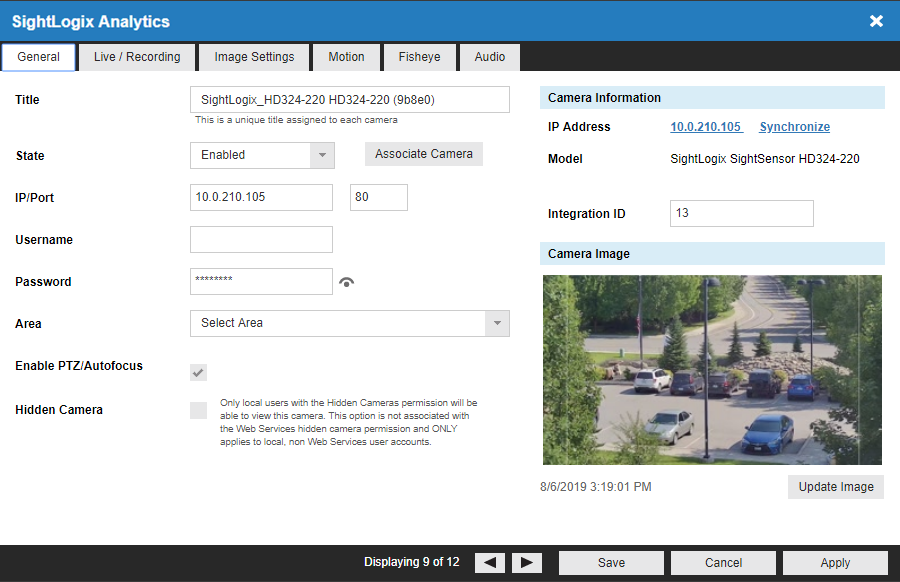
Configure the SightLogix camera in the OWS Camera Setup page:
- Click on the SightLogix camera from the camera list.
- Click on the Analytics tab and check the box for General Analytics.
NOTE: Record on event detection will be selected by default under SETUP.

- Click Save.
NOTE: You can use OWS to connect directly to a SightLogix camera by using CameraLink. This is accessible in the Analytics tab by clicking CAMERA, or the Image Settings tab by clicking Connect Directly to Camera. In the General tab, you can connect directly by clicking on the IP Address.
Configure Advanced Motion and Object Detection
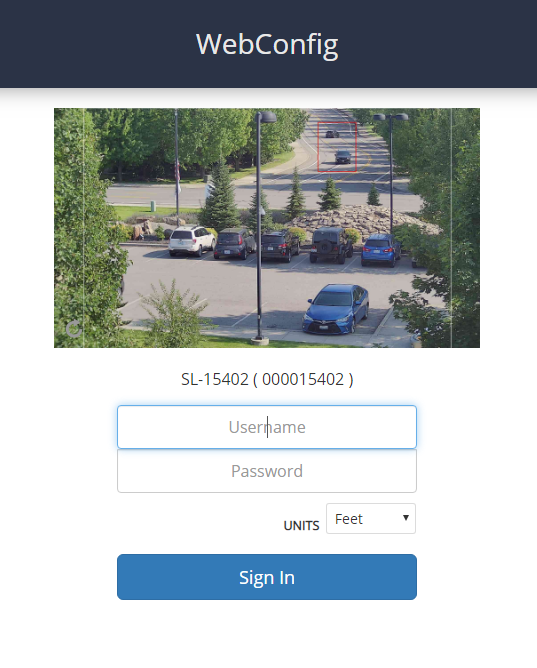
To configure advanced motion and object detection, log in to the SightLogix camera:
- Enter your SightLogix Username and Password and click Sign In.
- Select Policy from the left-hand menu.
- From the Zones tab in the Policy menu, select Add Zone.

NOTE: A default Alarm rule for human detection line is automatically created and listed in the table, and a zone overlay box covers the entire image.
- Adjust the zone size using the drag points in the corners of the zone overlay.
- View added policies in the Rules tab to customize and review.
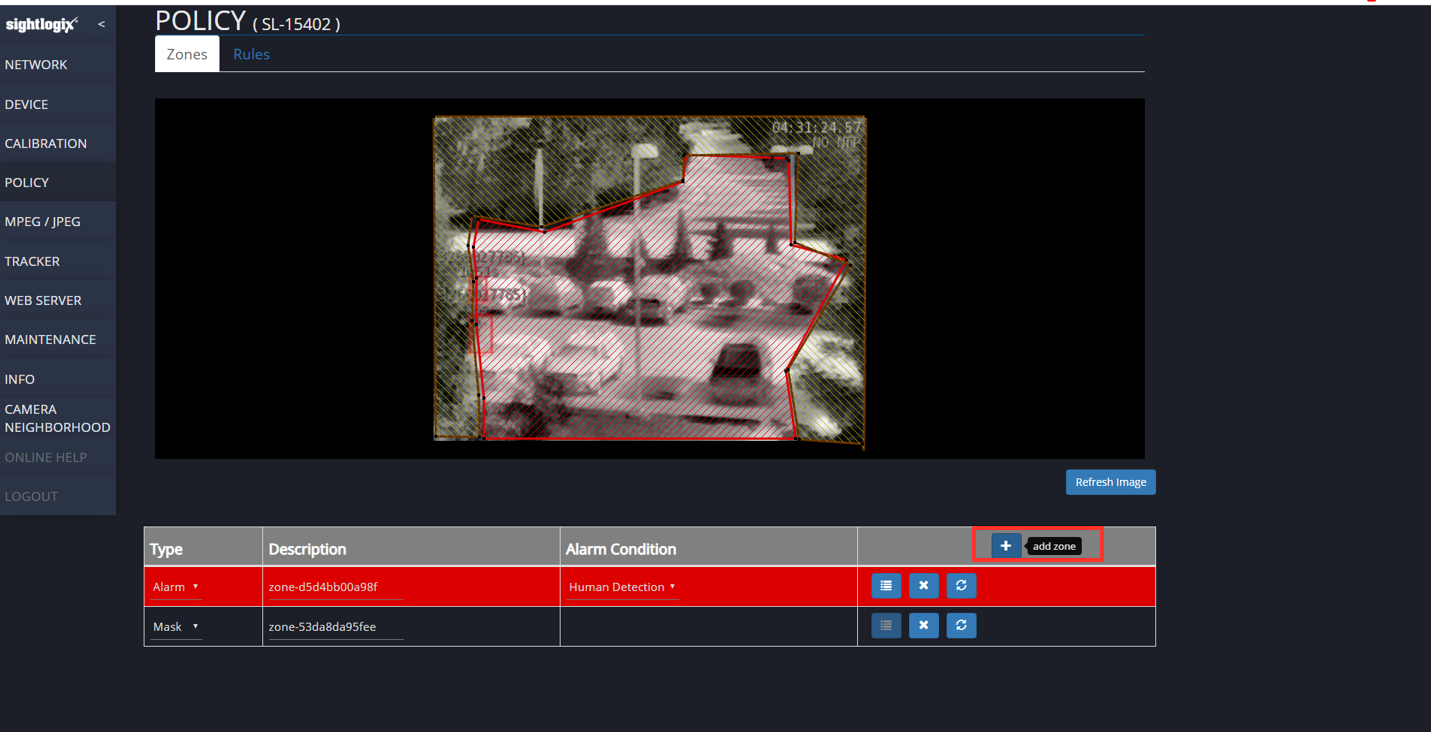
NOTE: The Calibration page parameters must be set prior to setting any Policy page parameters.
NOTE: For more information on creating zone, refer to the SightLogix Webconfig Installation Guide: https://portal.sightlogix.com/help/webconfig-docs
Configure OWS Alert Rules for SightLogix Events
An alert rule must be associated with a detection zone. Alert rules are configured in OWS.
- Under Rules, select Alert Rules from the dropdown menu.

- Click New Alert Rule.

- Select an Alert Type from the pop-up menu.

- Click Next.

- Name the alert and give it a Description as desired.
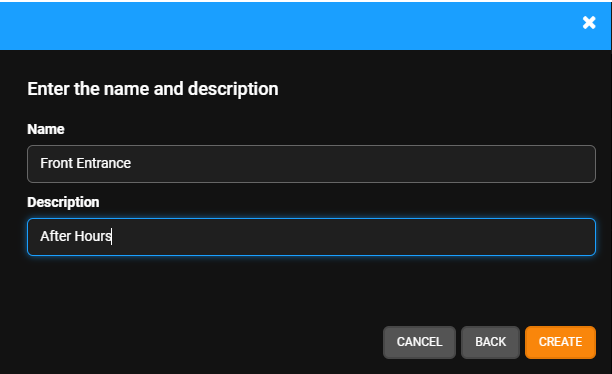
- Click Create.

Defining an Alert Rule: Motion Alerts or Sensor Alerts

- Enter the Time of Day range that this rule should be active for.
- Check the boxes beneath the Days of the Week on which the rule should be active.
- Select the minimum Motion Duration or Sensor Duration necessary before sending an alert.
- Select Seconds, Minutes, or Hours using the dropdown menu.
- Select Armed and Disarmed, Armed, or Disarmed from the Intrusion Area Armed dropdown. See Location Arming for more information.
- Active Alert (Optional) - Check the Active Alert box to add the alert to the Active Alert Dashboard and tag it as an Active Alert in email notifications.
- Activate Relay on originating device (Optional) - Check the Activate Relay on originating device box to activate a relay when an alert is generated. See Activating a Relay for an Alert Rule for more information.
- Send To 3rd Party Integration (Optional) - Check the Send To boxes to send the alert to the associated 3rd party integration.
- Click Save.
Adding Locations, Cameras, or Sensors to an Alert Rule
- Click Locations, Cameras, or Sensors on the navigation sidebar.


- Click Add Location, Add Location Group, Add Camera, or Add Sensor.


- Click the Add button next to each device you'd like to be included in the Alert.

NOTE: To apply the rule to every Location, Enable Auto Include when adding locations.
-
Click Select when finished.

NOTE: Click Manage  after adding a device or location to go directly to the corresponding device or location.
Add Users to an Alert Rule
NOTE: Adding Users to a rule automatically grants them permission to view alerts for cameras and locations they have access to based on their User Group permissions.
- Click Users/Notifications on the left-hand menu.

- Click Add User or Add Group.

- Click + next to each User or Group to send emails and push notifications when the alert is triggered.
- Click Add when finished.
NOTE: To receive email, push or client alert notifications, the Email Alert, Push Alert or Client Alert box must be checked. Simply adding a user only gives them access to see this alert’s history. See Alert Notifications for details.
Play and Export SightLogix Video Events
Access Alerts from the Customer Page
Alerts can be accessed from the customer account page.

- From the Alerts tab, select Alert History.
- Click on Show Filters.
- Use the Alert Rule filter to view alert rules linked to the SightLogix camera.
- Click Apply.
- Click View to see the alert details.

View and Export Video

- Click on the video image to view the Video Player screen at the time of the event.
- In the Video Player, select Export to export the video to the OWS cloud or to a local machine.

Export Video
- In Search, click Export to share the video clip.

- Choose Single Camera or Multi-Camera on the Export pop-up.

- Choose the Date/Time, Video Quality, Video Resolution, Audio, and click Next.

Video Resolution:
- Original - Fast option. Does not include date/time and does not dewarp video.
- High Quality - Takes longer. Max resolution of 9MP and adds date/time to bottom of video.
- Medium Quality - Takes longer. Max resolution of 2MP and adds date/time to bottom of video.
- Low Quality - Fast option. Does not include date/time and does not dewarp video.
- To export to the OWS Cloud Portal, select Export to Web Services and enter a Title and Description.
To export locally, select Export locally and enter the Filename.

- Click Export.
Once exported, users can view locally, or view, manage and share saved video clips directly from the OWS Cloud Portal.