
Sentinel Integration Instructions
Configuring OpenEye Web Services to Send Alerts to Sentinel
Before performing these steps contact your Sentinel ARC to receive your HTTPS Alert Push URL. You will need the URL to complete the steps below.
Add Alert Feed or Alert Push Integration
As a web services administrator:
- Go to Management > Integrations.

- Click the Add New Integration button.

- Select Alert Feed from the list of Integrations.
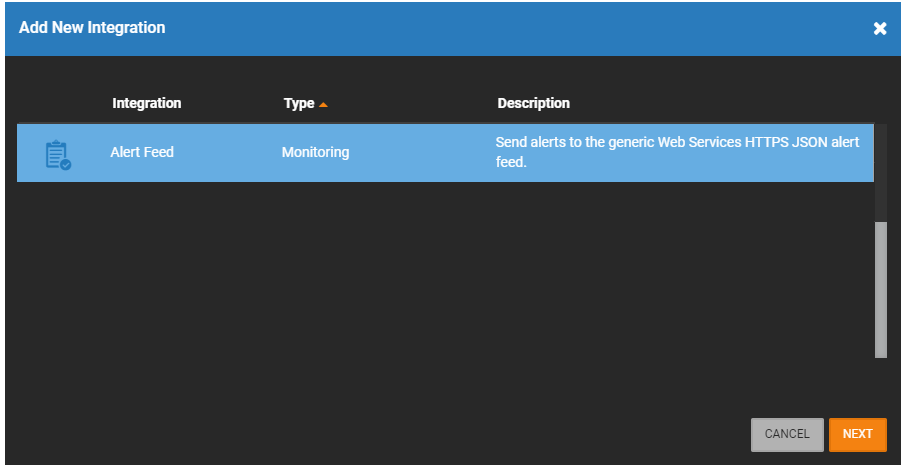
- Click Next.

- In the General Settings tab, the Enable Alert Feed integration will already be checked by default. Leave it checked.
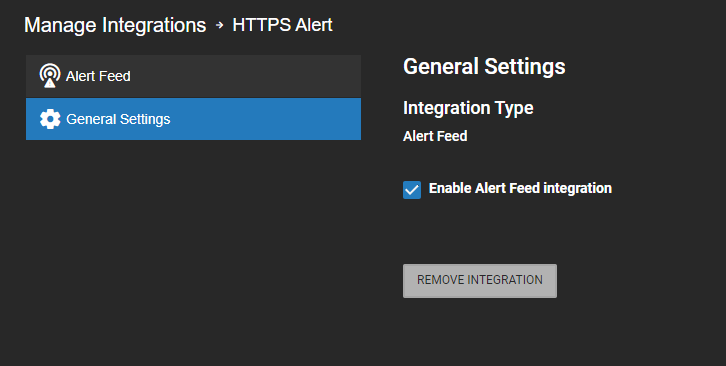
- Select the Alert Feed tab.
- Enter a Name and Address for either an Alert Push or an Alert Feed.
NOTE: More than one Alert Push can be created by clicking add  .
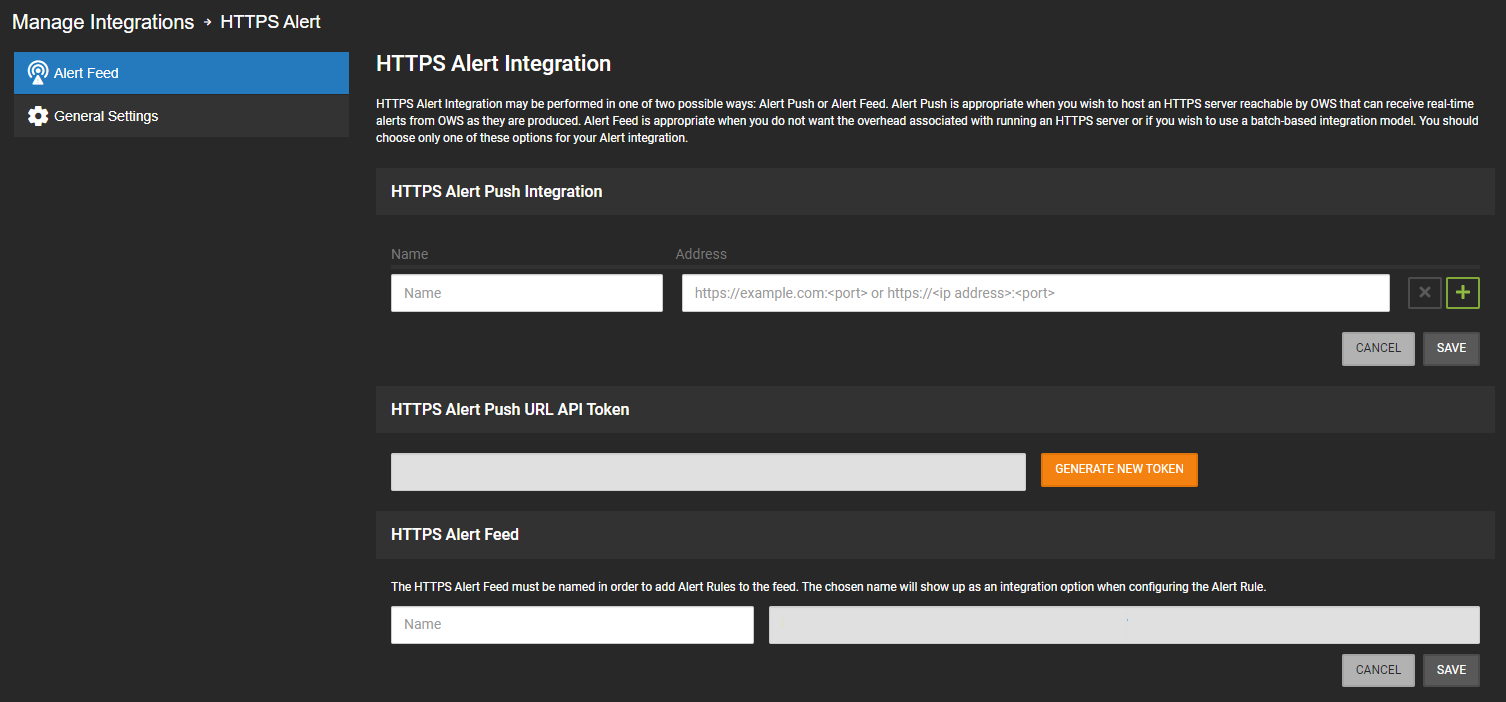
- For Alert Push, select Generate New Token to generate a token.

- Click Save.

As a web services administrator:
- Go to Management > Integrations.
- Click the Add New Integration button.
- Select Alert Feed from the list of Integrations.
- Click Next.
- In the General Settings tab, the Enable Alert Feed integration will already be checked by default. Leave it checked.
- Select the Alert Feed tab.
- Enter a Name and Address for either an Alert Push or an Alert Feed.
NOTE: More than one Alert Push can be created by clicking add .
- For Alert Push, select Generate New Token to generate a token.
- Click Save.
Configuring Sentinel to Get Events and Video from OpenEye Web Services
- From an existing customer, select Transmitter.
- Select the Transmitter ID tab.
- Enter the desired name of the Transmitter.
- In the Type drop down menu, select OpenEye.
- In the Receiver ID drop down menu, select OpenEye.
- Click Next ID to get a new ID.
- In the Monitoring Service drop down menu, select External Video Monitoring, or any option that includes External Video Monitoring.
- In the User Name field, enter your OpenEye Web Services email address.
- In the Password field, enter your OpenEye Web Services password.
- In the Other Parameters section:
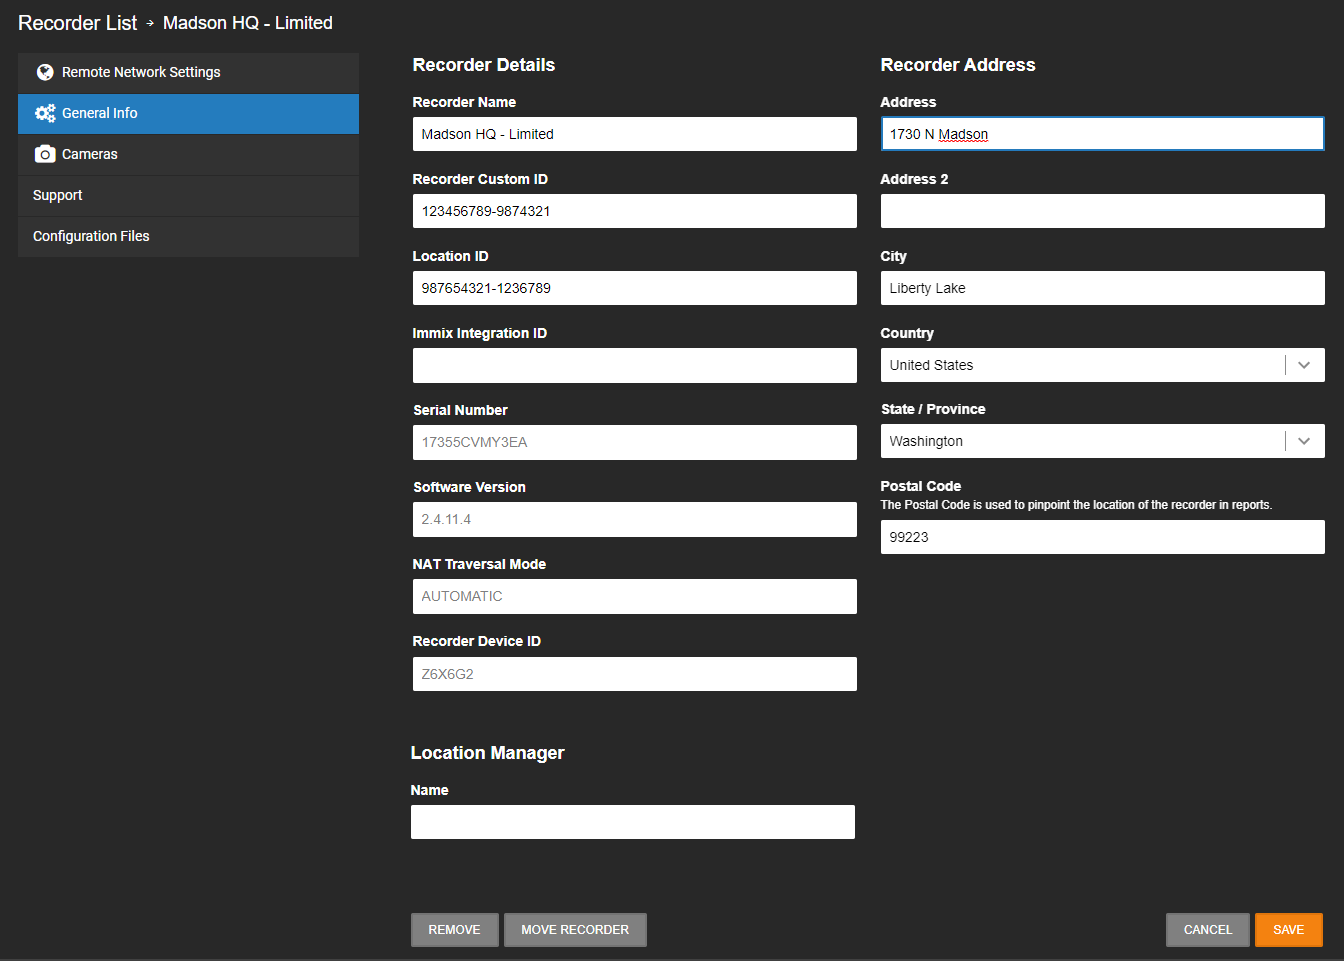
- Next to Recorder ID, uncheck the Default checkbox and enter the Device ID for your device.
- Next to Company ID, uncheck the Default checkbox and enter the Company ID for your company.
- Click Save.

- Click Get Configuration.
- Select the cameras and audio devices you would like to view in Sentinel and click Save.

Verifying Video
To verify you are able to get video, click the Video Player icon on the toolbar.

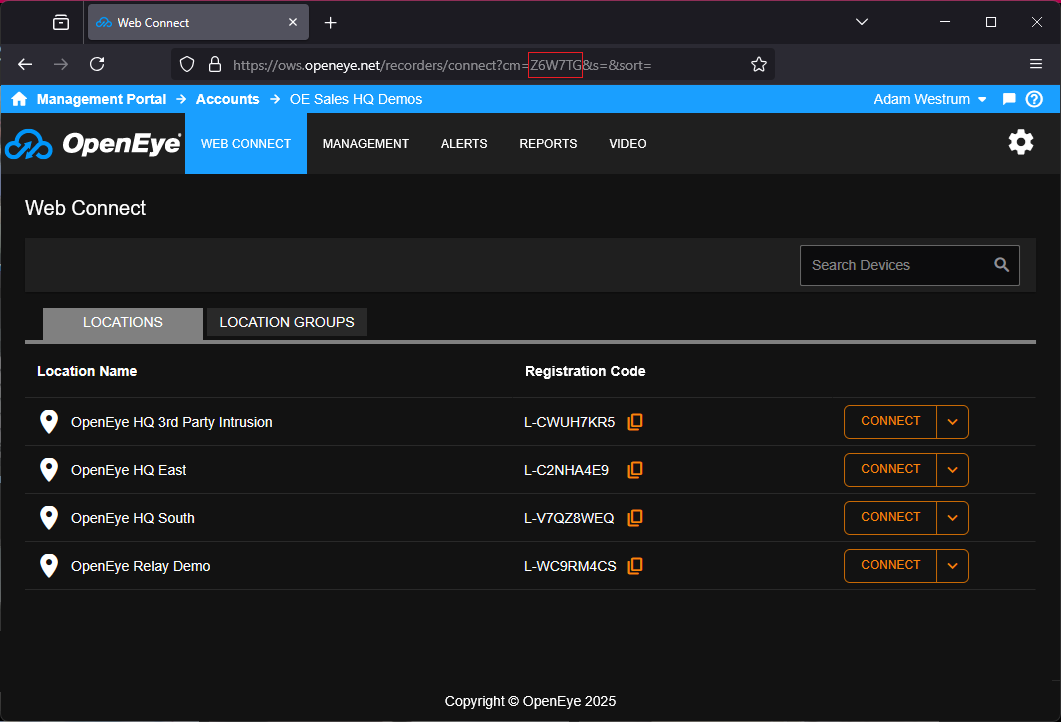
To acquire your Company ID, log in to OWS and check the URL. The Company ID is the letters following cm=
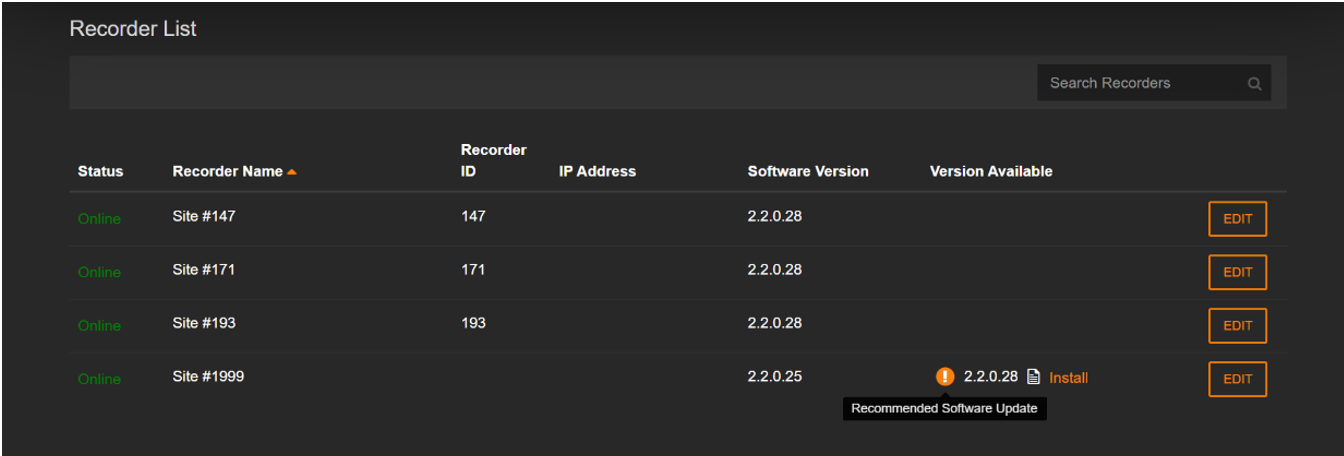
- In OWS, select Management > Recorders > Recorders.
- Select recorder in question and click
 .
- Click General Info.
- The ID can be found under Recorder Device ID.
Supported Sentinel Features
- Alarm Notification - HTTPS Webhook Messages
- Video/Image on Alarm - HTTPS Webhook Messages
- Live Video - OpenEye NAT Traversal via token authentication
- Video History/Playback - OpenEye NAT Traversal via token authentication
- Audio Challenge - OpenEye OscarDotNet DLL
- PTZ - OpenEye OscarDotNet DLL
- Get Configuration - OpenEye Web API