Live Video Monitoring with CHeKT
OpenEye and CHeKT Integration
OpenEye recorders may serve as the “analytic event trigger source” when used in conjunction with the CHeKT bridge. By taking this approach, the OpenEye recorder’s smart motion or person and vehicle analytic packages can normalize the CHeKT event trigger performance and reliability across all connected cameras.
NOTE: This feature is available to OWS 24/7 Standard and Plus licensing tiers.
Enabling CHeKT Integration in OWS
- Log in to OWS and access the End User account where you would like to use the CHeKT integration.
- Select Management > Integrations.

- Click Add New Integration, then select CHeKT and click Next.
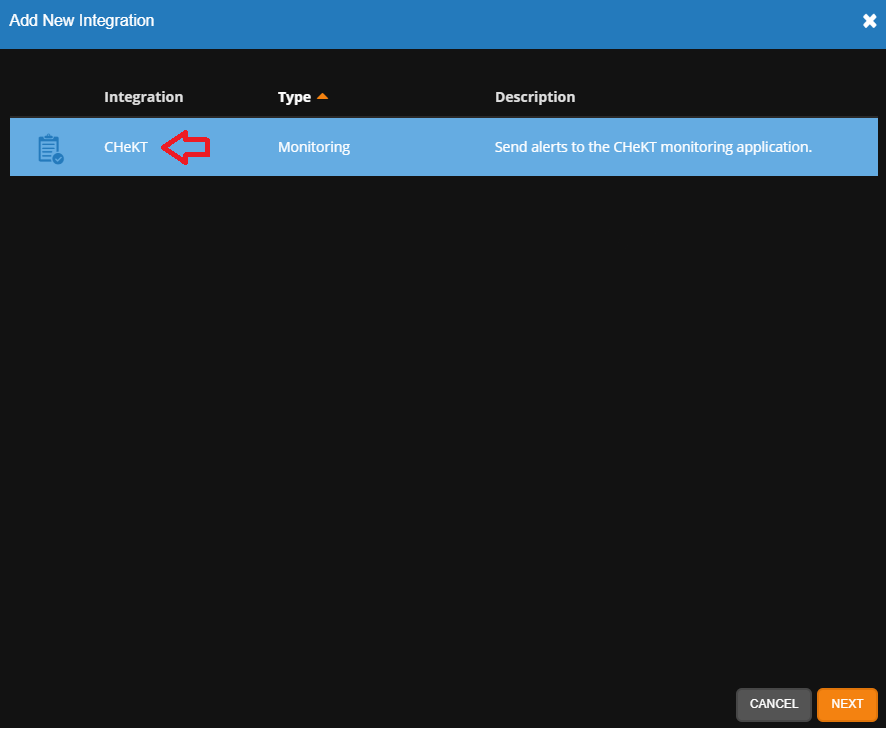
NOTE: If you do not see the CHeKT option, contact your OpenEye Sales Representative.
- Verify the Enable CHeKT Integration box is checked.

Configuring the CHeKT Bridge to Receive Events
To send macro based events from Apex Server Software to the CHeKT Bridge, you must enable the Local API Service and configure an API Key via the CHeKT Dealer Portal. Here are the steps to configure the API Service:
- Connect to your Dealer Portal in CHeKT.
- Access the configuration menu for the CHeKT Bridge that will receive the macro based events from Apex Server Software.

- Select the NETWORK tab.
- Click Disabled next to Local API Service to access the API Service menu.

- Click the option next to Enable API to enable the Local API Service.

- Scroll down to the API Keys and click Generate a new API Key. Make note of the API Key and the Port, as it will be needed in future steps.

Add the CHeKT Video Verification Bridge to Your Apex Server Software Recorder
- Access the configuration menu of the recorder, then click Integrations.
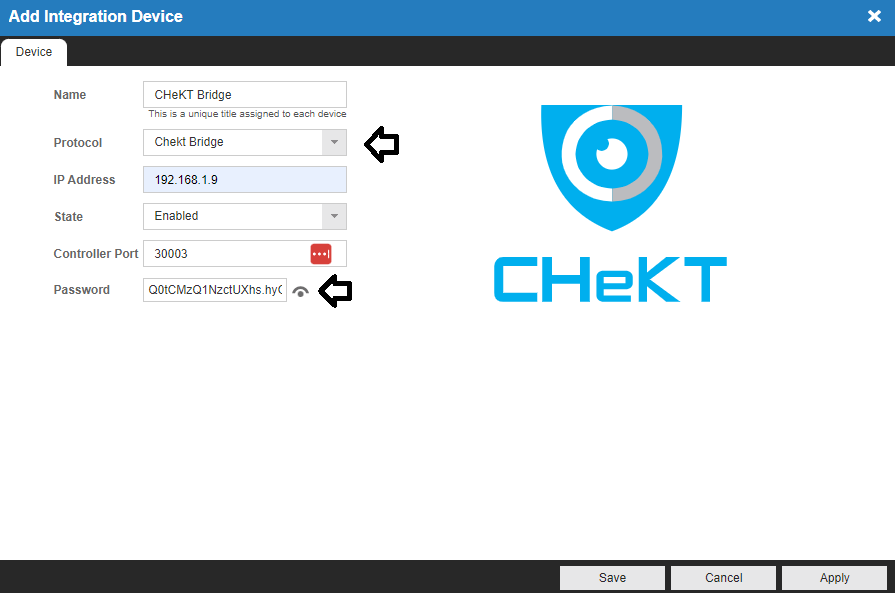
- Click Add New Integration Device.

- Enter a desired Name for the CHeKT Bridge.
- Click the Protocol dropdown menu and select CHeKT Bridge.
- Enter the IP Address of the CHeKT Bridge.
- Click the State dropdown menu and select Enabled.
- Click the Controller Port field and enter the port number that was set on the CHeKT Bridge in Step 6 of Configuring the CHeKT Bridge to Receive Events.
- Click the Password field and enter the API Key that was set on the CHeKT Bridge in Step 6 of Configuring the CHeKT Bridge to Receive Events.
- Click Save.
Adding a Camera to the CHeKT Bridge
NOTE: The CHeKT Bridge must be on the same network as the desired camera before performing these steps:
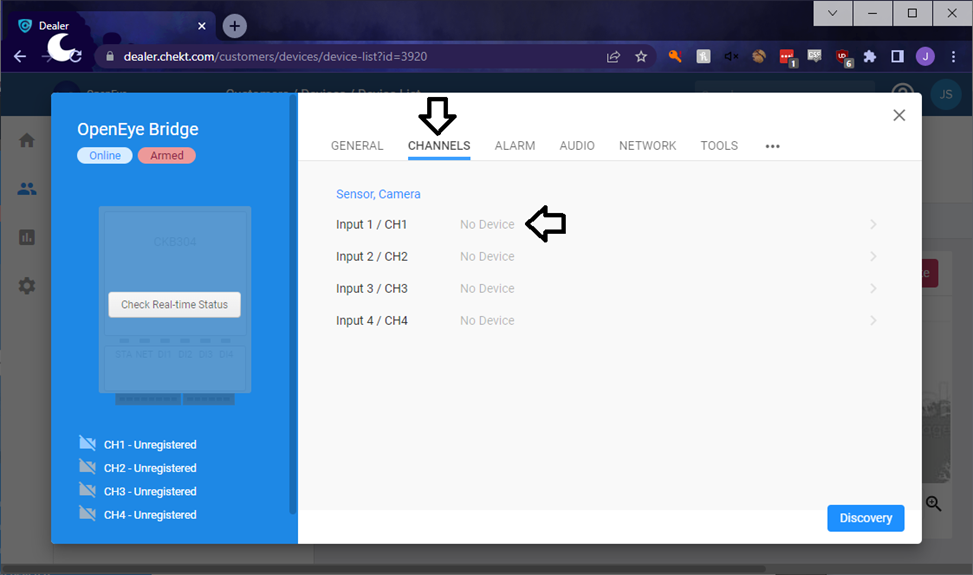
- Click the cogwheel on the desired CHeKT Bridge.

- Click Add, then Add Camera to add compatible IP cameras to the Device List.

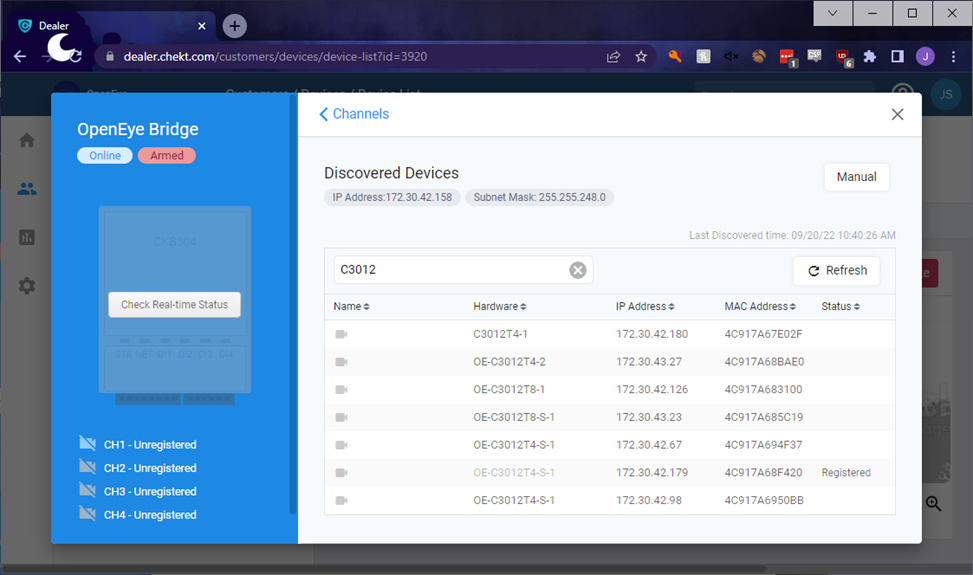
- Click the CHANNELS Tab and click the desired Input Sensor.
- Select the desired camera from the Discovered Devices list.
- Select ONVIF, enter the username and password of the camera, and click Authenticate.
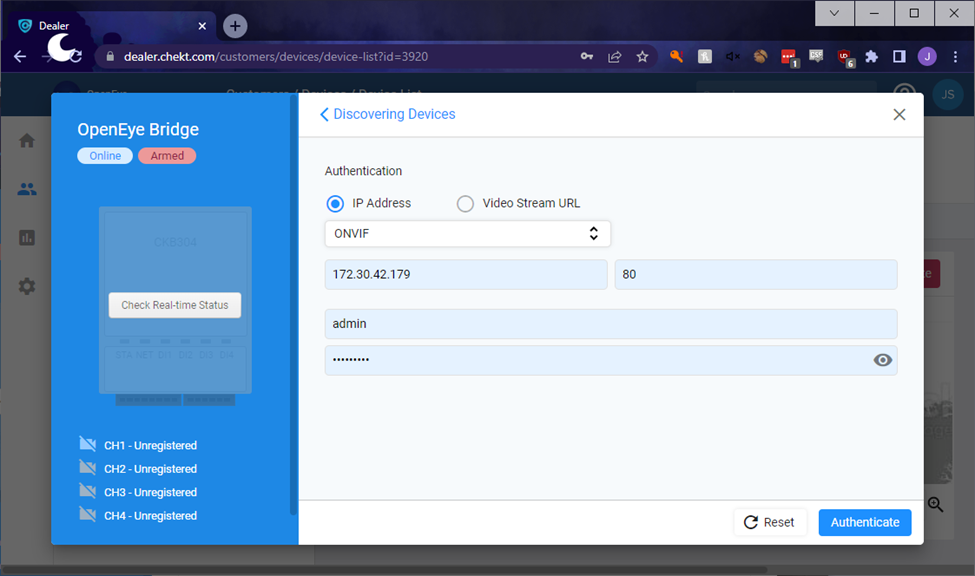
- Confirm the video is from the correct camera and click Next.

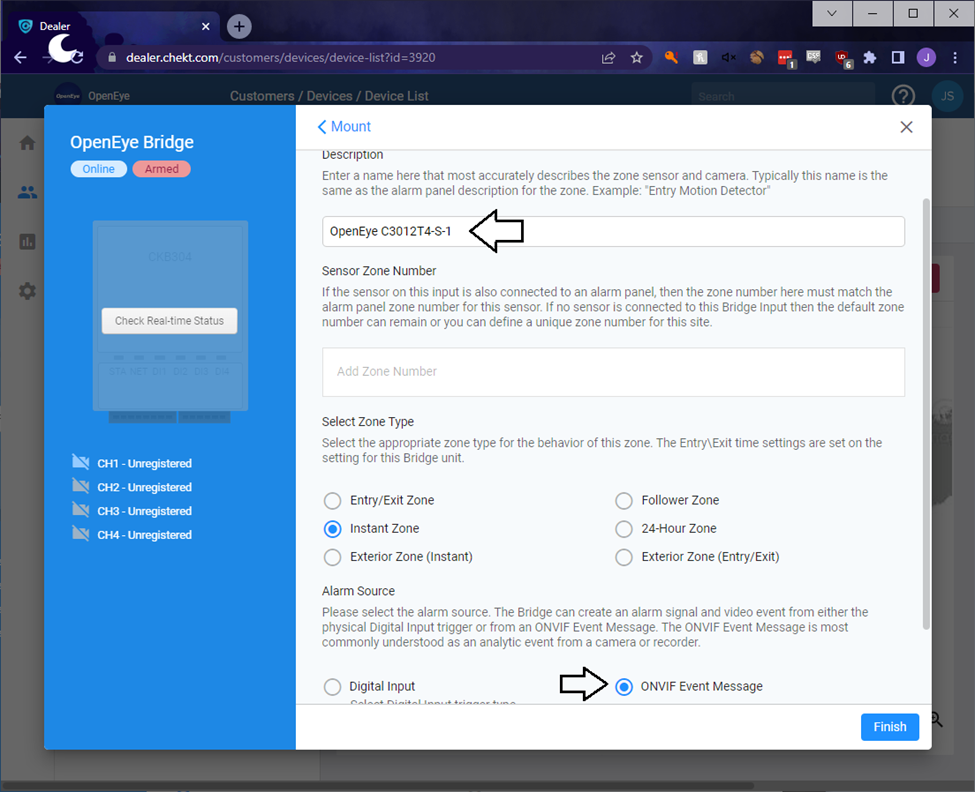
- Enter a Description, and at the bottom under Alarm Source, select ONVIF Event Message, and click Finish.
NOTE: A Sensor Zone Number is only required if the selected sensor on the CHeKT Bridge is also connected to an alarm panel. Otherwise, you can enter any number or leave it blank.
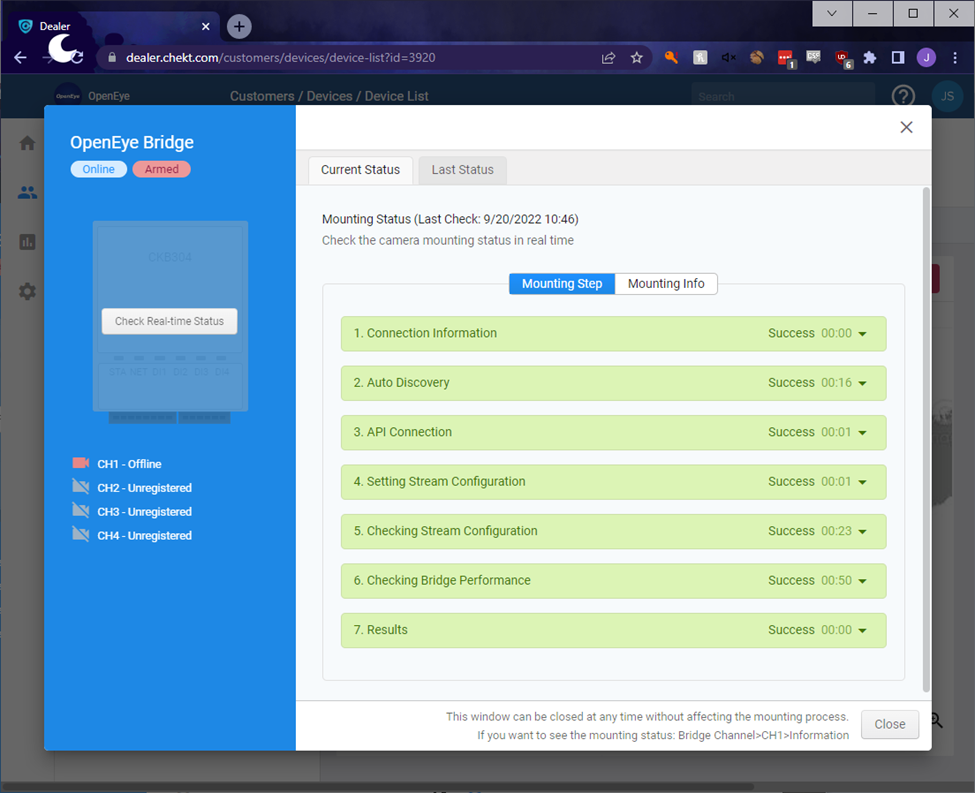
- The CHeKT Bridge will then connect to the camera and go through a series of automated steps. You do not need to wait until this process is completed, you can just click Close.
Configure a Macro to Send Events to the CHeKT Bridge
- Access the configuration menu on the recorder, then click Macros.
- Click Add Macro.
- Enter the desired trigger.
NOTE: Refer to the Macros guide for more information on triggers.
- Click the Type dropdown menu under Take this action and select Send To Device.
- Click the Target Object dropdown menu and select the name of the CHeKT Bridge that was set in step 3 of the Adding a CHeKT Bridge to your Apex Recorder section above.
- Click the Channel field and enter the Alarm Input number of the CHeKT Bridge that you would like to receive events from the macro.

- Click Save.