OE-MK Gen 3 Hardware Manual - Features and Contents
- Last updated
-
-
Save as PDF
Important Safeguards
Warranty
Product Description
Controls and Connections
Power, Status and Network Lights
Features
Box Contents
Default Administrator Username and Password
Recorder Installation
Controls and Connections
MK Gen 3 Front Panel

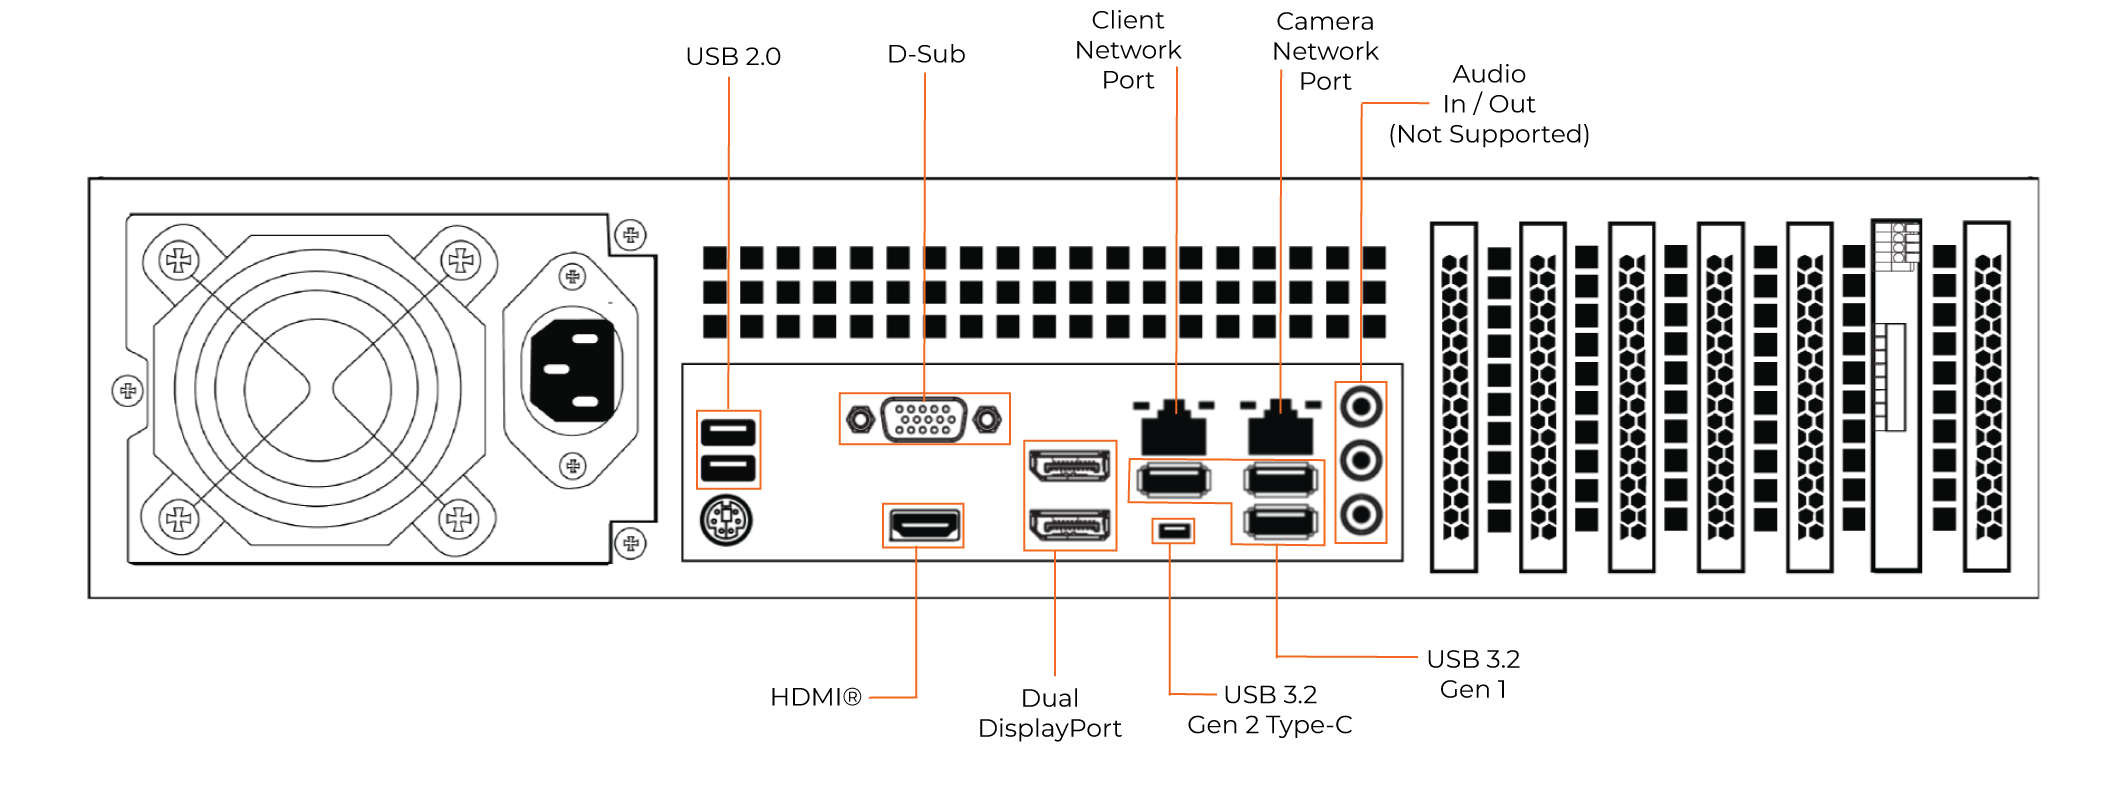
MK Gen 3 Rear Panel
![]()
Power, Status and Network Lights
The LED lights can be found on the front panel between the USB ports and Power Switch.
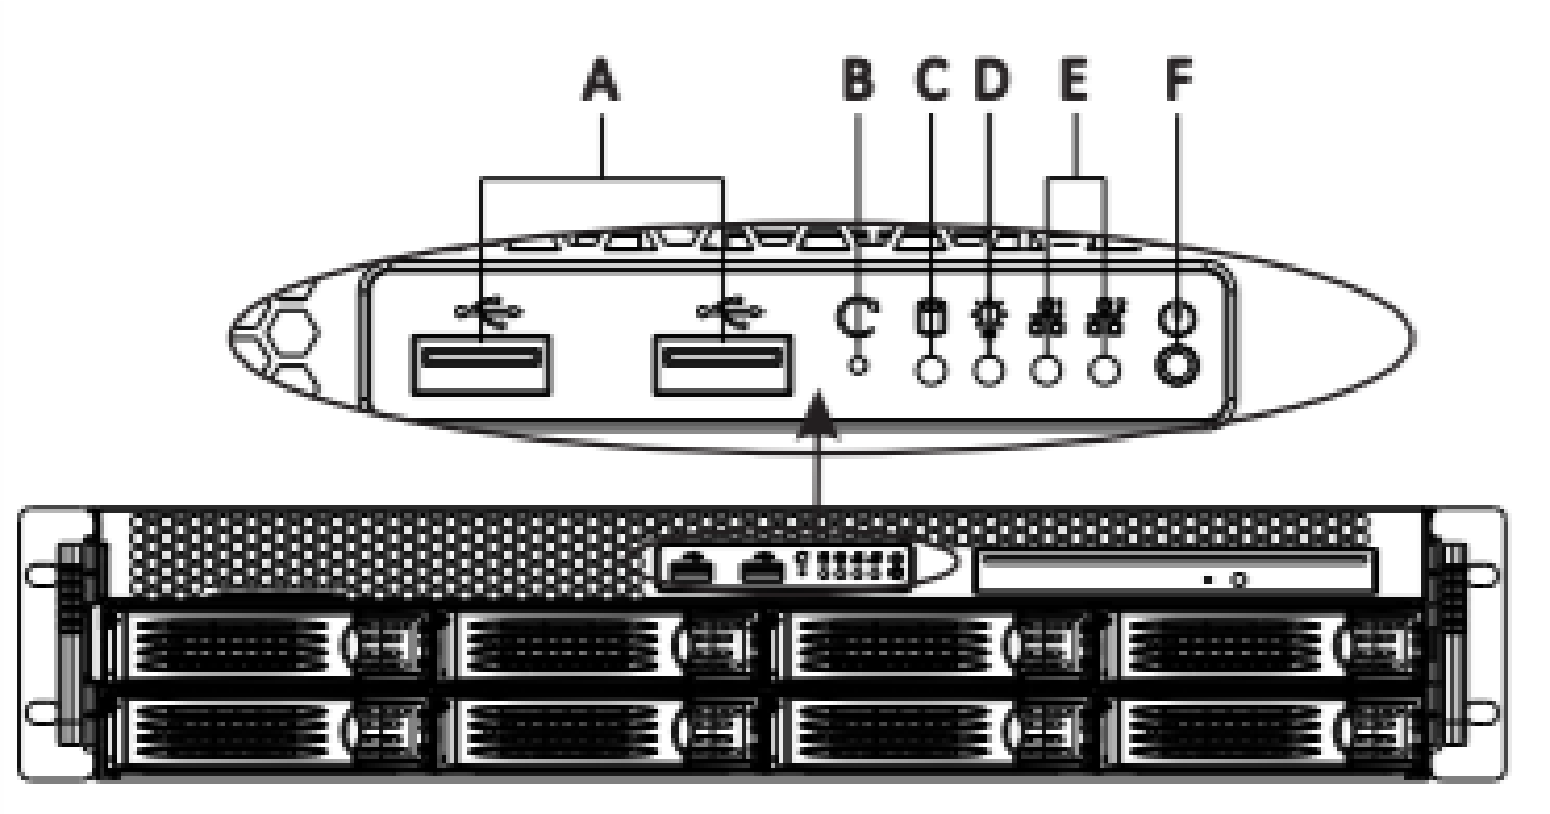
- USB 3.0 Ports
- System Reset Button
- HDD Activity LED
- Power LED
- LAN1 & LAN2 LED
- Power Switch
When properly connected to a power source, the LED lights indicate the state of the appliance.
| LED |
Color |
Status |
| Power |
Blue |
Power On |
| HDD |
Yellow |
HDD is busy |
| Error |
Red |
Signal is in error |
| LAN1 - LAN2 |
Green |
Internet is busy |
Features
OpenEye Apex Server MK-Series recorders include the following features:
- Fully integrated with OpenEye Web Services (OWS)
- Complete remote operations and administration with Web Connect
- Up to 192TB on-board storage
- Record up to 128* channels of IP video per server
- Removable front drive bays for easy expansion
- Solid state OS drives for improved reliability and fast boot times
- RAID storage and redundant OS drive options ensure maximum up time
- Increased storage capacity for maximum data retention
- Optional Sensor/Relay card upgrade
- Dual GbE for Dedicated Client and Camera Networks
- Locking front bezel for added security
*with upgrade
Box Contents
OpenEye MK-Series recorders come with a power cord, mouse, and a rack mount installation kit. Identify the following components to make sure everything has been properly included with your new recorder. If any of the following items are missing, contact the dealer to arrange a replacement.
|

OE-MK Recorder
|

Locking Front Bezel
|
|

Mouse
|

Power Cord
|
|

Mounting Hardware
|
|
Default Administrator Username and Password
When the server software is launched, the user will be prompted to log in. On Linux systems, this will launch automatically after powering on the recorder. On Windows systems, users will need to sign in to Windows, then launch Apex Server Home from the desktop.
The default Administrator usernames and passwords for are listed below:
NOTE: Once registered to OWS, a user’s OWS credentials can be used to log in, in addition to the default credentials listed below.
LINUX SYSTEM LOG IN
Username: admin
Password: 1234
WINDOWS SYSTEM LOG IN
Administrative User
Username: NVRAdmin
Password: The server serial number is used as the default password for both accounts
Standard User
Username: NVRUser Password: The server serial number is used as the default password for both accounts
Additional Notes:
- It is strongly recommended to change the password during setup.
- The serial number can be found on the product label located on the side of the server.