Analytics-Enabled Cameras
Configure OpenEye's family of analytics-enabled cameras, capable of detecting person, vehicle and line-crossing video events. The analytics-equipped cameras are available in multiple form factors and resolutions and combine the analytics capabilities with OpenEye Web Services (OWS) to receive real-time alerts and streamline video event search.
With analytic event processing being performed by the camera hardware, users can deploy analytics across the full range of OpenEye recorders without concern for increased system load or recorder performance.
To set up the analytics-enabled cameras, you'll:
- Enable Analytics within Setup
- Configure the Analytics Rules within the camera UI
- Create and add users to the Analytics Alert Rule in OWS
- Recommended Best Practices
|
|
Intrusion: Person and Vehicle Detection
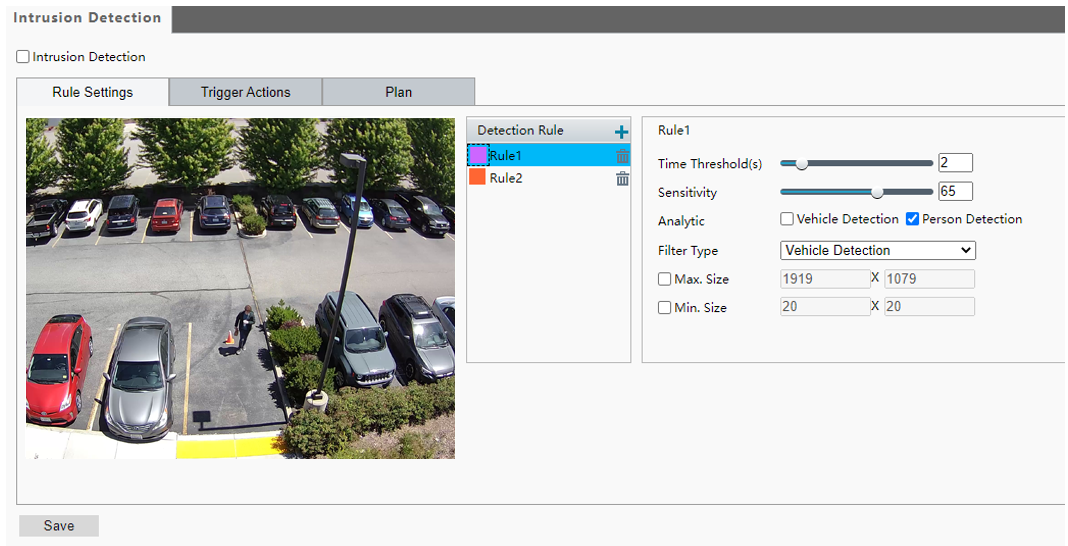
Enable Intrusion Detection
- To enable Intrusion Detection, check the Intrusion Detection checkbox at the top of the page.
- Click the plus icon
 to add additional detection rules. To delete a detection area, click
  .
. - Drag the borders of the detection box for each Rule to set the intended position and range.
- Set Time Threshold and Sensitivity for the camera to decide whether to report an intrusion detection alarm.
- Time Threshold: The minimum length of time that the intruder stays in the detection area before an alarm will be reported.
- Sensitivity: Sensitivity of detection. A greater value means higher detection sensitivity.
NOTE: Setting sensitivity too high will increase the likelihood of false alerts.
- Check either Vehicle Detection or Person Detection.
- Choose the Vehicle Detection or Person Detection Filter Type.
- Enable Max. Size or Min. Size to resize the filter detection box to a default size.
- Min. Size: To set the minimum or min size detection box, select the filter type and click the min size checkbox. Click and drag a point on the green box labeled min size representing a person or vehicle at the furthest distance from the camera to detect.
- Max. Size: To create a maximum or max size detection box click, the max size check box. Click and drag a point on the green box labeled max size representing a person or vehicle at the closest distance from the camera to detect.
- Click Save.
Important Notes:
- Detection area defines the area in an image where smart analytics will be performed. Modifying this area can mask out parts of the scene you do not want to trigger a detection event. Detection boxes are used to set the minimum and maximum size of objects you would like to detect using smart analytics in the image.
- Threshold is the amount of time in seconds a person or vehicle must be detected in the detection area to trigger an event. For example, if the threshold is set to 2, an event is triggered when a person or vehicle has been detected inside the detection area for two seconds. We recommend a threshold of two to three for most scenes.
- Sensitivity value defines how sensitive the system is to objects which can trigger events. Setting the sensitivity too high can result in increased false alerts and setting the sensitivity too low can result in missed events. We recommend a sensitivity range of 65 to 75 for person and vehicle detection accuracy in most scenes.
Trigger Actions
- Check the boxes to choose the actions that are triggered when a person or vehicle is detected.
- Click Save.
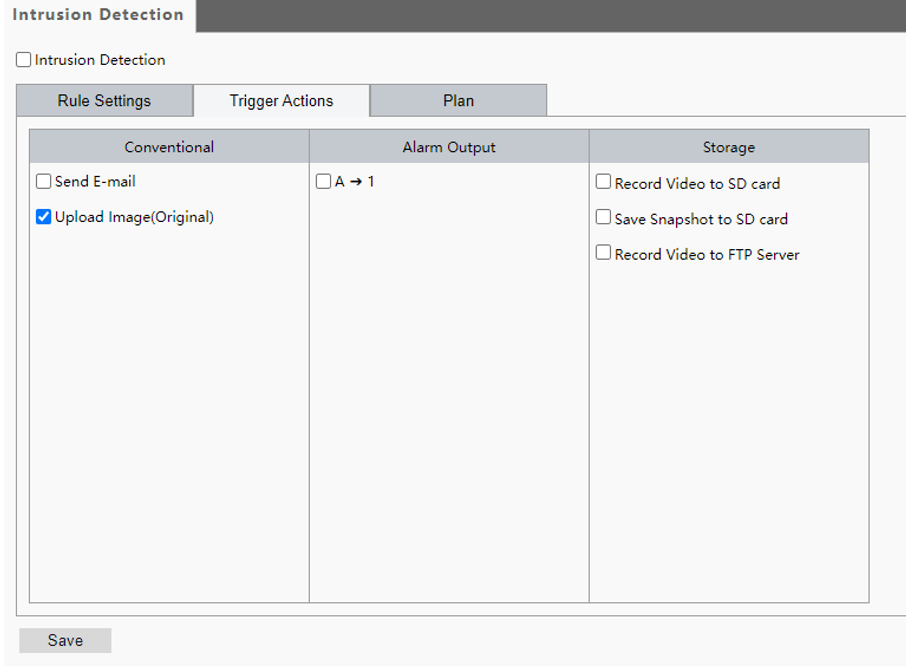
Send Email: With Send E-mail selected, the camera will automatically send snapshots to the specified E-mail addresses when a person or vehicle is detected.
NOTE: Make sure you have completed E-Mail Recipient configuration before using this function.
Upload Image (Original): With Upload Image selected, the camera will automatically upload snapshots to the recorder when a person or vehicle is detected.
Alarm Output: This setting is the alarm output interface linked to motion detection alarm.
NOTE: When an alarm is reported, the camera triggers alarm output to trigger actions by a third-party device.
Record Video to SD Card: With Record Video to SD Card selected, the camera will automatically record video to the SD Card when a person or vehicle is detected.
NOTE: Make sure you have completed Storage configuration before using this function.
Save Snapshot to SD Card: With Record Snapshot to SD Card selected, the camera will automatically save an image to the SD Card when a person or vehicle is detected.
NOTE: Make sure you have completed Storage configuration before using this function.
Record Video to FTP Server: With Record Video to FTP Server selected, the camera will automatically upload video to the specified FTP server when a person or vehicle is detected.
NOTE: Make sure you have completed FTP configuration before using this function.
Important Notes:
- The Upload Image (Original) should be checked as a best practice.
Plan
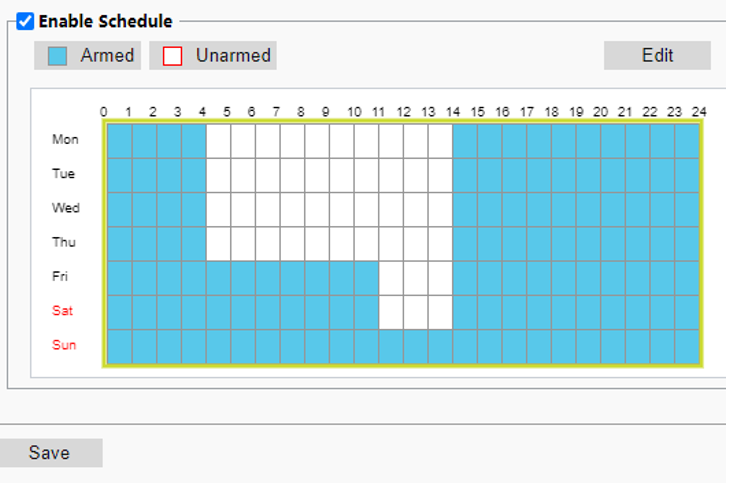
- Click Armed or Unarmed and click the schedule to set when enabled Trigger Actions are effective.
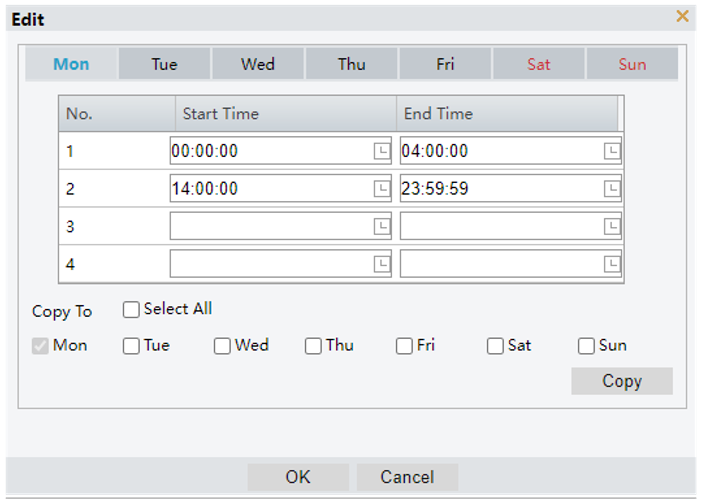
- Click Edit.
- Set the start and end times during which Trigger Actions are effective. The time periods cannot overlap. The camera reports alarms during the specified period(s) only.
- Select from Monday to Sunday and set up to four periods for each day or check the days and Copy to set the same schedule for multiple days.
- Click OK.
- Click Save.
Important Notes:
- Keep schedule Armed as a best practice.
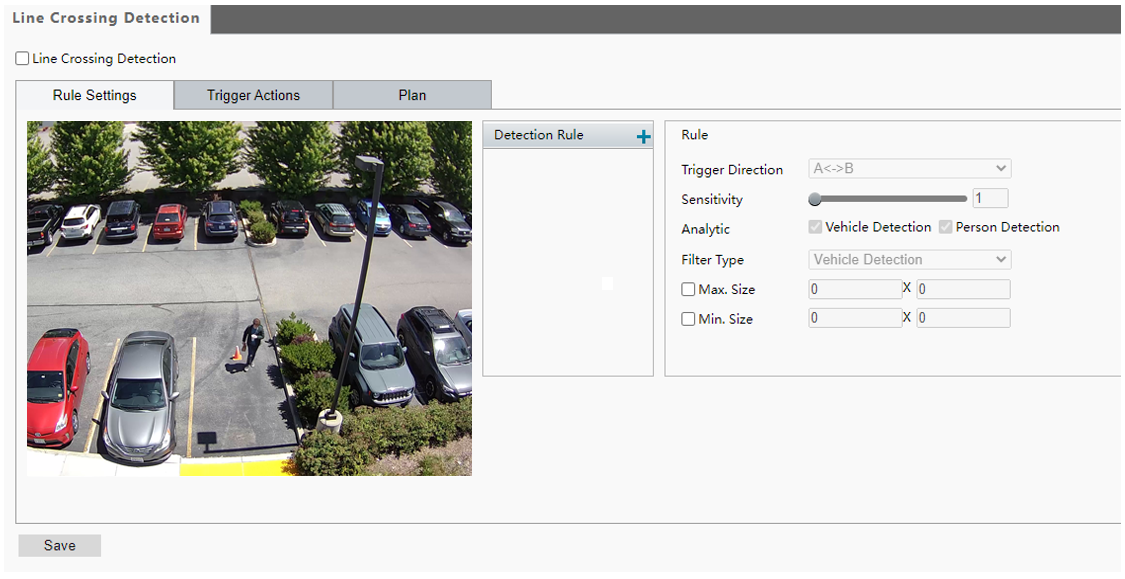
Line Crossing Detection
- Check Line Crossing Detection to enable.
- In the Detection Rule area, click to add a new detection area. To delete a dete
 ction area, click .
 - Drag the line to set the intended position.
- Drag the ends of the line to set the length and angle.
- Set Trigger Direction and Sensitivity for the camera to decide from which direction to report an intrusion detection alarm.
- Trigger Direction: Set from which direction a crossed line will trigger or if it will trigger when crossed from both directions.
- Sensitivity: Sensitivity of detection. A greater value means higher detection sensitivity.
NOTE: Setting sensitivity too high will increase the likelihood of false alerts.
- Check either Vehicle Detection or Person Detection.
- Choose the Vehicle Detection or Person Detection Filter Type.
- Enable Max. Size or Min. Size to resize the filter detection box to a default size.
- Min. Size: To set the minimum or min size detection box, select the filter type and click the min size checkbox. Click and drag a point on the green box labeled min size representing a person or vehicle at the furthest distance from the camera to detect.
- Max. Size: To create a maximum or max size detection box click, the max size check box. Click and drag a point on the green box labeled max size representing a person or vehicle at the closest distance from the camera to detect.
- Click Save.
Important Notes:
- Detection area defines the area in an image where smart analytics will be performed. Modifying this area can mask out parts of the scene you do not want to trigger a detection event. Detection boxes are used to set the minimum and maximum size of objects you would like to detect using smart analytics in the image.
- Sensitivity value defines how sensitive the system is to objects which can trigger events. Setting the sensitivity too high can result in increased false alerts and setting the sensitivity too low can result in missed events. We recommend a sensitivity range of 65 to 75 for person and vehicle detection accuracy in most scenes.
Trigger Actions
- Check the boxes to choose the actions that are triggered when a person or vehicle is detected.
- Click Save.
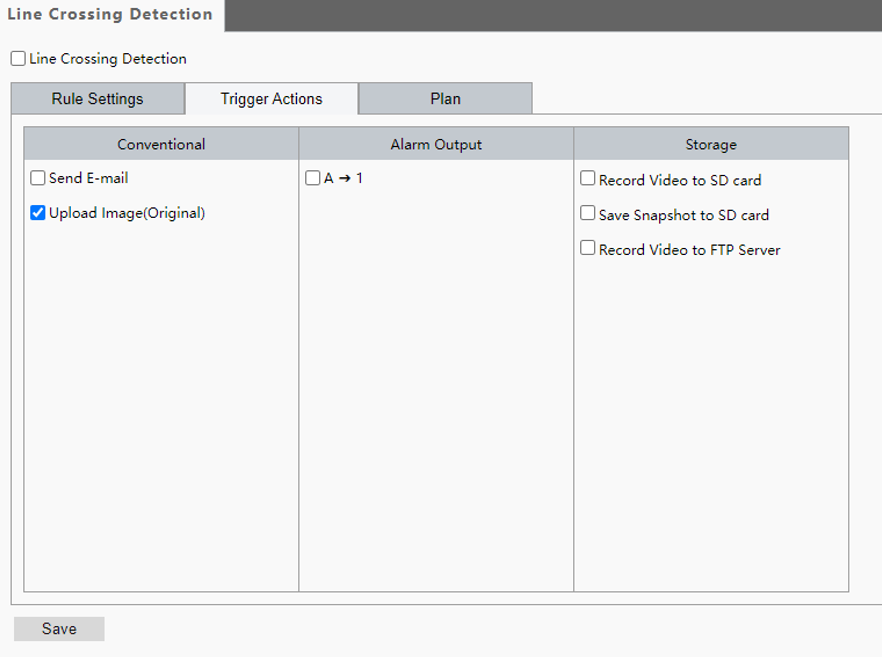
Send Email: With Send E-mail selected, the camera will automatically send snapshots to the specified E-mail addresses when a person or vehicle is detected.
NOTE: Make sure you have completed E-Mail Recipient configuration before using this function.
Upload Image (Original): With Upload Image selected, the camera will automatically upload snapshots to the recorder when a person or vehicle is detected.
Alarm Output: This setting is the alarm output interface linked to motion detection alarm.
NOTE: When an alarm is reported, the camera triggers alarm output to trigger actions by a third-party device.
Record Video to SD Card: With Record Video to SD Card selected, the camera will automatically record video to the SD Card when a person or vehicle is detected.
NOTE: Make sure you have completed Storage configuration before using this function.
Save Snapshot to SD Card: With Record Snapshot to SD Card selected, the camera will automatically save an image to the SD Card when a person or vehicle is detected.
NOTE: Make sure you have completed Storage configuration before using this function.
Record Video to FTP Server: With Record Video to FTP Server selected, the camera will automatically upload video to the specified FTP server when a person or vehicle is detected.
NOTE: Make sure you have completed FTP configuration before using this function.
Important Notes:
- The Upload Image (Original) should be checked as a best practice.
Plan
- Click Armed or Unarmed and click the schedule to set when enabled Trigger Actions are effective.
- Click Edit.
- Set the start and end times during which Trigger Actions are effective. The time periods cannot overlap. The camera reports alarms during the specified period(s) only.
- Select from Monday to Sunday and set up to four periods for each day or check the days and Copy to set the same schedule for multiple days.
- Click OK.
- Click Save.
Once you have adjusted your camera's settings to your particular installation's needs, click save and the camera will use the new settings. Run your system for a few days, if you are still receiving false alerts, we recommend making small changes to your settings until you are satisfied with the results.
Recommended Best Practices:
- Optimal detection is at 20ppf or higher
- Objects will be detected beyond this range, but detection will be less accurate
- Optimal light level is at and above 7 lux
- Object detection will occur at lower lux levels, but may be less accurate. At very low lux levels, IR is recommended
- Try to angle the camera downward to avoid environmental factors such as glare and shadow
- Mount the camera to a stable surface such as the side of a building
- Adjust sensitivity levels to reduce false positive alerts
- Lower sensitivity levels will reduce false positive alerts on static objects, but may miss events at lower levels
- Higher sensitivity will provide detection at further distances, but may generate some false positive alerts at higher levels
- Adjust sensitivity by 5 at a time as needed and monitor alerts until the desired result is achieved
- Objects moving horizontally through the scene are detected more accurately than those moving vertically
- Min/Max boxes should be configured based on the size of the person or vehicle you wish to detect within the scene
- Minimum should be 10% smaller than the smallest (furthest away) person or vehicle that may be in the scene
- Maximum should be 10% larger than the largest person or vehicle that may be in the scene
- Configure the time threshold to specify how long a person or vehicle should be in the scene before an alert should be generated
- The default value of 2 seconds is usually sufficient for most use cases
- For scenes where the person or vehicle may not be in the scene for very long, reduce this threshold
- A person's full body must be present and moving in the scene in order to be detected
- Adjust the region of interest to mask out areas that may generate excessive alerts such as streets
Creating an Analytics Alert Rule
To create and add users to an Analytics Alert Rule, follow the instructions here.