OE-CA51WM-01 Installation Guide
Follow the Quick Start Guide for installing an OpenEye cloud camera and adding it to OpenEye Web Services.
NOTE: Only install the wall mount after a hole is drilled in the wall for routing power lines, DI/DO, and Ethernet cables.
NOTE: Route cables before you secure the wall mount to a wall.
CONTENTS
|
OE-CA51WM-01 Wall Mount |
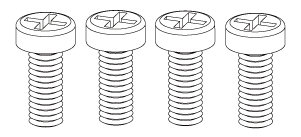
M4X10 Phillips Pan Head Screw x 4 |
|
M4X25XD9 Phillips Pan Head Screw x 4 |
Screw Anchor Mounts x 4 |


INSTALLATION
- Locate the position where you want to install the wall mount and camera. Drill holes on the wall for securing the wall mount and for routing the cables.
- Secure the wall mount by hammering anchors into the wall and then fasten screws through the four mounting holes on the wall mount.
- Route power lines and other cables through the wall and the wall mount.
- Remove the waterproof connectors from the camera.
- Align the camera's mounting holes with the A holes. Secure the camera to the wall mount as shown below.
 |
NOTE: The screws and mounting surface must be able to support a weight of 8.8 lbs (4 kg).
NOTE: Use the correct type of screws when installing cameras to the mounting cap. You will need to pass the cables through the waterproof connectors, and then use a crimping tool to connect the cable wires to an RJ45 connector.
 |
- Proceed with initial setup such as enabling network access, focus tuning, or zooming. When done, secure the outer dome cover.
 |