Integrations
Integrations
- Add new Integration Device - Click to add device.
- Enable Auto-Discovery - Check to automatically detect connected devices (only supported for DMP at this time).
- Sort By - Use dropdown to Sort By Firmware Version, IP Address, Manufacturer, Model, Name, or State categories.

Sensors
NOTE: This tab is not visible unless an integration device has been added.

Enable – Enable or disable a sensor.
Number – Number value from the sensor input record.
Address – Sensor number associated with the recorder.
Sensor Name – Name of the sensor associated with the recorder.
Origin – Origin of the sensor being used by the recorder (typically internal to the recorder).
Current State – Current state of the sensor (open or closed).
Type – Shows the type of sensor.
Area – Associate a sensor with an intrusion area.
Associated Macros – Shows any macros associated with a specific sensor.
Associated Camera – Allows the association of a specific camera to a sensor.
Image Offset – The delay between the start of a sensor event and the time an event is captured.
Event Schedule – Select Always, Never, Weekdays or Weekends.
Areas
NOTE: This tab is not visible unless an integration device has been added.
Use this tab to view area names, origin, current state, and associated macros.

Settings
Check Enable Hourly Sync and enter a DMP Listen Port for DMP Panels.

Integration Devices
Use the Integrations tab to add new, view or edit integration devices.
NOTE: Check the box labeled Enable Auto-Discovery (Only supported for DMP at this time) to have the system attempt to automatically add a connected integration device. This setting must be enabled each time the recorder is powered on. Modifying the global DMP Listen Port applies to all panels.
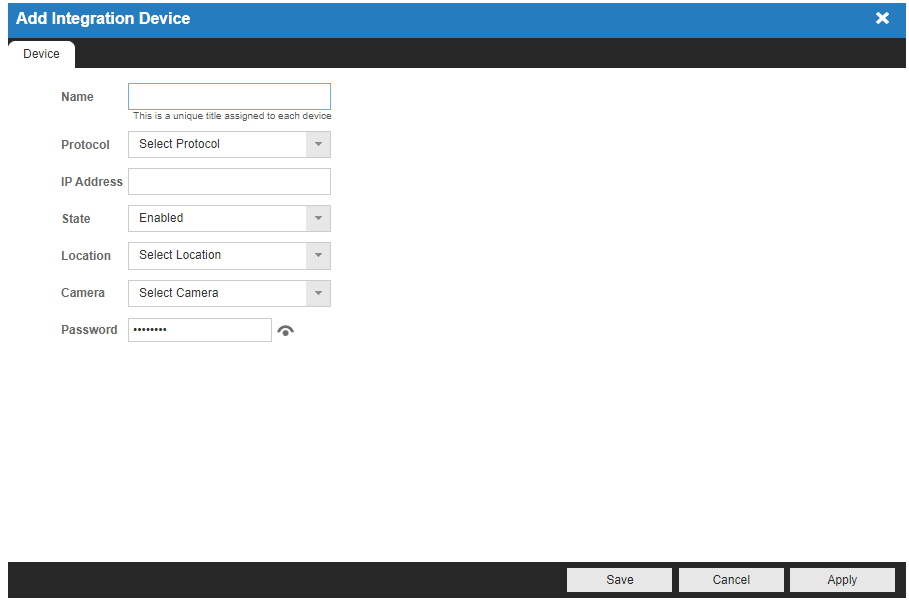
- Click Add Integration Device.
- Enter the name of the device.
- Select the protocol to use in the Protocol dropdown menu.
- Enter the IP address of the integration device.
- Select the state of the integration device from the State dropdown menu.
- Select the integration device location in the Location dropdown menu.
- Select the camera to associate with the integration device in the Camera dropdown menu.
- Click Save.
Attached Devices
Use this tab to view attached devices such as doors and keypads.

Assigning Cameras to Areas
To assign a camera to an Area, follow these steps
- Open the Cameras menu
- Select the desired camera
- Select the Area drop down menu

- Select the desired Area from the list
- Click Save.